Most of us have experienced photographing an incredible sunrise or sunset only to get home and realize that the colors in your images are not nearly as good as the colors you witnessed with your own eyes. There can be many reasons to this, such as camera limitations or mistakes you made in the field. However, that’s not what you will learn about in this article. Correcting the colors, or adding color, isn’t something you need to spend hours working on. In fact, it can be done in just a few minutes using Adobe Photoshop and you don’t need to be a Photoshop expert to do it.
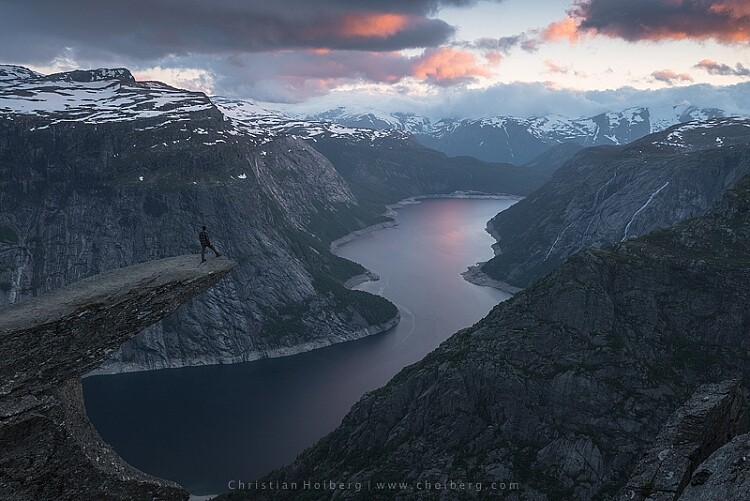
Trolltunga, Norway – We will be adding color to this sky
As we all know there are many ways to get to Rome, there isn’t only one method of adding colors in Photoshop either. It can, as I mentioned above, be done fairly easy but the more detailed adjustments you wish to make, the harder it will become. In this article, we will be looking at two easy methods to add color in Photoshop.
#1 Adding Color with a Photo Filter
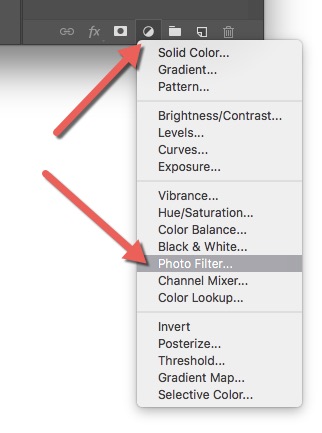
The first method we will look at involves the Photoshop tool called Photo Filter. This is an Adjustment Tool which you can find by clicking the Adjustment Tool icon (the half-filled circle located below the layers palette, see screenshot below). This creates a new layer named Photo Filter 1, which we will be working on.
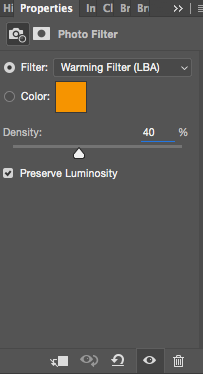 A warming filter is the default setting so, as you might see, the image now has an orange color cast. Personally, I prefer using Warming Filter (LBA) as I find this to have the most natural color that suits my images best (see screenshot on the right). Select this filter by clicking on the Filter dropdown menu. Alternatively, you can select a color manually that might suit your specific image better. If you find the adjustment to be a little too weak you can strengthen its appearance by increasing the Density. I rarely go above 40% Density as the colors then quickly become washed out and results in a look I don’t want.
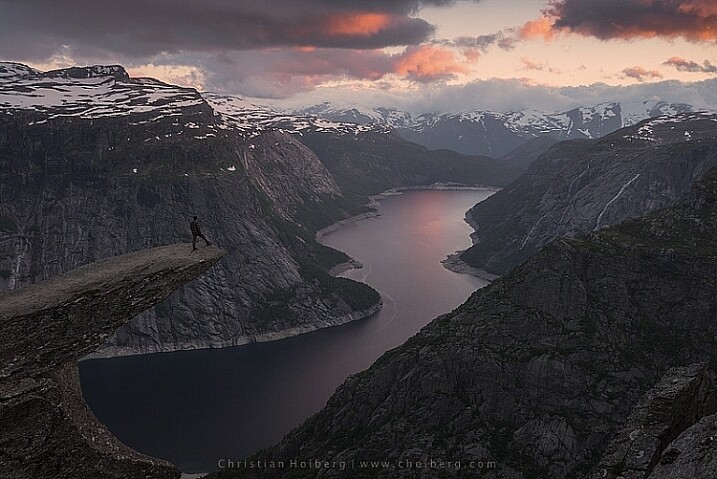
Photo Filter applied to the whole image at 40%
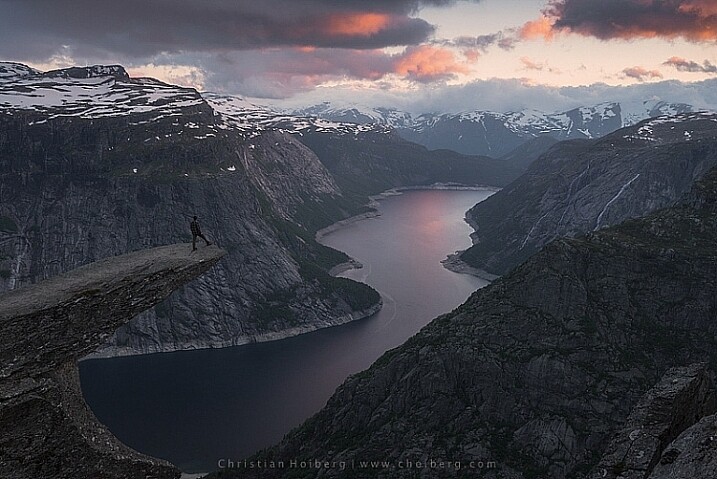
Photo Filter applied to the whole image at the default 25%
By using this filter we have brought back some of the color in the sky. There’s not a huge difference but we’ve managed to keep a natural look in the image while the sky still looks good. However, there’s one problem. We don’t necessarily want to add the extra color to the landscape itself, we only wanted the sky to be affected.
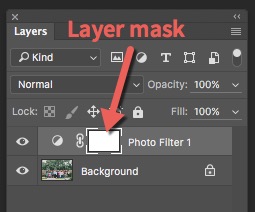 Left of the Photo Filter 1 text there’s a white box. This is the layer mask, basically telling Photoshop what area of the image should be affected by that particular layer. White means that it’s visible and black means that it’s concealed. By default the entire mask is white. To remove the adjustment from the landscape itself follow these steps:
- Select the Layer Mask by clicking on it (it will show square brackets around the mask when it is selected, see screenshot on the right))
- Select a black brush and set Hardness to 0%
- Reduce the opacity of the brush to 80%
- With the Layer Mask still selected, carefully paint on the areas you do not want affected by the filter. You’ll see the adjustment disappear from those places as you paint.
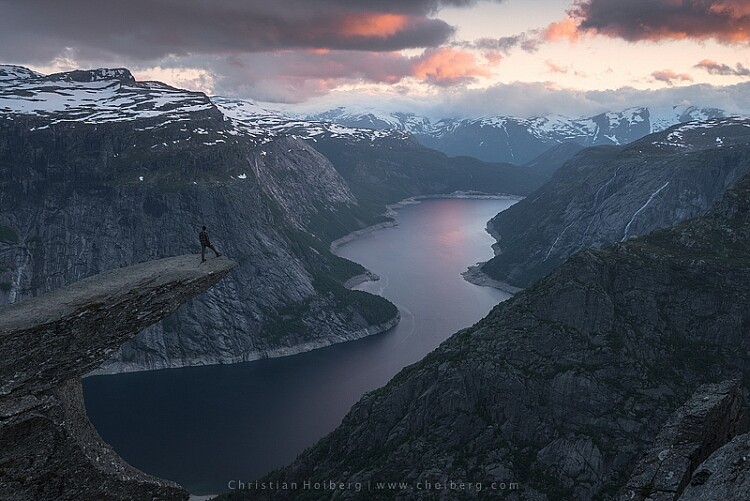
The Photo Filter layer masked to only affect the sky.
This is the easiest way to manually choose where the adjustment will be visible. Unfortunately, it’s also the least accurate. You might see some haloing along the edges or perhaps the color bleeds onto the horizon at certain places. By zooming in on the image and using a smaller brush you’ll be able to reduce the amount of haloing or bleed. Other methods, such as Luminosity Masking, are more accurate but also demand a better understanding of Adobe Photoshop.
#2 Add contrast with Curves Adjustment Layer
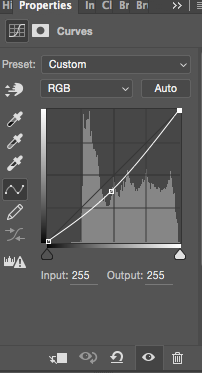 Another easy method to add colors is by using the Curves Adjustment Layer. Unlike Photo Filter, we will be using Curves to add contrast in the sky. Follow these steps to do a Curves adjustment:
Open a Curves Adjustment Layer by clicking on the Adjustment Layer icon again, and selecting Curves this time.
You want to add some contrast and increase the colors slightly by darkening the sky. Do this by clicking in the middle of the line in your Curves layer and pulling it down gently. Make sure that you don’t go too far as that will lead to unwanted grain or color distortions.
That’s it. To remove the adjustment from the landscape create another Layer Mask and follow the same steps as with the previous method above.
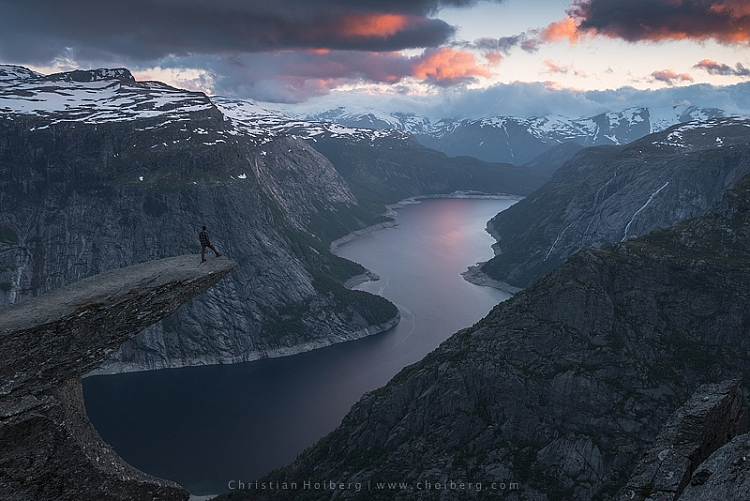
As you might have noticed these are two subtle adjustments. You won’t get a surreal sky by following these methods. Instead, you’ll maintain a natural look and still bring out some of the color you wanted to capture.
The post 2 Simple Methods for Adding Color to Your Images Using Photoshop by Christian Hoiberg appeared first on Digital Photography School.