Lightroom presets are basically post-processing shortcuts that can save you tons of time and really speed up your editing workflow. They allow you to save a particular set of edits and apply them later with a single click. Presets can either be a final solution or a great starting point from where you can further tweak and perfect your images.
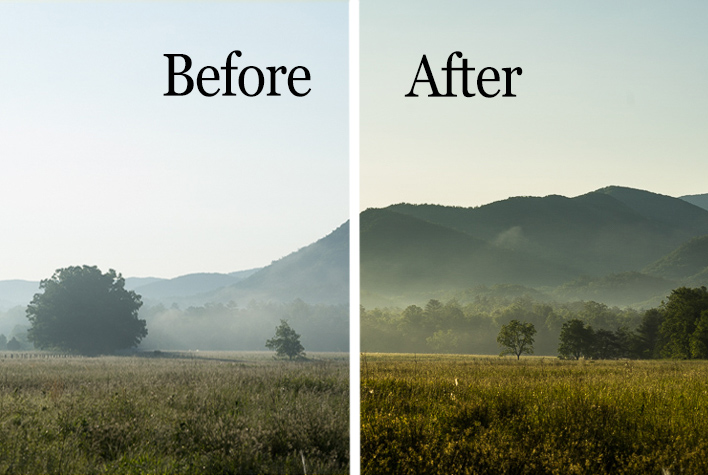
Making development presets is incredibly easy and effective working in Adobe Lightroom CC. It even gives you the option to import presets made by others into your own library. Chances are, if you’re a seasoned photographer, you have used presets at some point.
But are you really getting the most from the huge range of editing control that presets can give you? In this article, you will learn just how versatile your Lightroom preset options can be and how you can essentially stack multiple presets to achieve the exact result you want.
The Basics
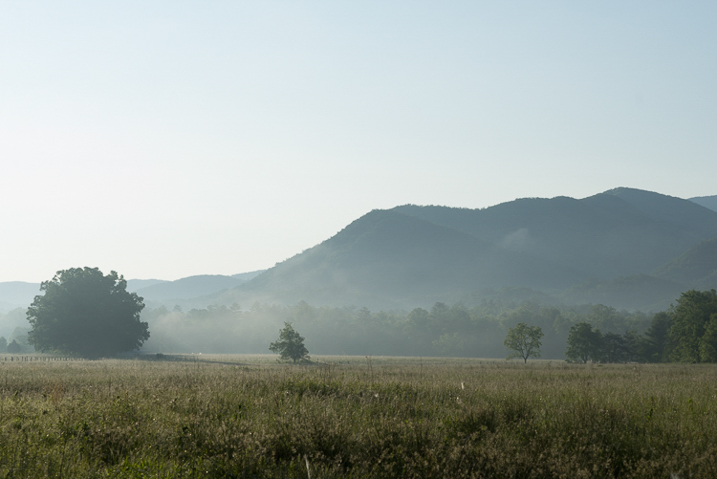
Just as a refresher, let’s go over the steps for creating and saving presets in Lightroom. Here is a original RAW file of a mountain meadow in the early morning mist.
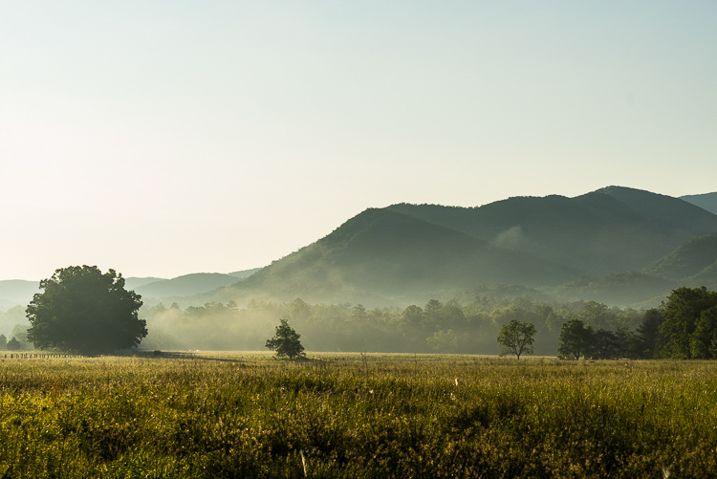
I applied some basic edits to the RAW file which consist of contrast, clarity, whites and shadows, warming, and then finally sharpening to get the following result:
How to save a Preset
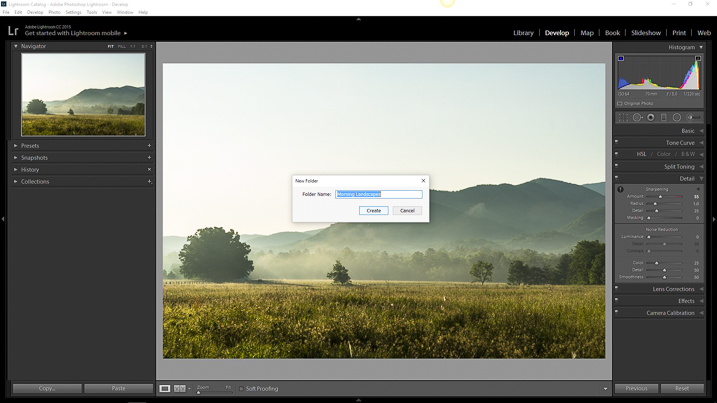
It’s looking decent. Hmmm, if you feel these edits might work for some similar images later, why not make a preset to save some clicking next time? To do this, you must first create a folder to house your presets. Click the Develop dropdown at top left or use the keyboard shortcut Ctrl+Alt+N (Command+Option+N for Mac).
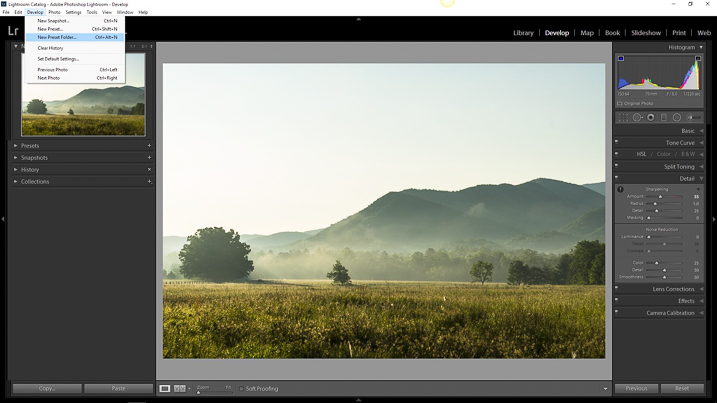
Then name your freshly minted folder so you can easily locate it later.
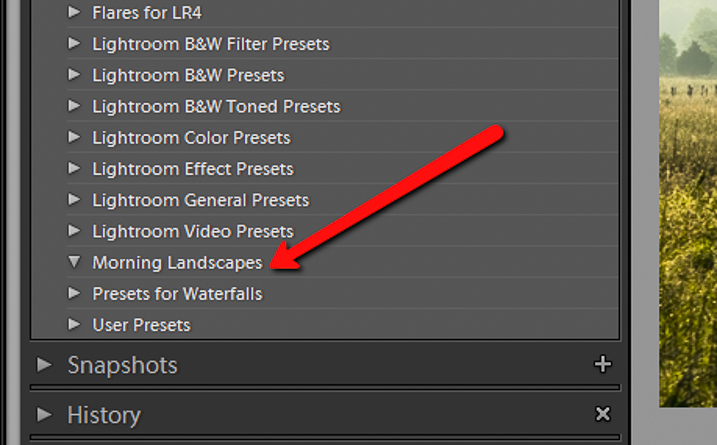
Now you will see your brand new folder appear under the Presets drop down menu.
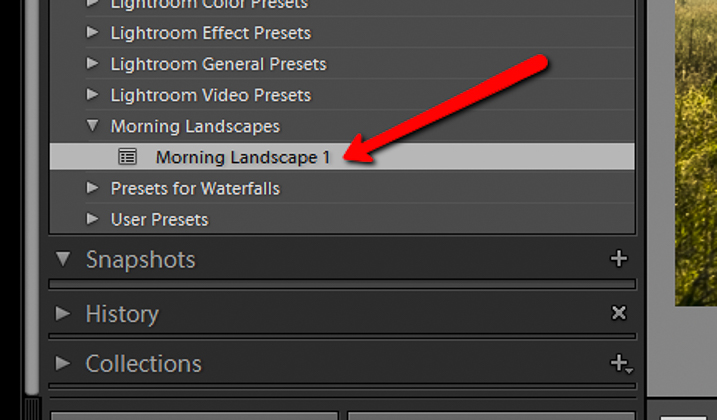
Since you now have a destination for your preset you can go about actually saving the preset itself. To do this, simply go back to the Develop drop down and select New Preset. You can also use the keyboard shortcut Ctrl+Shift+N (Command+Option+N for Mac) or just click the + symbol next to the Presets menu on the left panel (see below). A fairly large dialog box will appear bring along with it a host of options for saving your preset. First things first, come up with a name for your preset and then select the folder you made earlier as the destination.

If you leave the Check All option selected, all the edits you made with any of the sliders and filter tools will be saved. Click on Create at the bottom right of the dialog box and viola! You will see your newly created preset appear in the folder to the left.
Preset conflicts
In most Lightroom preset tutorials that would be all you would do. But this isn’t most tutorials. In order to have full control over your presets you have to go a little deeper and that hinges on just how far you are willing to venture down the post-processing rabbit hole.
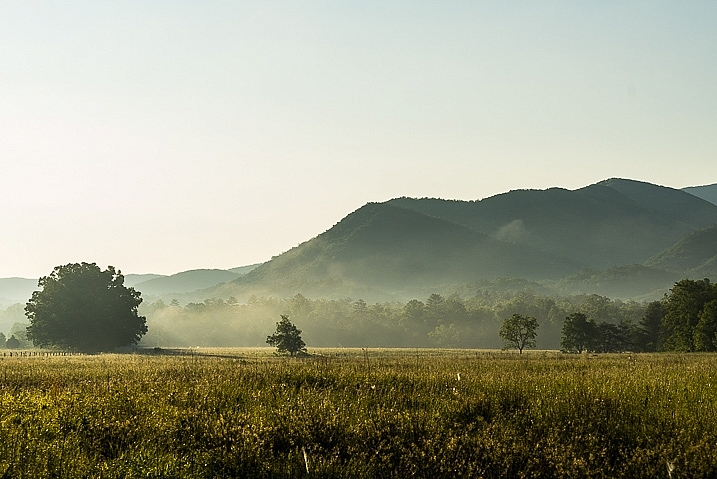
Here is the final image from which I saved the Morning Landscape 1 preset with the Check All settings applied.
If I attempt to apply another preset, all of the current settings will be changed to whatever values the new preset dictates. Here is the same image after clicking another preset from my preset library.
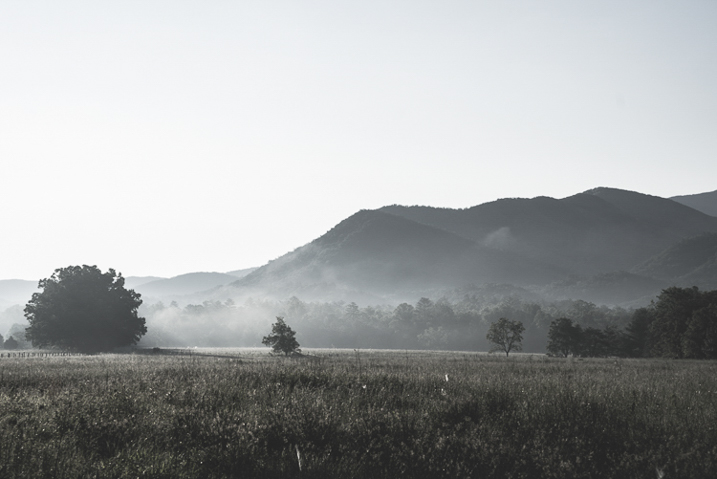
The problem that arises when you try to combine multiple presets is that you can’t do it without the processing values conflicting and overriding one another. Or can you? Well, yes and no.
Remember, that dialog box asking which edits you wanted to save that appeared earlier while you were making the preset? That dialog box is the key to being able to stack multiple editing presets so you can apply different adjustments without them overriding one another. Let me show you how.
Stacking Lightroom Presets
It comes down to which edits you choose to save when creating your preset. Instead of selecting to save each and every adjustment, you can select only the ones you want. This way, you can avoid conflicting edits when you apply multiple presets. That means you can have a preset folder for various Clarity edits, a folder for Contrast and Exposure, a folder for Vignettes, or virtually any combination of any adjustment in Lightroom. Here’s how it’s done.
How to do it
I’ve created a folder called Clarity and Sharpness. This will be where I keep the Sharpness and Clarity (and even Dehaze) adjustments. I then created a folder for Exposure and Contrast and another for warming and cooling effects aptly titled Warming and Cooling.
Each one of these folders contains presets related to their respective edits to varying degrees of intensity. When saving for the Clarity and Sharpness folder click the uncheck all box and then select ONLY the Clarity, Sharpness, and Dehaze boxes. This way, any other edits will be left as they are and only these settings will change once you apply your presets.
Do this with the presets you save for the Exposure and Contrast and Warming and Cooling folders except only check the respective edit boxes to save for each.
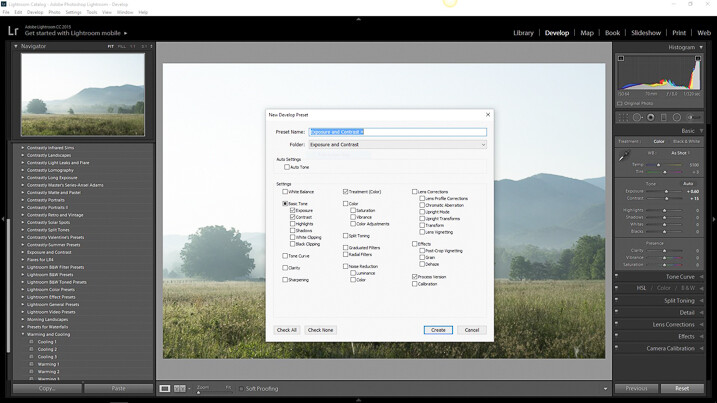
For Exposure and Contrast, select only the relevant boxes as seen here.
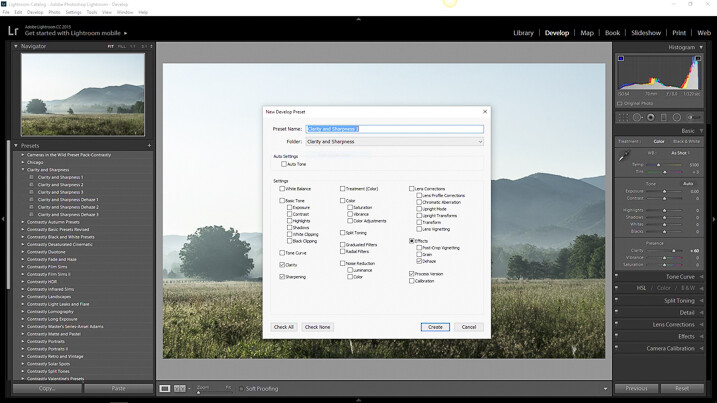
Do the same for the Clarity and Sharpness folder.
Saving separate presets which only affect certain aspects of your processing will allow a huge range of preset adjustments to be applied without affecting all the other unrelated edits from another preset. Essentially letting you stack one preset on top of another.
Applying the new presets
Let’s look at an example. Here is the RAW image again to which we will now apply our selective presets one by one.
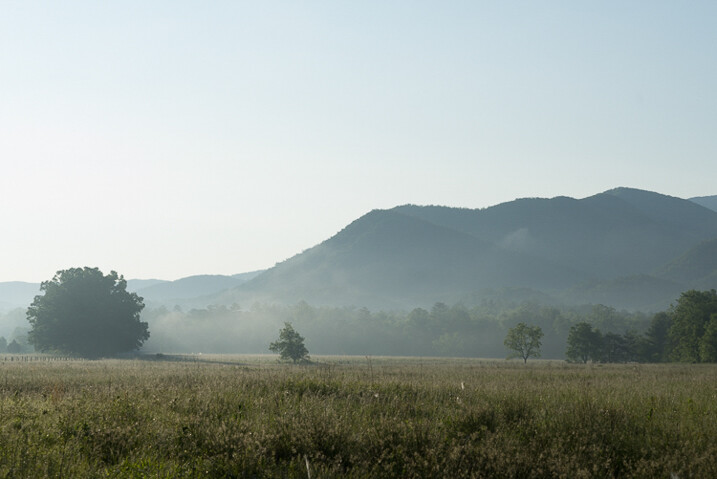
RAW image.
First I will apply the Exposure and Contrast + preset.
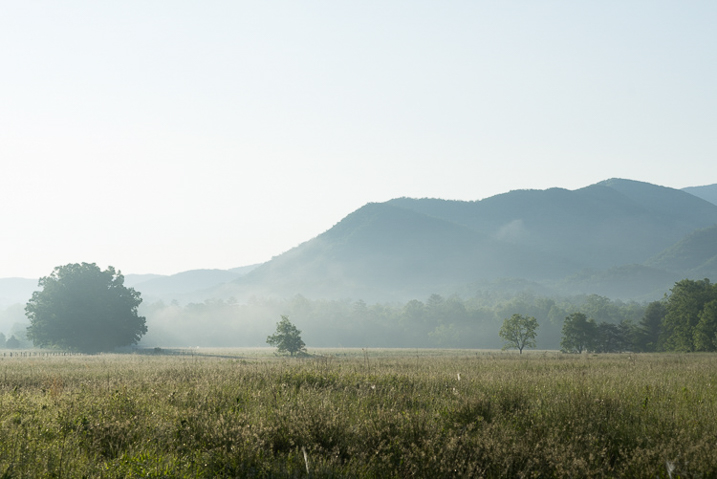
Next, I will add the Warming 2 preset.
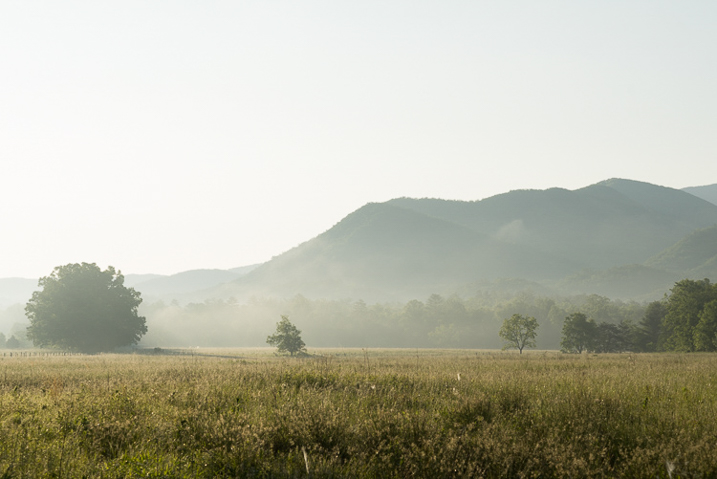
And lastly, I will Sharpen and Clarify the photo with my Clarity and Sharpness Dehaze ++ preset.
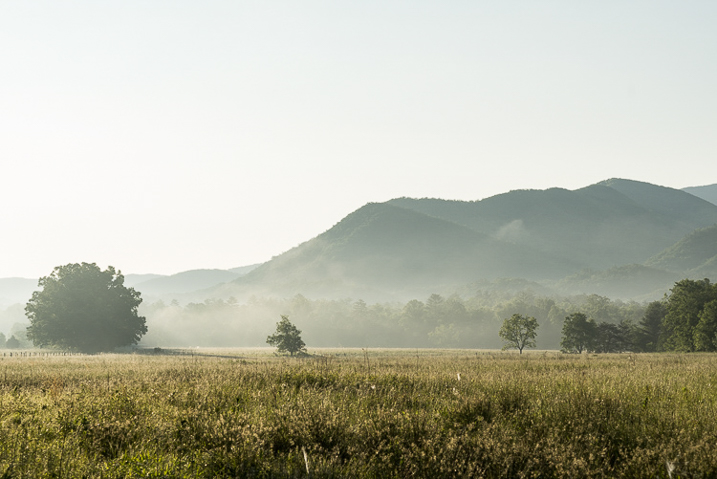
Conclusion
By saving your presets in a way which targets only specific edits, you essentially enable yourself to allow the presets to work together. This way, quickly editing your photos becomes much more controllable and streamlined because you can apply different presets in tandem without disrupting the edits applied by each.
This advanced knowledge of creating, saving, and applying Lightroom presets can remove a lot of the headache from your post-processing conundrums. It can give you, for lack of a better word, limitless combinations of adjustment possibilities. What might have taken you an hour’s worth of post-processing can now be reduced to only three or four clicks of your mouse.
While presets might not be a one and done method for editing your photos they can still give you a wonderful starting point to base your more in-depth editing. By being able to apply multiple presets to one image you will have even more of a head start in your processing workflow. Work smarter – not harder.
How do you use Lightroom presets? Please share in the comments below.
The post How to Save and Use Stackable Lightroom Presets by Adam Welch appeared first on Digital Photography School.