There are many reasons why you would like to select the sky in your image using Photoshop. Maybe you would like to replace it, to add details, change the contrast, etc. Selections give you a precise contour of your subject and facilitate local adjustments, without altering the other elements in your images.
In landscape and architectural photography, the sky is a really important element. It has to be an exciting part of the image. Boring skies translate into boring images, and amazing skies can also translate into solid images because it will make the viewer forget about the foreground or middle ground if they are not that beautiful.
Three different methods for selecting the sky
Depending on the image and the subject, making precise selections of the sky can be quite difficult. That is why is this tutorial, I will show you three different ways to select the sky in three different situations
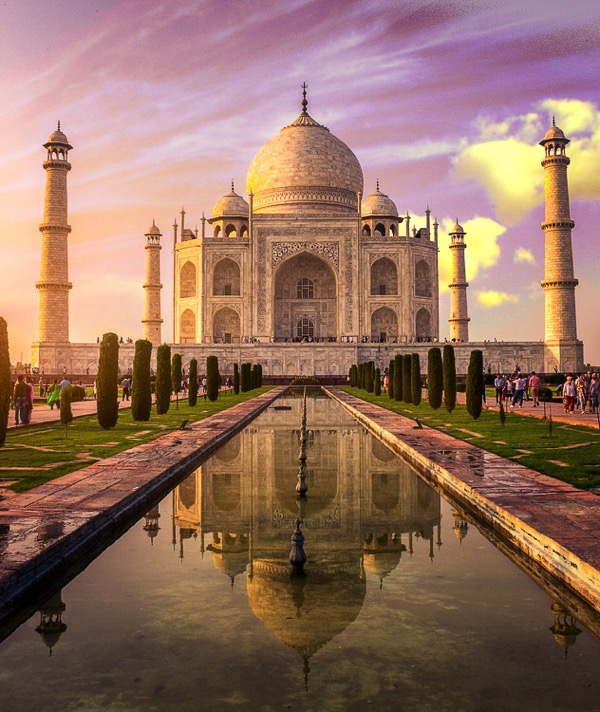
I replaced the sky in this image, and I love the results.
I personally love to play around with my skies and most of the time it is a fake one. Sometimes I am able to be at one location just for a day and if I get a solid image with no clouds, I will not hesitate to replace it.
Do not hesitate to try crazy things with your images, photo manipulation is really fun
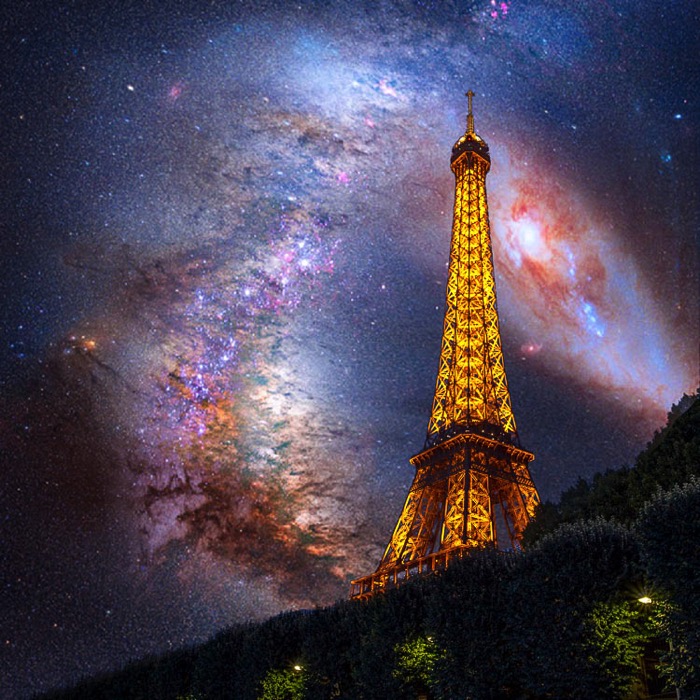
I wanted to get some crazy result, so I added an image of the Milky Way behind the Eiffel Tower.
Be careful to use royalty free images with no copyrights, there are so many websites where you can pick images of skies without having any problems afterward.
Method #1 – Using the quick mask tool
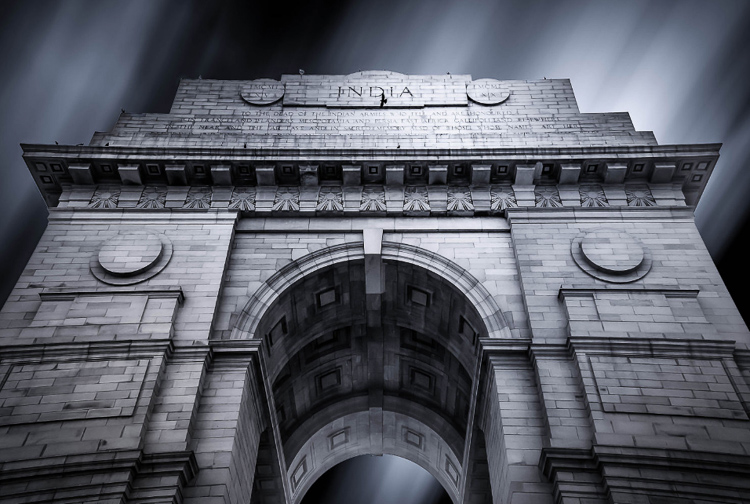
This is the easiest of the three ways, and the most used. We will be working on an image with a blown out sky and a subject with easy contours.
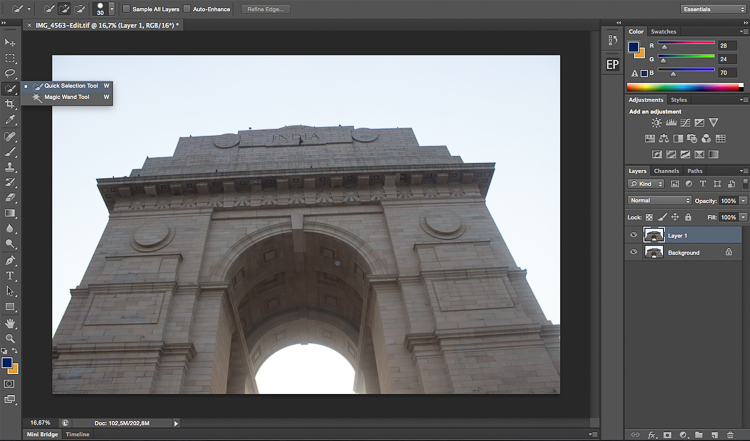
The sky in this image will be easy to select because of the simple contours of the monument.
The first thing you need to do is open your image in Photoshop and duplicate the layer to avoid any destructive editing. You can always go back to the original layer if you make any mistakes. Do this all the time, it will save you a lot of time and hassle if you make a mistake.
Start by selecting the Quick Selection Tool on the tool’s panel, make sure to increase the size to facilitate the selection.
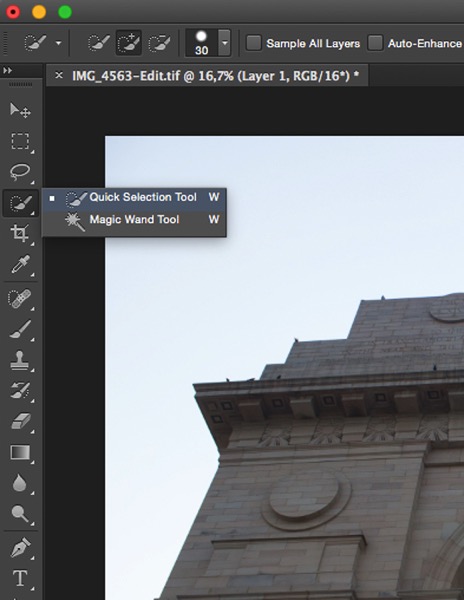
Then simply click on the sky starting at one end. In this case, I started from the bottom left and dragged all the way to the other end (bottom right). With these kinds of images, the selection will work 90% of the time on the first try and it should be pretty accurate. Do not forget to select the other parts of the sky, pay attention to your image and look where there is some sky left that is unselected.
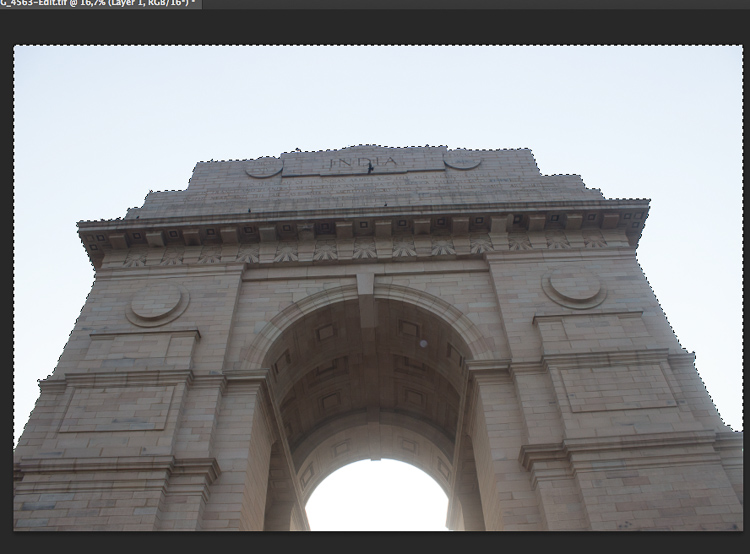
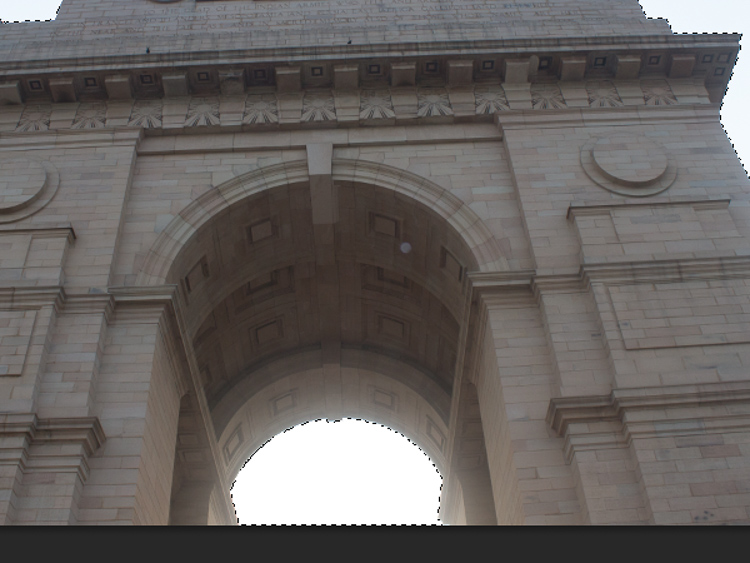
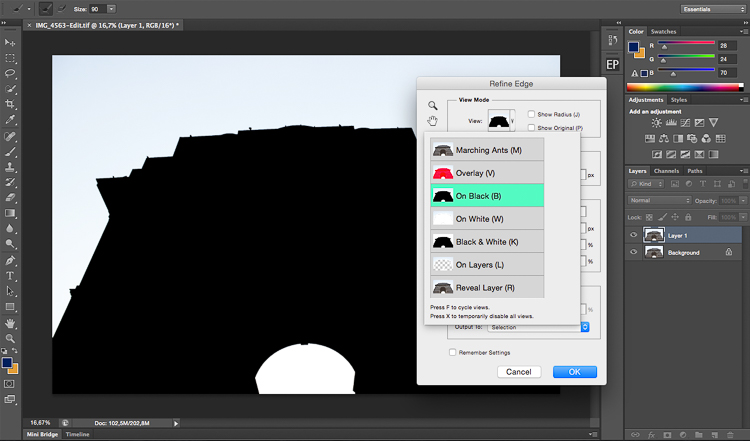
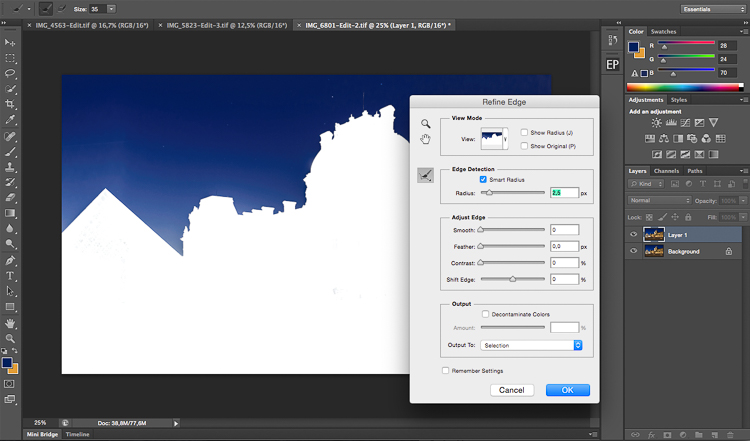
Once you have your selection, you want to click on refine edge to make it more precise (Refine Edge is located on top of the Photoshop window). You will have multiple viewing options, a good one to use is On Black.
On the edge detection section, click on Smart Radius, then play around with cursor until you find the right radius. This will vary from image to image.
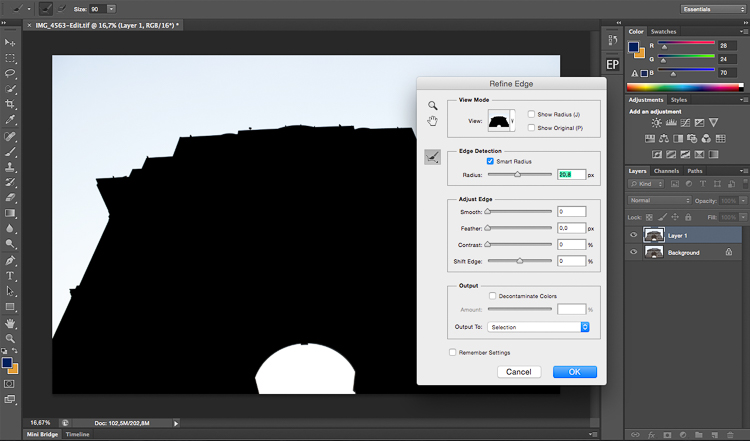
When you are satisfied with your selection, press on OK and you will go back to your image with your selection. Make sure you are still using the quick mask tool. To save your selection, simply right click and pick save selection. You just need to name it and press OK to confirm. Your selection will be saved and you can use it whenever you want by clicking on select on the top of the Photoshop window then choosing load selection at the bottom
Method #2 – Using Color Range
This selection is also quite easy to do, but it is very precise. We will basically select the sky while sampling a color. So logically your sky has to be uniform, these types of selections work really well during the blue hour or on clear days, with a vivid blue sky.
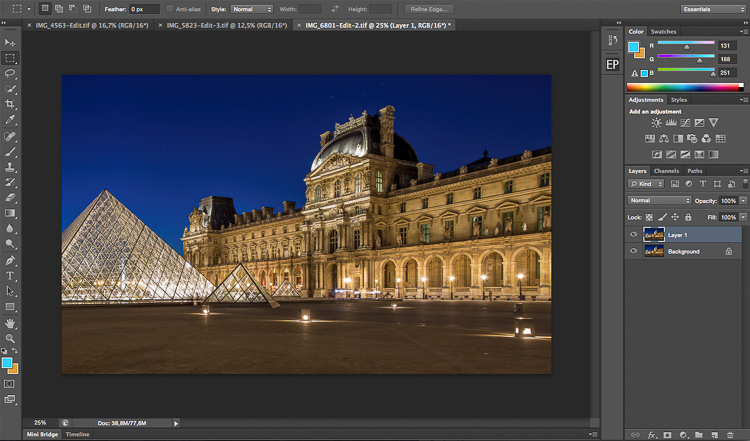
We will be working on this image, the sky is completely blue and easy to select. It would be much more difficult to do this selection with the quick mask (Quick Selection) tool because the image is quite dark and the contours of the building are quite difficult to separate from the sky.
Start the same way as the first image by duplicating the layer. You then want to go to select on the top of your window and select color range.
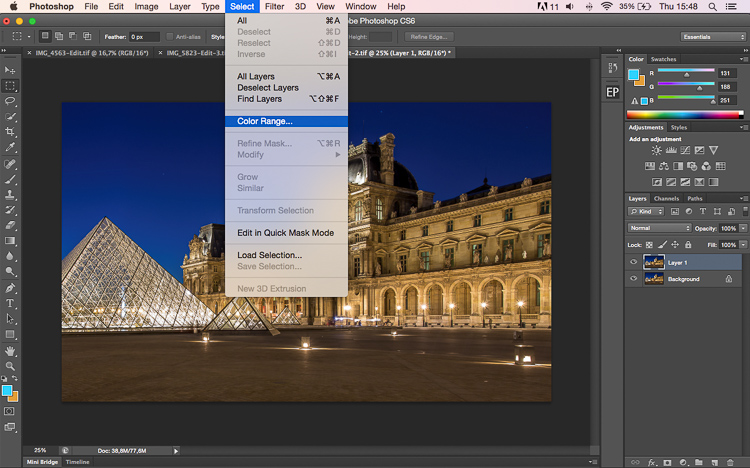
A small window will pop up, and the only thing you need to do is click on the sky in the main layer (not the pop up window) with the eye dropper tool (it will be set automatically as your cursor). Once you have selected your color, you will see a mask being created on the small color range window. Remember that white reveals and black conceals, so whatever is white is being selected: That will be your selection.
Play around with the fuzziness cursor on top of your selection in the color range window to decide how much you want of the sampled color to be selected.
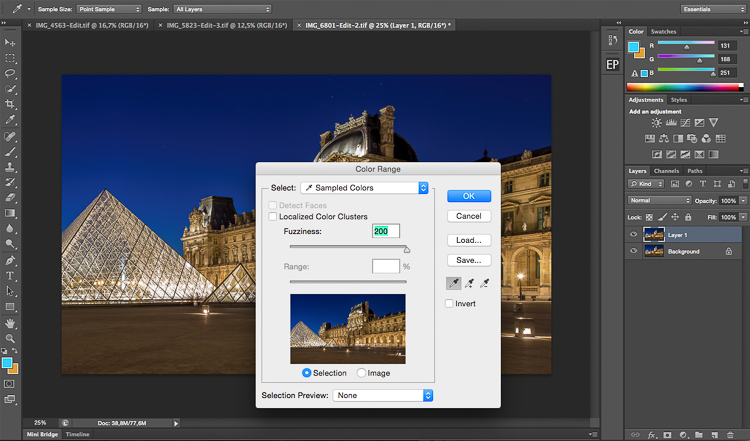
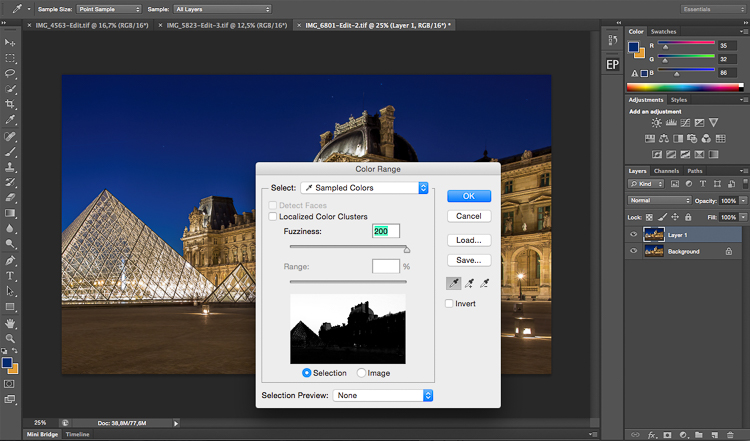
Once you are satisfied with your color range selection, press OK. Redo the same thing as the first image with the refine edge tool, then finish off by saving your image.
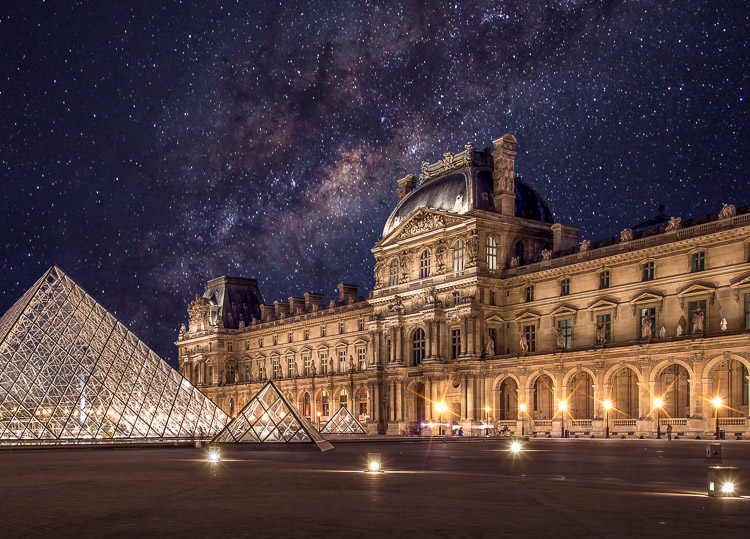
This is the final result with the sky replaced.
Method #3 – Using a Levels Layer to Create a Luminosity Mask
This kind of selection is a bit more difficult to do. Use it when you don’t have only one color in the sky or subject has complex contours that will be difficult to separate from the sky.
This is quite advanced but it’s very easy once you understand how it works. It always works, and if it doesn’t do 100% of the job it will at least do about 90% of the work need. The rest can be completed with a brush and adjusting your mask after you are done with the first selection.
We will be working with this image and as you can see, the sky is quite dark just like the buildings so it will be difficult to use the quick mask tool. The colors in the sky are mixed between blue, orange and white (yes these are blown out highlights).
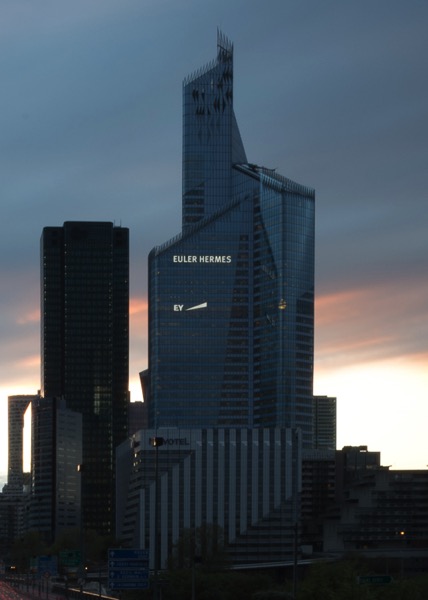
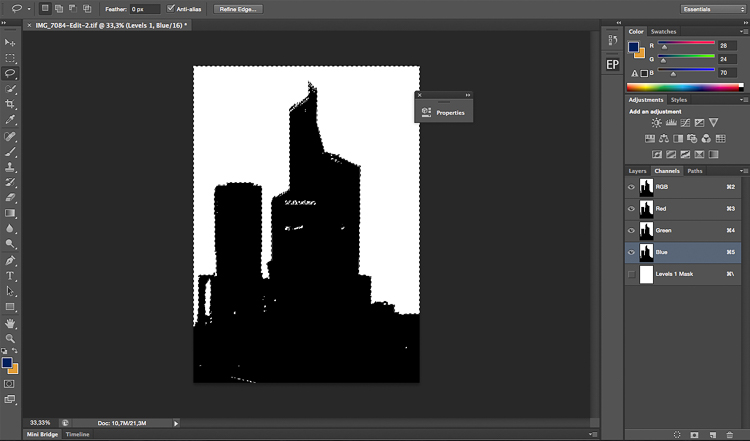
What we are going to do is quite simple. We’re going to create a luminosity mask selecting only the highlights, in other words, the brightest pixels of the images. The highlights correspond to the sky so that’s exactly what we want.
To make the selection easier we’re going to convert the image to black and white so we have an easier visual. We’re basically going to crush our whites and blacks to have a nice separation between the shadows and the highlights. We’ll be doing this using the levels layer adjustment, we are also going to remove all the mid tones from our image. Don’t forget to duplicate the layer first.
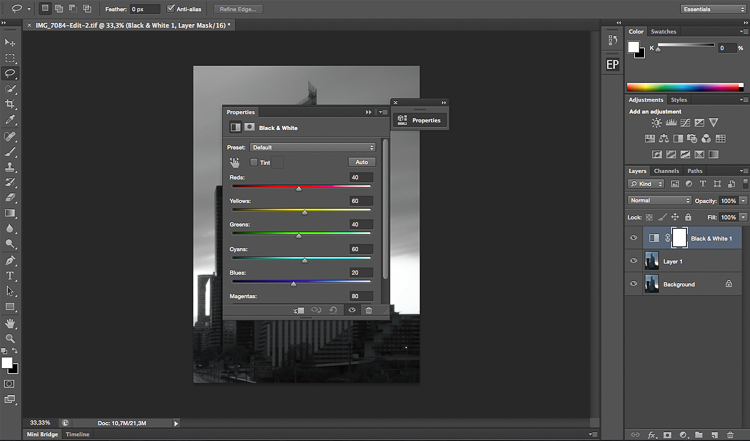
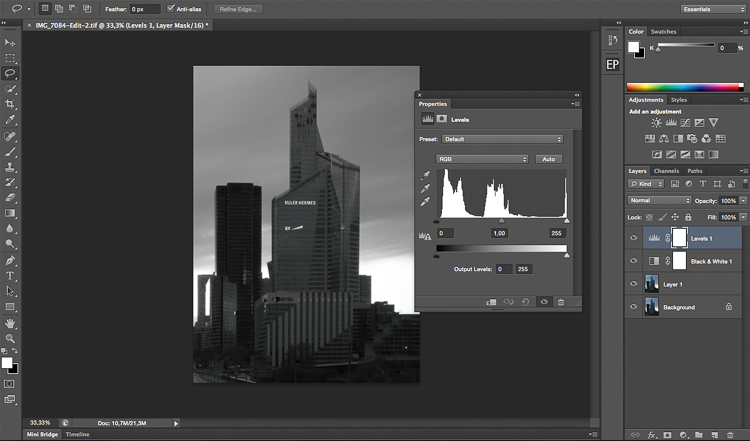
After converting your image to black and white and creating a levels layer, you’re going to play around with the three sliders to have a white sky and everything else black. White reveals and black conceals so your selection will be in white.
The three cursors should all meet at one point, you have to play around and see which selection works best for your image. You’re basically creating a luminosity mask.
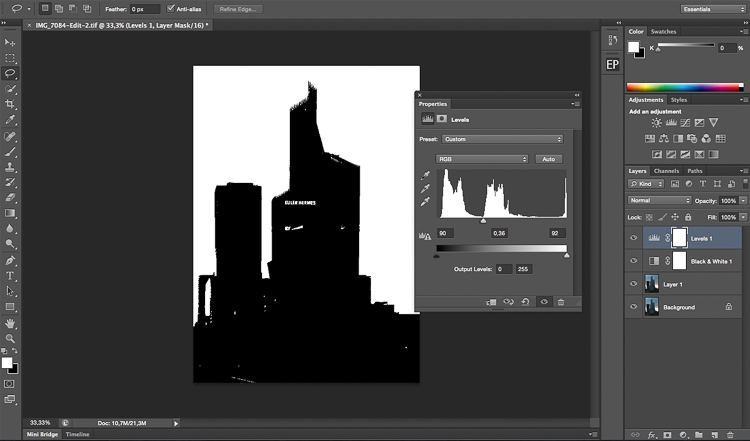
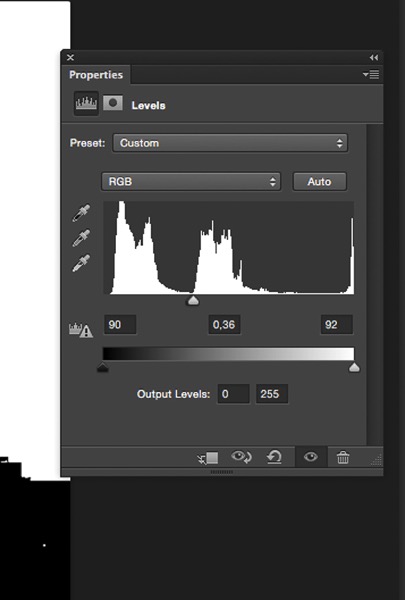
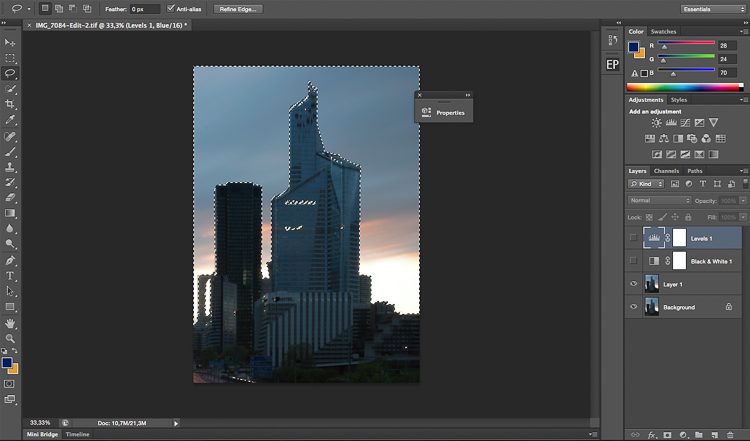
After finding the sweet spot, you just need to close your levels layer and go to channels. Pick any channel, click on it, and type Command/CTRL + A to create the selection from the levels layer you just created.
Once you have done that you can delete the levels and black and white layers to go back to your original image. Your selection is still going to be there. After that it is pretty much the same thing, click on refine edge on top of the Photoshop window and play around with your radius until you get the perfect selection.
This is the final image after some adjustments, I used the sky selection to add colors without affecting the rest of the image.
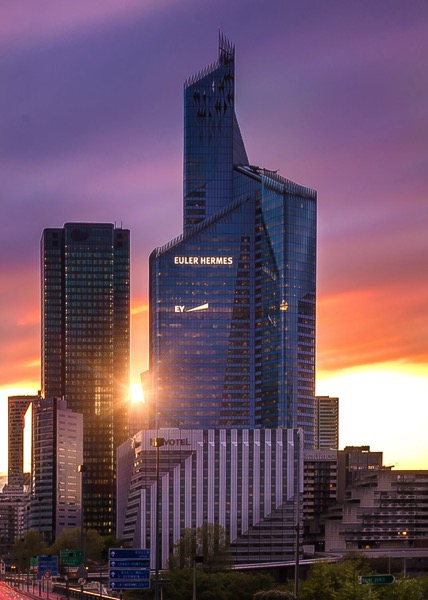
Whether you want to just edit or completely replace the sky is up to you. But, I hope that gives you some techniques that you can apply to your landscape and cityscape photography to perk up the sky.
Do you have any other methods you use for making a sky selection?
The post 3 Ways to Make a Sky Selection Using Photoshop by Yacine Bessekhouad appeared first on Digital Photography School.