Note: For this tutorial I am using Photoshop CS6, however every version from CS2 up will work for this technique.
What is Infrared Photography?
Infrared (IR) light lies just beyond the visible spectrum, so we can’t actually see it with the naked eye. However, IR photography allows us to view this spectrum with a camera, to capture a whole new world of invisible light.
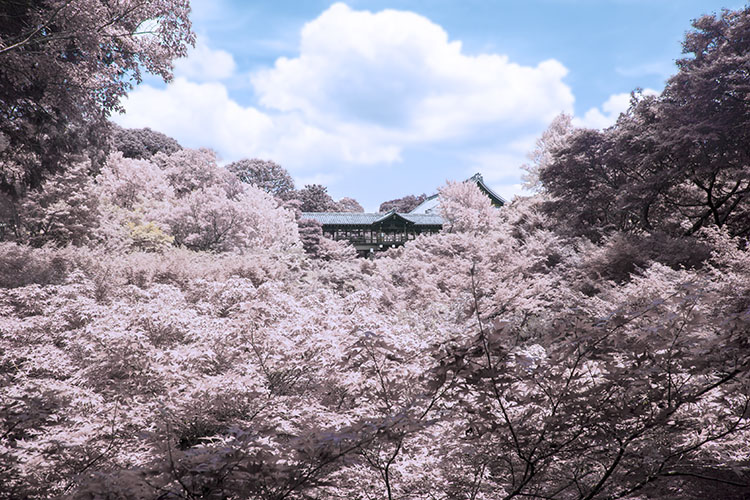
In basic terms, anything that reflects a lot of infrared light, will appear red in IR photography. As healthy vegetation absorbs blue and red-light energy to fuel photosynthesis and create chlorophyll, organic matter is the most popular subject for IR photography. The surrealistic effects that are created when IR comes into contact with plants and grass makes the method very popular for with landscape photographers, and is a great way to diversify your portfolio.
There are a few ways to capture IR photos in-camera
As most digital cameras are somewhat sensitive to IR waves already, screw-in filters are a reasonably straightforward way to make IR photographs. They are, however, fairly expensive and significantly reduce the amount of light that reaches the sensor of your camera, thus also increasing exposure times. Infrared light also focuses at a slightly different point than visible light. Once the filter is on, you won’t be able to see much at all, a combination that makes for a difficult time focusing. Autofocus is also rendered useless.
You can also use a film camera with special infrared film. This type of film is quite expensive and requires special handling, but shooting IR photos with it requires no modification to your camera.
Your third option is to pay for your digital camera to be altered to capture infrared light exclusively. But the procedure is expensive, and involves altering the internal layout of the camera, meaning it will never photograph light in the visible spectrum again.
This simple tutorial will show you how to mimic the distinct, surrealistic effect of in-camera IR photography, without the hassle or expense of buying an IR filter, IR film, or doing a camera-overhaul.
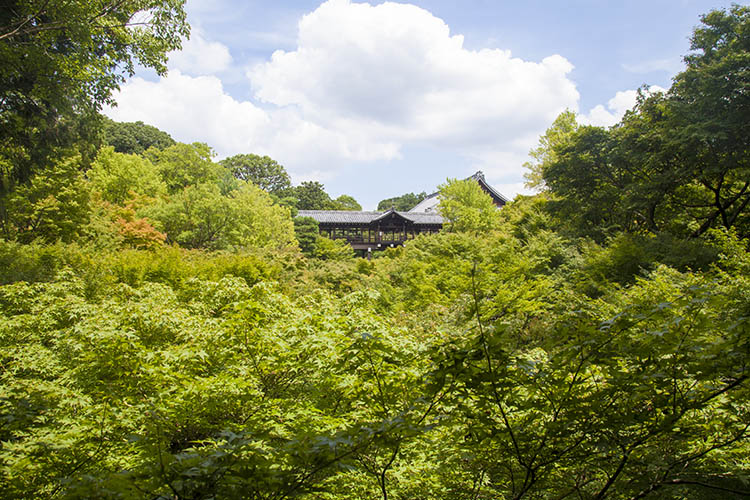
Step 1 – Open our image in Photoshop
Open up your image with Adobe Photoshop. The image I’ve chosen for this tutorial has plenty of organic material in it, so the finished result will be pretty intense. However, if a subtler effect is what you are after, simply pick an image with less dense greenery. As demonstrated in the conclusion, sometimes less can be more with this effect.
Now, duplicate the image layer via Image > Duplicate Layer or by using the shortcut CMD/CTRL + J. Rename this layer “Infrared” via the command box or by double-clicking on the layer name.
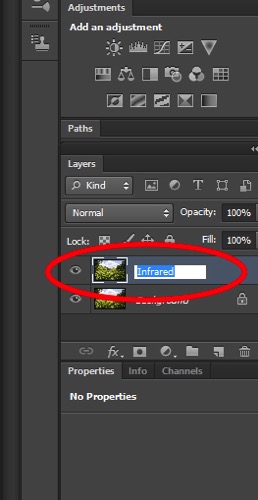
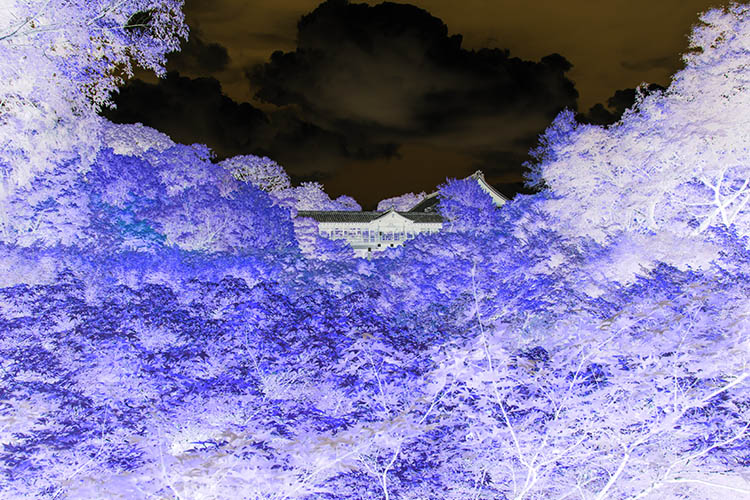
Next, invert the colors of the layer you just named “Infrared” by using the Invert option in the Adjustments Layer Panel. We will be using a few tools in the Adjustment Layer Panel. This method adds layers over the original image rather than directly editing it, which reduces the overall image quality and its ability to be altered again later if you change your mind. This is called non-destructive editing.
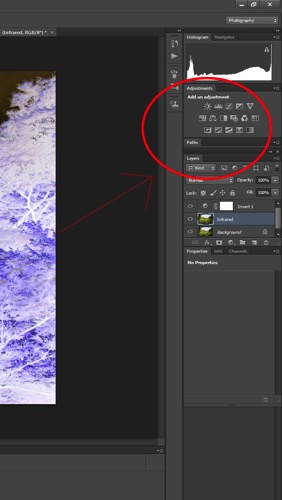
Once the layer is inverted it will look like a color negative.
Step 2 – Blending Modes
With the Invert Adjustment Layer selected, change the Blending Mode to Color, from the dropdown menu in the layers panel.
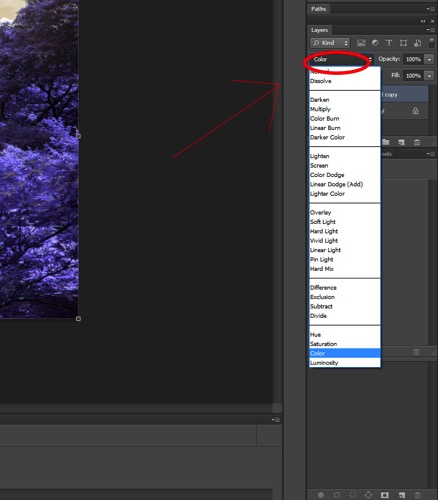
The image should now have a nice orange and blue tone.
Step 3 – Channel Mixer
Select Layer > New Adjustment Layer > Channel Mixer, or select the Channel Mixer icon in the adjustment layers panel.
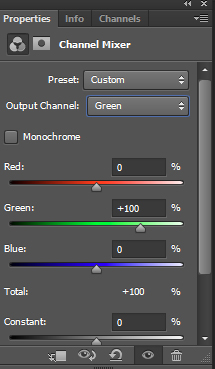
Now, in the Channel Mixer, first set the output channel to red, and move the red slider to 0. Move the blue slider to +100.
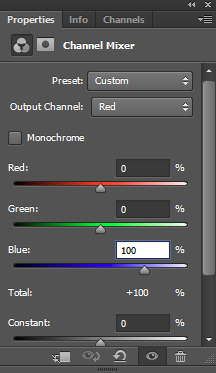
Then set the output channel to blue. Increase the red to +100 and move the blue slider to 0.
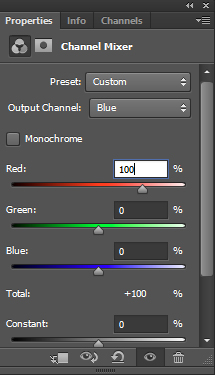
Leave the green output channel as it is, making sure that the green slider it is set to +100.
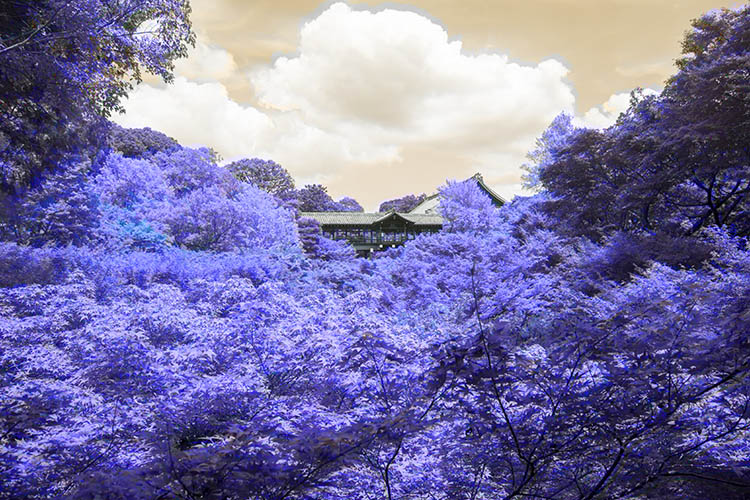
The image will now look a lot more saturated, color wise.
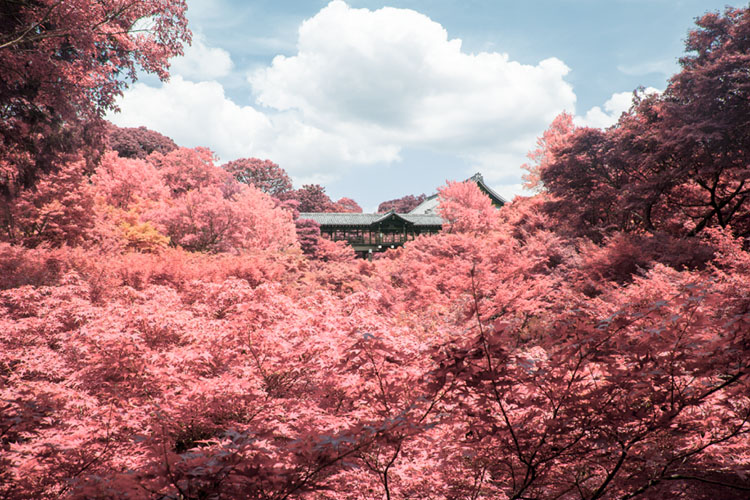
Step 4 – Hue and Saturation
This step is going to vary depending on what photo you have selected, but the overall goal is the same: isolating the pink/red colors and converting them to whitish/yellow color.
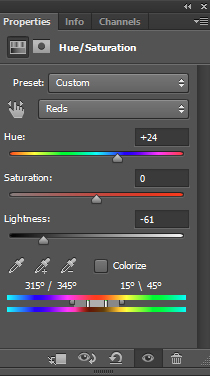
Make a Hue and Saturation adjustment layer via the Adjustment Layer Panel. Select the red channel. Reduce the saturation down so the result is almost grey.
Following this, adjust the hue slider until you get a hint of yellow. Feel free to play around with the other channels slightly to get the best results.
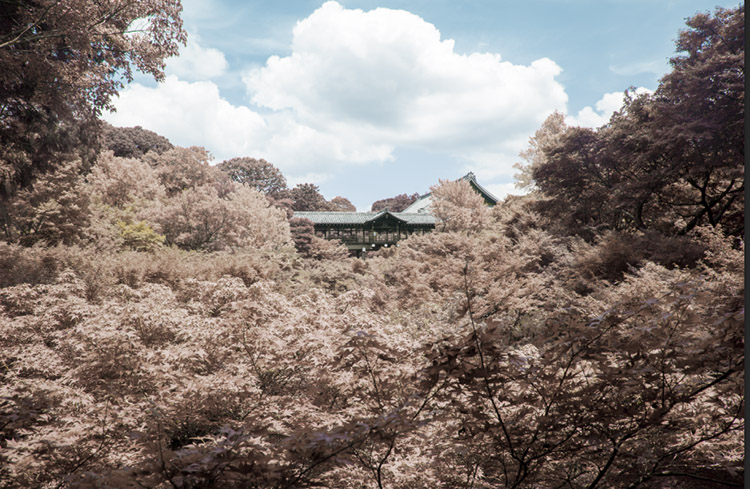
My image now looks more faded and subtle:
Step 5 – Finishing Touches
To finish up, I adjusted the contrast of the image using the Curves Adjustment Layer on the Adjustment Layer Panel.

Other Examples
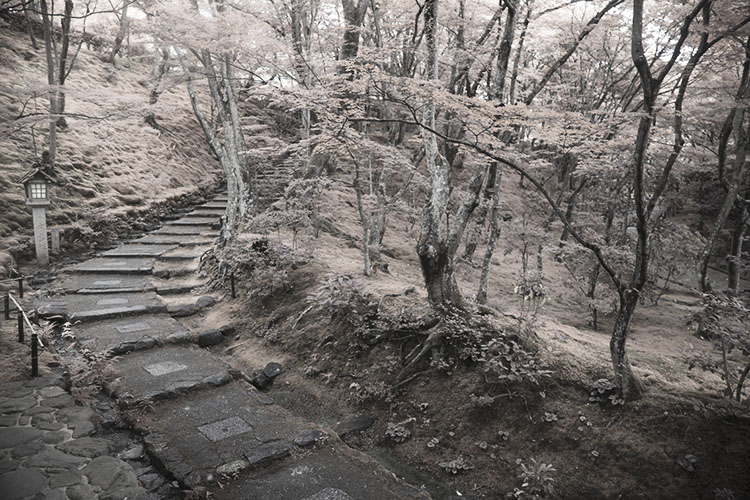
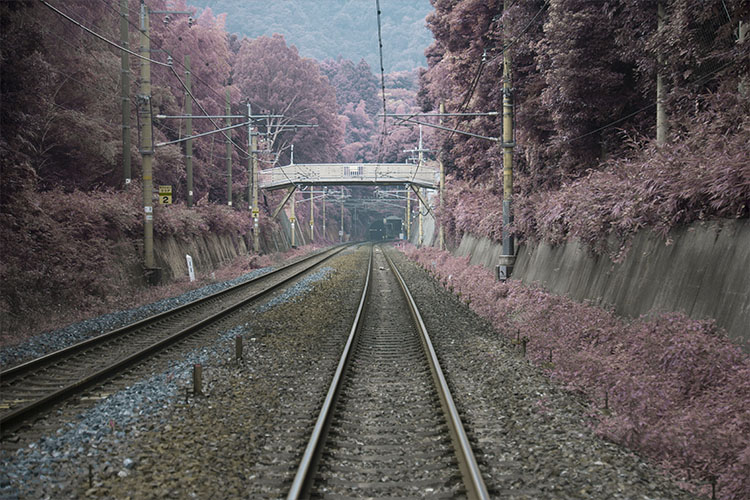
Here are some examples of other landscapes I’ve used this technique on:
The image below started with little or no blue tones. The final image takes on the appearance of a black and white, hand painted with a slight yellow tone.
Inorganic material isn’t really affected by the IR treatment, so only the grass and plants in this image take on a surreal hue.
I hope this tutorial was useful as a quick trick to diversify your landscape work.
Enjoy playing around with this technique, because the results are often unpredictable and can lend a completely different perspective to an image. Please share your questions and IR image results in the comments section below.
The post How to Create an Infrared Effect in Photoshop by Megan Kennedy appeared first on Digital Photography School.