Presets this and Presets that. It’s like the world has gone Lightroom Preset mad of late. Some people hate them, others rave about them! So where do you start? Well, the beginning is best really.
When Lightroom was only a beta program (and for Mac only), one of the big features was that you could make changes to an image in the Develop Module, and save those settings to apply them to another image directly! They didn’t even have to be in the same shoot. (Lightroom organized by shoots then, not folders). Unlike Actions in Photoshop, the setting changes were immediate, and easy to undo. These were the first Presets. While they worked pretty much like Presets today, they weren’t as versatile as they are now.
What are Lightroom Presets
Presets are files that allow Lightroom to apply particular Develop settings to an image. They appear in the Left Panel of the Develop Module in the Presets Panel. They’re also available in a drop down menu in the Quick Develop panel in Library.
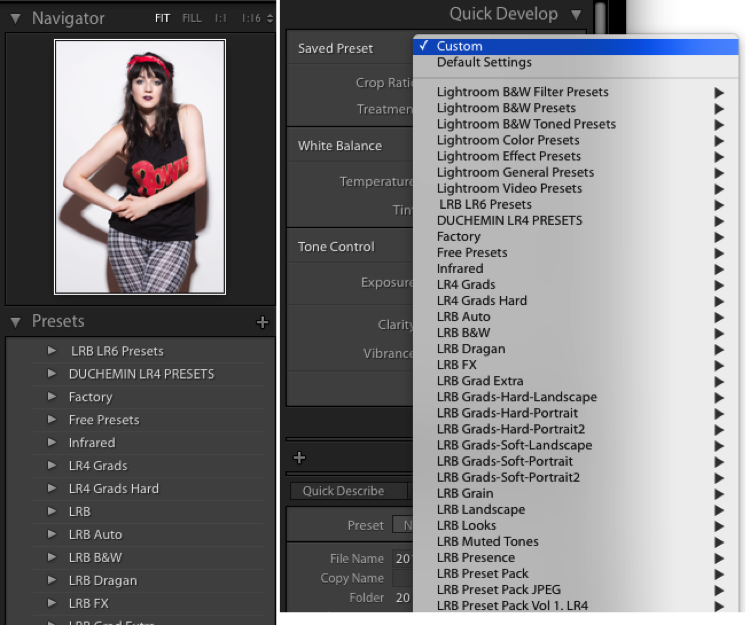
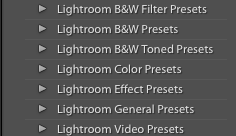
Lightroom ships with a range of Presets, which are stored in folders based on the type of Preset within. This organization suggests a great way to store Presets: organize by what the preset does.
With the Preset and Navigator panels open, hover over one of the default Presets (you may need to click on the folder triangle to open it). You should see the Navigator preview change to show what the preset would do to the image if you click and apply it. Now if only you could make the preview bigger!
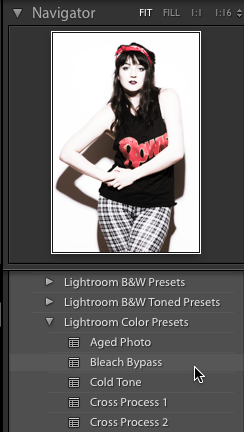
A preview of the preset will appear in the Navigator window top of the left side panel.
Making your own Presets
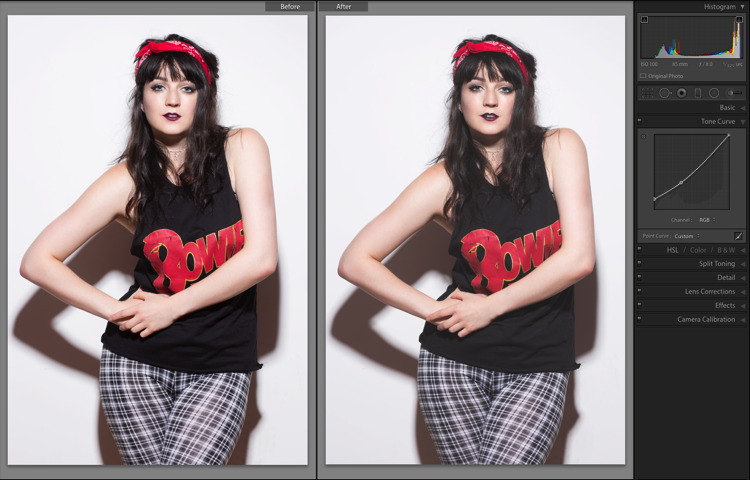
You can get a handle on Presets by making them, exporting them, sharing them, and even importing Presets from other people. First you need to make changes to your image to be able to save a preset. You could start with a Tone Curve adjustment. First, go to the Tone Curve panel, and click on the Point Curve icon (indicated with the red box).
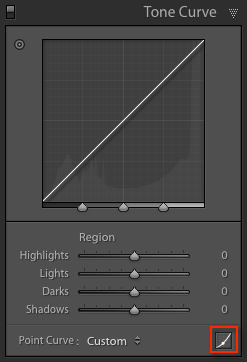
Next, click about one third of the way from the bottom. Finally, click the square point on the bottom right of the box, then drag it up while holding the Shift key. The blacks in your image will fade to give a nice retro, matte-finish look. You can see the difference by pressing the Y key to see a before and after view.
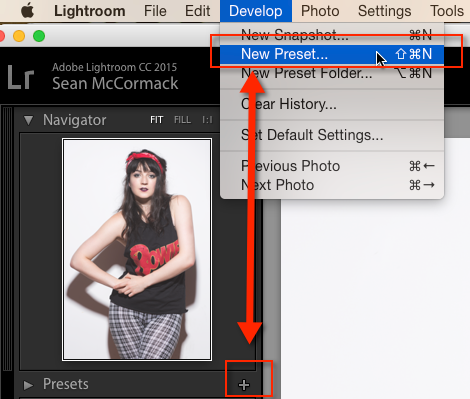
To save this look to use again, go over to the Presets panel and click the plus (+) in the panel header. You can also choose New Preset in the Develop menu or use the keyboard shortcut: Shift + Control + N on PC, or Shift + Command + N on Mac. This opens the New Develop Preset dialog box, where you save your settings.
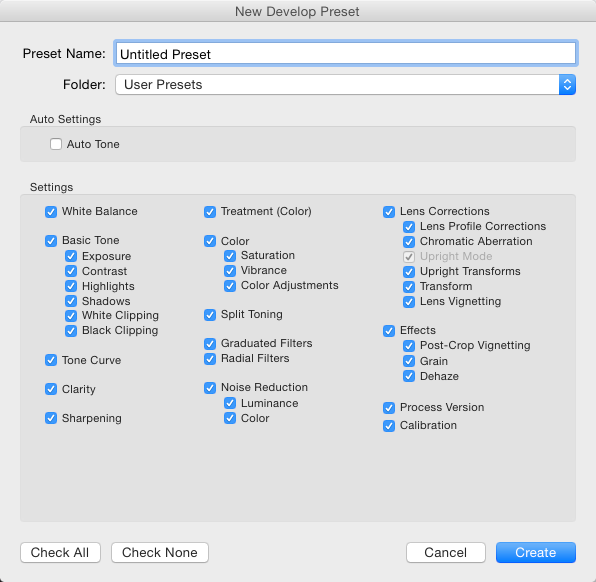
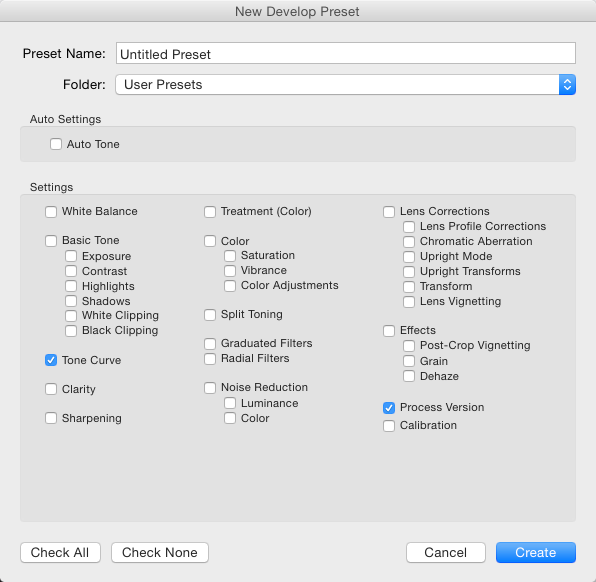
This is a good time to talk about what to include when you save your Presets. You can just save everything into the Preset (which is the default). There’s no harm in that, but generally it means the preset will only work on images that look similar to the one you started with. It also means that preset will overwrite all develop settings in the image, so any other work you’ve done to the image will be lost.
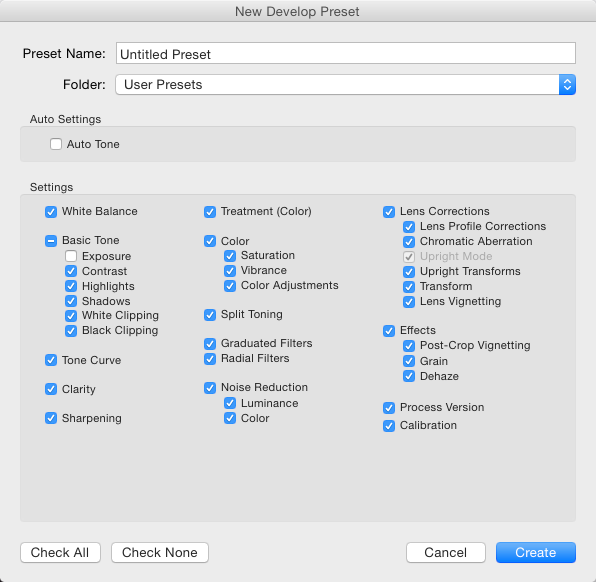
But, there is a better way. The second option (besides saving all settings) is you exclude Exposure from your preset. This means any changes to the apparent brightness of the image you made remain intact. That’s a win straight away.
The third option you have, is to save only the settings that are making the change to the images. You’ve just used the Tone Curve here, so you could press the Check None button, and then tick Tone Curve, followed by Process Version – it’s best to always include that last one so that all the other settings apply correctly.
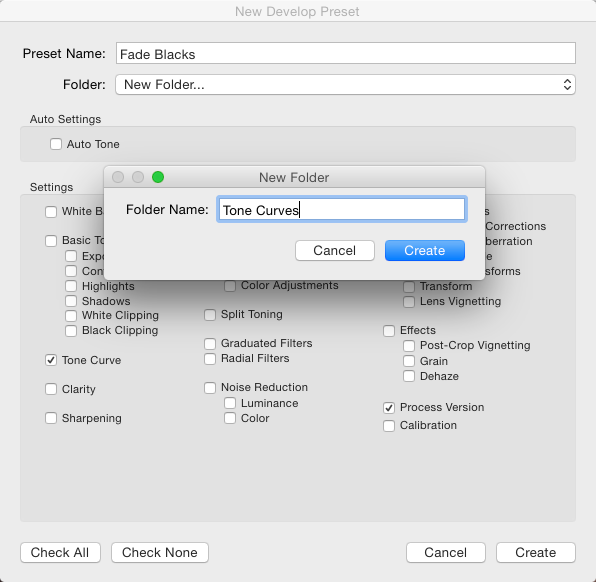
For organization, you could also create create a new Folder for these Presets. To do that, click the Folder menu and choose New Folder at the top of the menu. Name the Folder Tone Curves. Finally, you can give the Preset a useable name. While flowery names might work for selling your Presets as artsy product, in reality, you’re better off using a name that reminds you what the Presets does. You could use Fade Blacks, or Lighten Blacks, for this one.
Applying the preset to other images
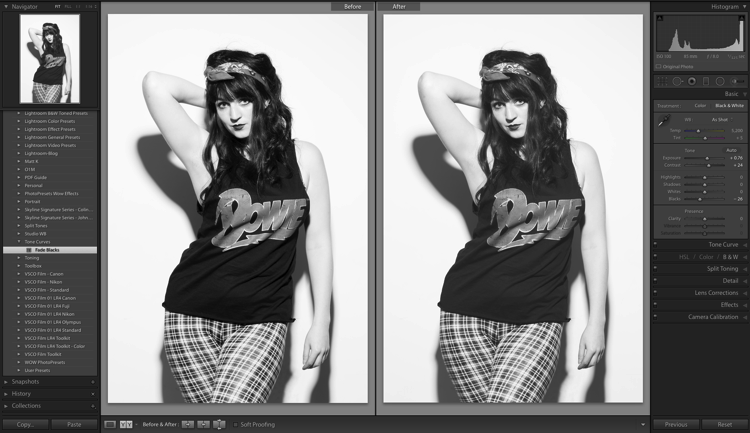
This Preset can now be applied to any other image. You could test with an image that has other settings already applied, like a black and white photo for example. Notice how the image remains black and whie after applying the Preset? If you’d saved everything into the preset, the image would’ve turned back into color, because one of the options selected was the B&W Treatment.
Sharing the preset with others
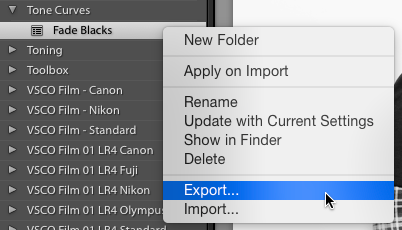
You can also share this Preset by right clicking on it, and choosing Export. Notice that you can also choose Import from here (as well as Apply on Import) which is how you also get shared, or purchased Presets, into Lightroom. Apply on Import is different, and refers to when images are being Imported into Lightroom, selecting that will change the settings on each photo brought into Lightroom automatically. Also in this menu is, Update with Current Settings. This allows you to make changes to your settings, then save them to an existing preset instead of making a new one.
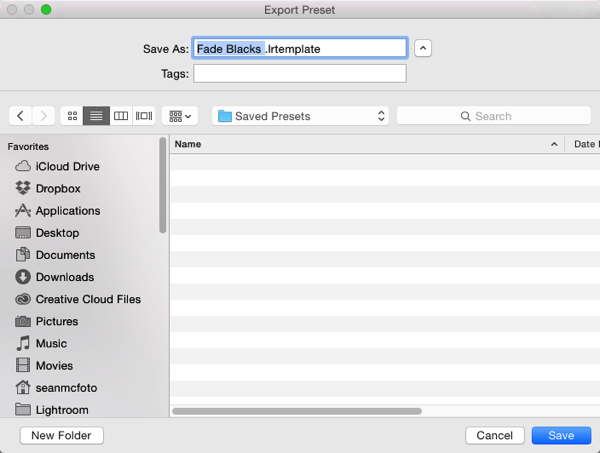
Back to Export: When you click Export, you get an OS Save window. The suggested filename will be the name you gave the preset, followed by ‘.lrtemplate’, which is the required file extension for Presets. Save them somewhere useful, like a folder called Saved Presets.
Where are your Presets stored?
You might be wondering where the Presets you haven’t exported are stored. Fortunately Lightroom does allow you access to them. You can get to them by opening Lightroom Preferences (which you’ll find in the Edit menu on PC, and the Lightroom menu on Mac). Click the Presets tab (in blue below) when the Preferences box opens. In the middle is a button that says Show Lightroom Presets Folder. If you click that a folder will open, with a subfolder called Lightroom selected. Open that folder to see all of Lightroom’s Presets and Templates folders for Develop, Slideshow, etc. The one you want is called Develop Presets.
If you have a lot of downloaded or purchased Presets to add to Lightroom, it is quicker to open this folder, drag the new Presets into it (preferably in their own folder for organization) and then restart Lightroom to load them. Another way to get to a Preset is to use the Show in Finder/Explorer option from that right click menu earlier.
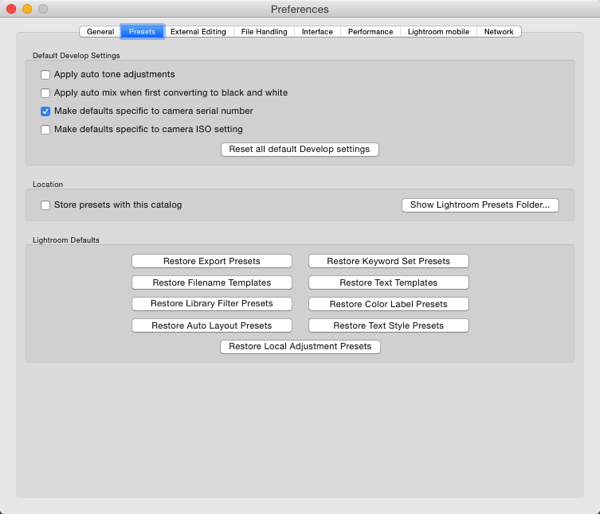
The last thing worth a mention in this article is the Store presets with this catalog checkbox. This does what is says, but the practical reality is that it means if you then use another catalog, you don’t have access to your Presets. So in general I recommend not using that option.
Hopefully now you know a lot more about Lightroom Presets than when you started. If you have any questions or comments please share them below.
The post The Beginners Guide to Lightroom Presets by Sean McCormack appeared first on Digital Photography School.