Back when Lightroom 5 was released, Adobe included an extremely useful tool called the Radial Filter. However, the name wasn’t particularly clear about what it could do, so many people still have yet to find how useful and powerful it can be. Further improvements were added in Lightroom 6, with the ability to further edit the effect of the tool with the Brush function.
Workflow process
A generally accepted practice when editing images, is that you do your global adjustments first. These are the ones that affect the whole image at once. Some examples of adjustments that you might use are:
- Exposure
- White Balance
- Contrast
- White or Black Point
- Sharpness
- Clarity
- Shadows and Highlights
Once the global adjustments are done, then the local adjustments can be made. These are changes made to only a small part of the image. They may be to add final polish to the image or to fix some blemishes. These changes should be subtle and layered on with a delicate touch. It should not be obvious that they have been made, but when you are finished and compare the before and after image, there should be some improvement visible.
How the Radial Filter fits in
This is where the Radial Filter can be used, adding in areas of highlight or clarity to the key subject, brightening or darkening areas, or adding a custom vignette. Lots of little touches to take your final image to the next level.
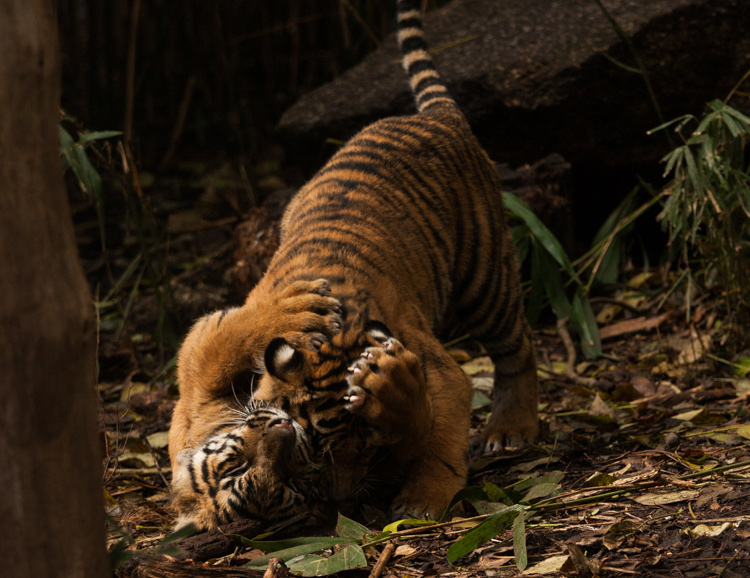
My example image is a shot of a couple tiger cubs taken at Melbourne Zoo in 2010. It was very dark and shaded in their enclosure so the original RAW images are very dark. This image has been edited in Lightroom 6 to apply all the required global adjustments. It is now ready to have some localized tweaks added with the Radial Filter.
WHERE TO FIND THE RADIAL FILTER AND HOW TO USE IT
The Radial Filter lives in the right panel of the Develop Module. Under the histogram are six shapes that link to different tools. The round circle with a dot in the centre at the fifth position from the left is the Radial Filter.
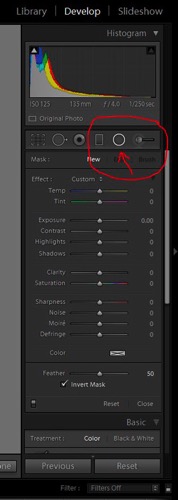
When you click on the button for the Radial Filter (you can also use the keyboard shortcut Shift+M to open the Radial Filter), a panel opens up with all the editing choices available for this tool.
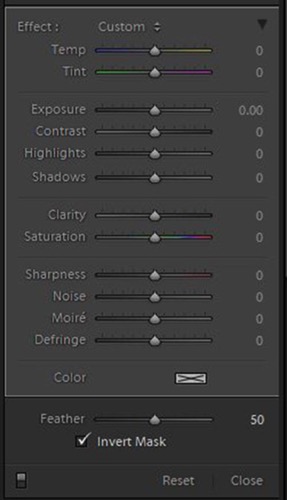
Adding and adjusting the filter
If you click on your image and drag the mouse out a bit, a roundish ellipse shape will form with a centre button and four control handles. Let go of the mouse when the shape is roughly the size you want it. The Radial Filter only offers a roundish ellipse shape but it has a lot of flexibility with changing the size and squashing it down to be a narrow oval shape instead of a circle.
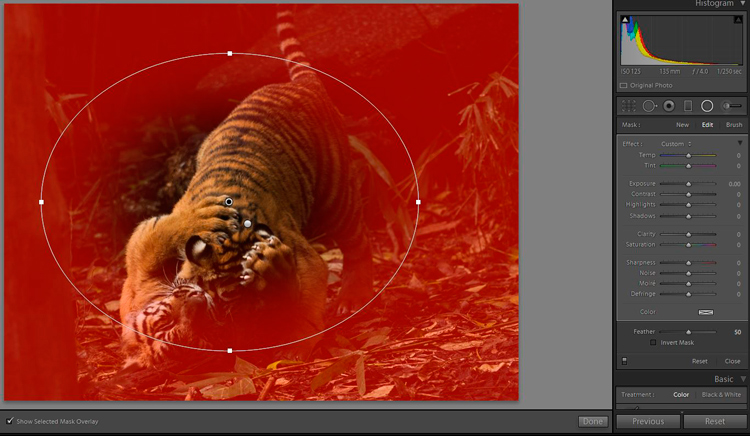
Clicking and dragging on the centre button allows you to move the filter to the part of the image you want to edit. Use the control handles to change the size and also the shape of the ellipse.
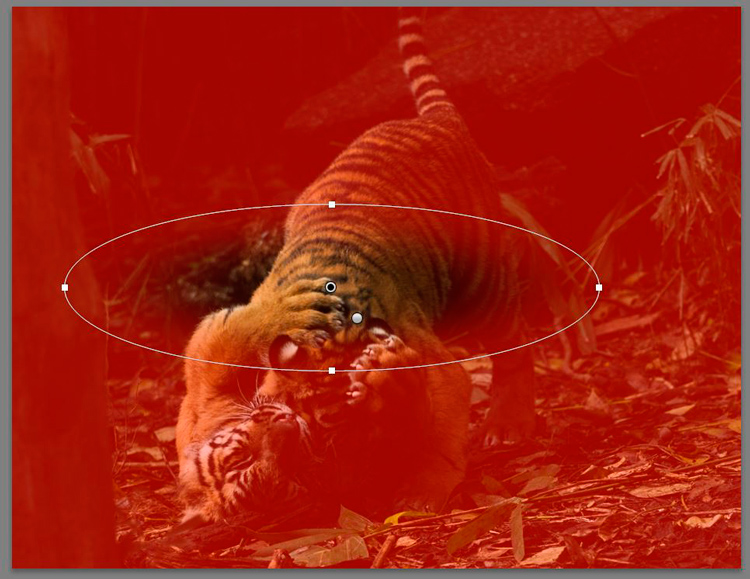
Which area is affected
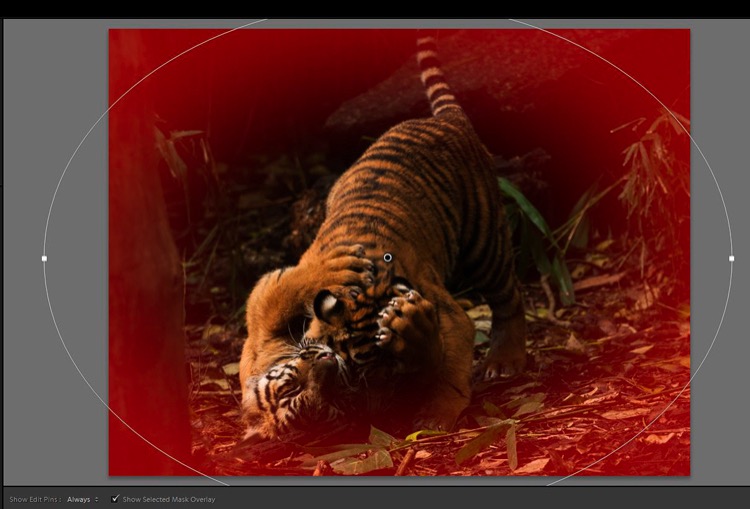
By default, Lightroom sets the editing area to OUTSIDE the ellipse. If you want to edit INSIDE the area, tick the Invert Mask box on the Panel.
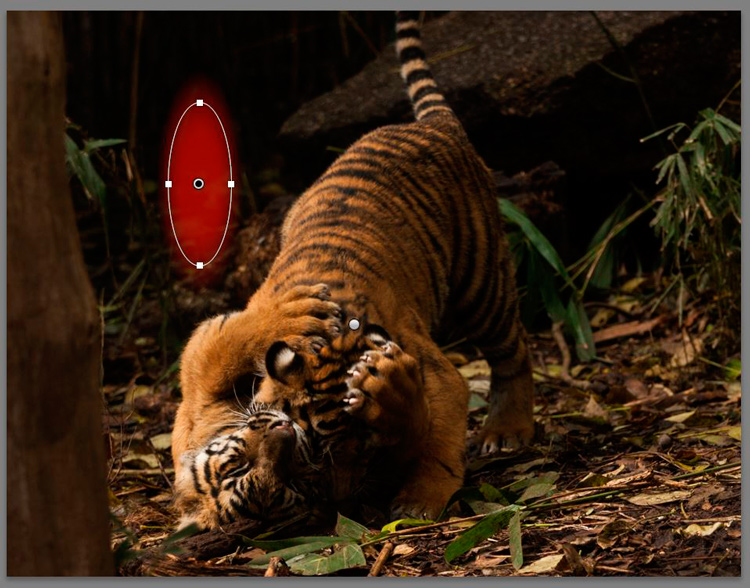
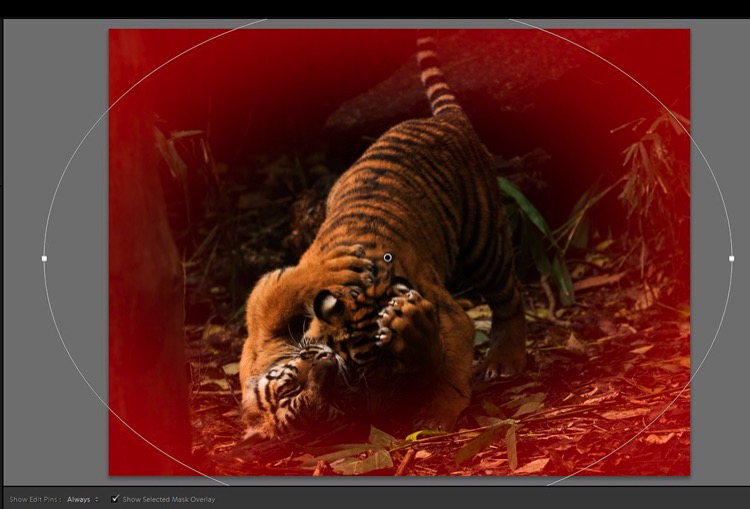
The red colour shows up if you have Show Selected Mask Overlay ticked. It is handy to see where Lightroom will apply the effect and how much feathering you need to use.
NOTE: if you do not see a coloured overlay like the red one shown here, hit the O keyboard shortcut for “overlay”. Holding shift and tapping O will change the color of the overlay.
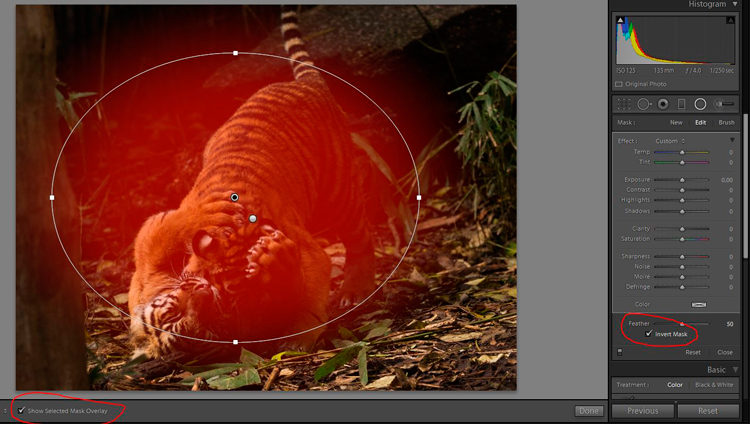
Note: Always click Close or Done (or the keyboard shortcut Shift+M again) once you are finished editing a particular button so you can see the edited image clearly.
USING THE RADIAL FILTER TO EDIT AN IMAGE
In the example image the aim is to bring attention to the tiger cubs, adding some tweaks around the head and paws area (it’s not 100% sharp due to the low light and the movement while they were wrestling).
Add an off-centre edge vignette
First, we add a vignette to darken the distracting elements on the edge of the frame and bring the focus to the cubs.
Because they are not in the absolute centre of the image, the usual post-crop vignette tool will not work. This is where the Radial Filter is so useful, as you can add a vignette with the focus an off-centre subject rather than being limited to the middle of the frame.
The vignette needs to have Invert Mask NOT ticked, as the effect goes on the outside of the ellipse.
Add the Radial Filter and adjust the shape to be quite large – you can make the ellipse bigger than the actual image if necessary. Invert the mask and bring the exposure down just enough to darken the edges of the frame.
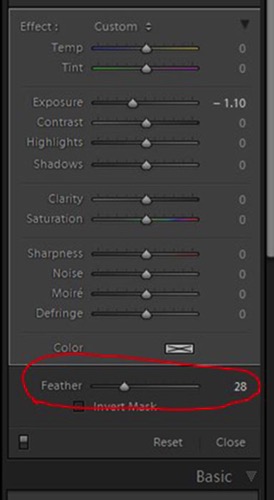
Feather the filter
Lightroom has a default feather setting of 50 which is quite a lot, too much for this image, so adjust the feather down. Be careful not to go too far as a harsh edge will become visible.
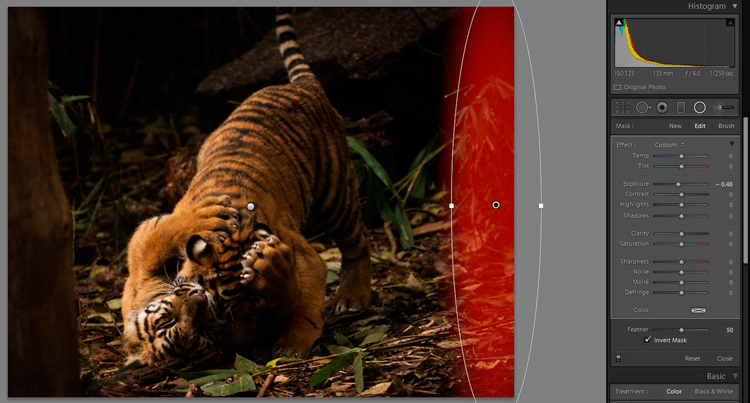
The right-hand edge of the image still has a bright spot of foliage. So add another long Radial Filter and bring the exposure down a little bit.
There are no set numbers of how much to edit with this tool, you will need to experiment and go with what feels right. The good news is these are all non-destructive edits (the image is not permanently changed) so you can remove them all and start again, or change the settings on one or all of them, as many times as necessary.
Tone control on select areas
There is a bright spot of foliage on the left-hand side, just sticking out from behind the tree trunk. Create a new Radial Filter just big enough to cover the right area and shape with the control handles.
Invert the mask and bring the exposure down a bit. This time, click and drag on the bottom control handle and drag to the right until the ellipse tilts back to the left a bit and aligns better with the line of the tree trunk.
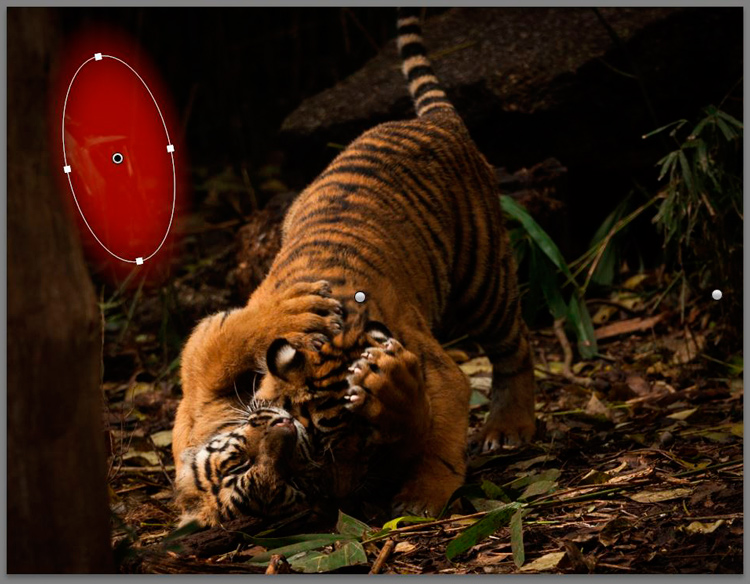
Add focus on the subject
Now it is time to add some brightness and focus to the tiger cubs. Add a new Radial Filter to cover the area on the bright side of the head and paws and bring up the exposure a tiny amount. That is where the sunlight is naturally falling, so that is the area that needs brightening. Be careful to add light effects only to the lighter parts of the image as it can look a bit odd if a darker area is unnaturally bright.
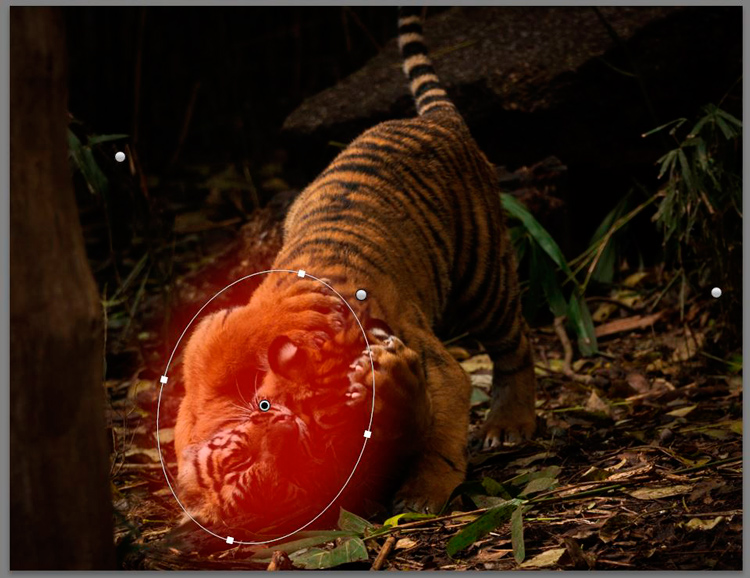
Now is a good time to mention that you may have to make LOTS of little adjustments to cover areas with different shapes. It is fiddly and takes time, but you will get a better result if you take the time to edit that way.
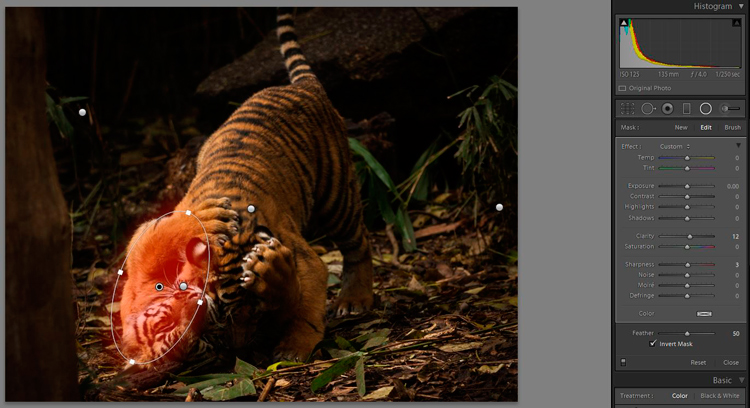
Adding some clarity to the side of the face and paw in the sunlight is the next step. Create a new Radial Filter with size, shape and tilt to match the area and invert the mask. Add some clarity, and because this image is not quite sharp, just a little bit of sharpness. Be careful with these tools, as it is easy to go too far and get obvious effects.
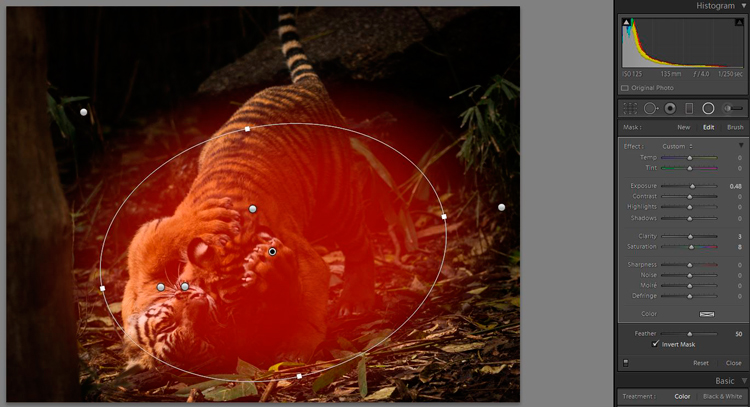
The vignettes have darkened the overall area in the middle a bit much so let’s add some brightness. Add a Radial Filter to cover the area around the cubs and tweak the exposure up a small amount. Also, increase clarity and saturation a very small amount.
Before and after comparison
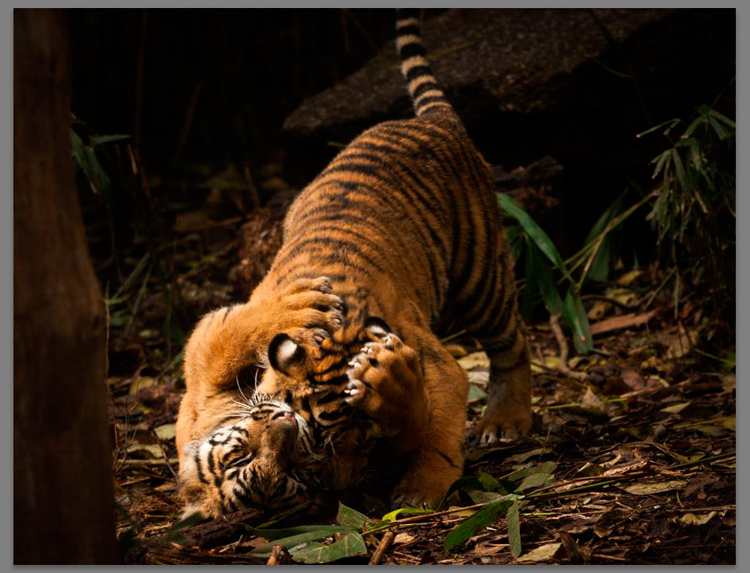
Let’s stop there and compare the BEFORE image with global adjustments only to the AFTER image with several specific applications of the Radial Filter.
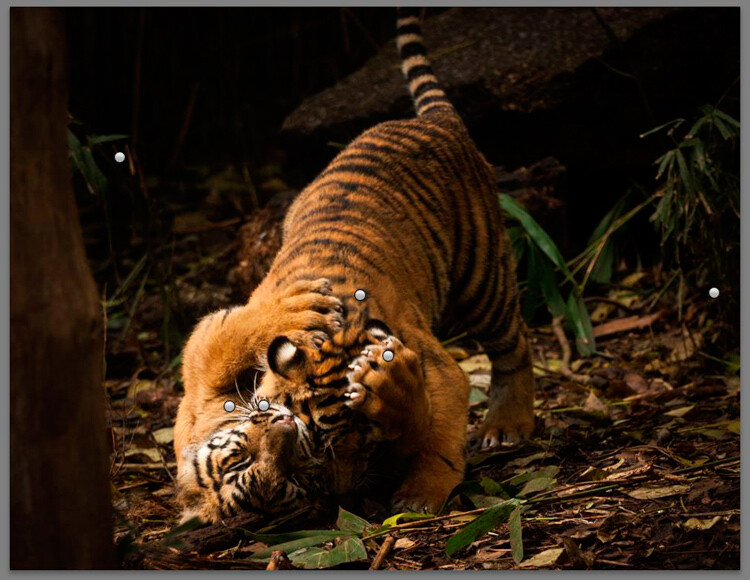
First, we have the finished image with all the dots for the different individual Radial Filters added.
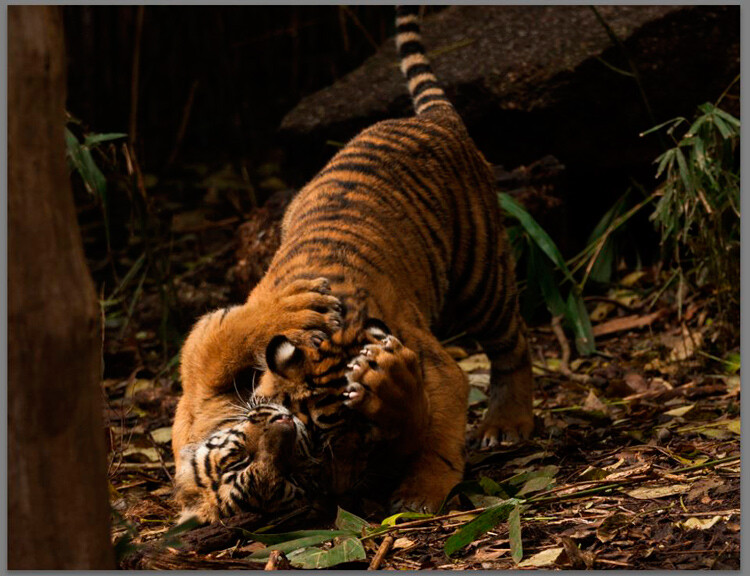
Then we have the BEFORE image.
Finally the AFTER image with both global, and local edits applied with the Radial Filter.
CONCLUSION
As you can see, careful use of the Radial Filter can add many small subtle changes to an image, and bring the focus to the subject. It can also be used to further enhance the subject and give it extra punch and vibrancy.
The Radial Filter is a very capable tool that can take a bit of time to get used to. The limited shape has some challenges to learn how to work with it to get the best effect but it gives you a lot of power and control too.
Do you have any other tips for using the Radial Filter? Please share in the comments below.
The post Lightroom’s Secret Weapon: The Radial Filter and How to Use it by Stacey Hill appeared first on Digital Photography School.