There may be times when you want to play around with some elements in your images. Perhaps you want to change a color to a more suitable one in post-processing. One of the tools you can use in Photoshop is the Channel Mixer. It is a simple process that allows you to change the color of any element in your image to any other color under the rainbow. The Channel Mixer adjustment is widely used for making good black and white image conversions, correcting color casts, and exaggerating color. But why not use it for fun too, such as changing the color completely!
Before you start, however, there is one vital thing you must know, if you want to work in Photoshop in a non-destructive way: layers and masks.
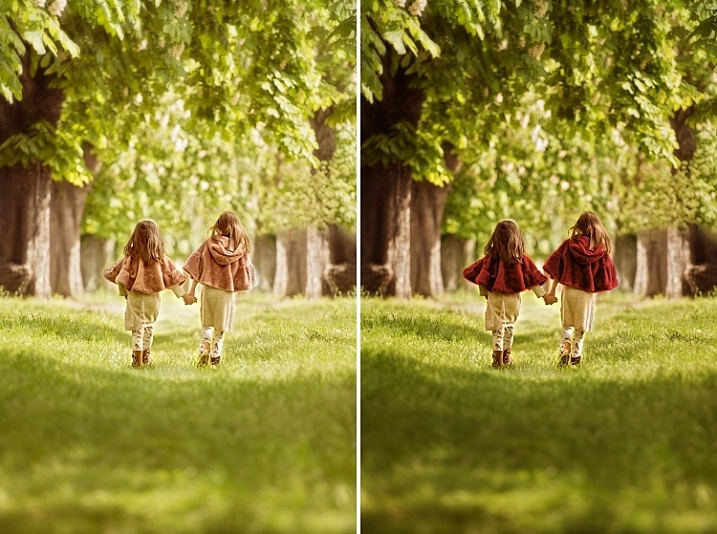
The examples below are from a photoshoot I did with my girls. I did not like the colors of their capes, and didn’t have any other alternative, so Photoshop was to be the answer.
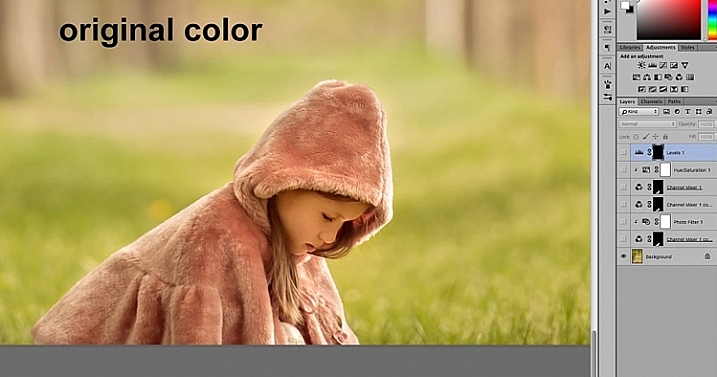
The first thing you need to do once your file is opened, is to select the area where you want the color changed using either the quick mask mode, or one of the lasso tools. While your selection is highlighted, add a channel mixer adjustment layer and your selection will automatically be added as a layer mask. Click on the channel mixer icon to the left of the layer itself and a window pops-up.
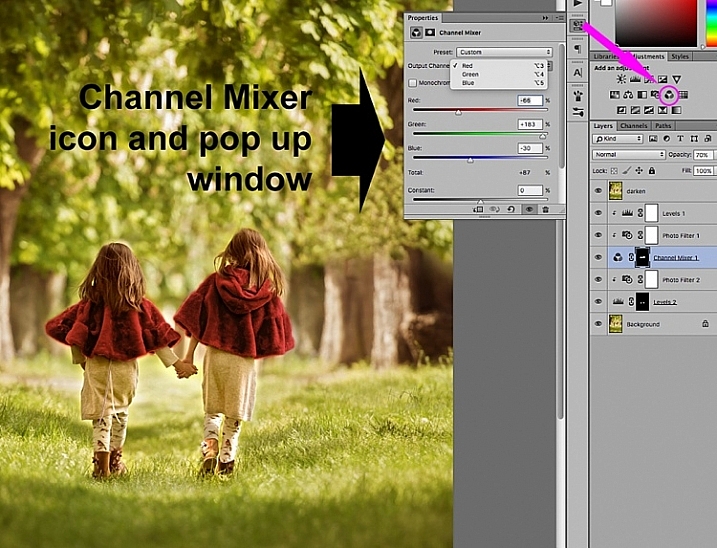
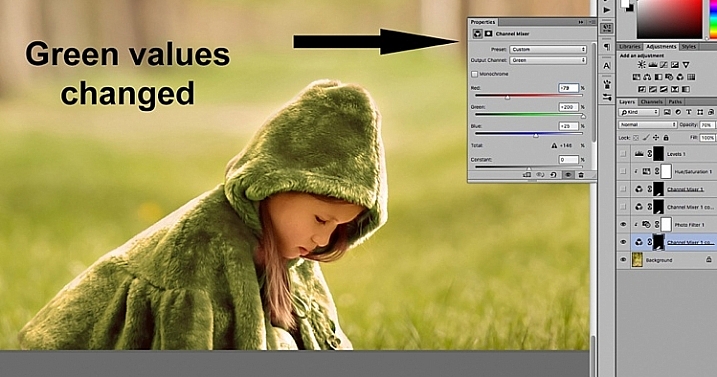
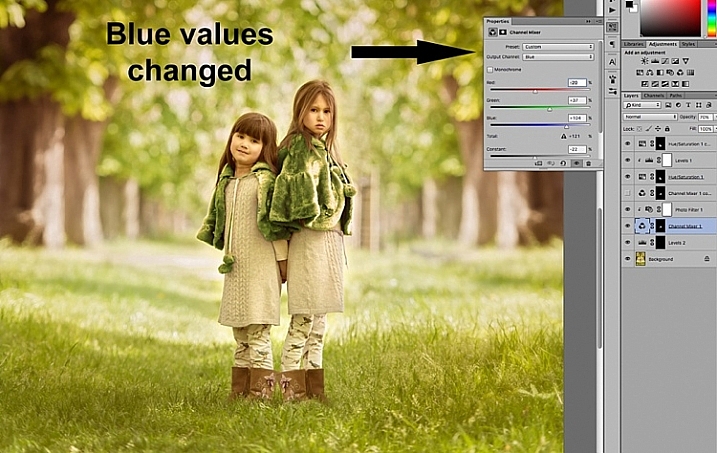
There are three values under the output channel: Red, Green, and Blue . You need to bring up each value and move the sliders until you get your desired color. It will take a little experimenting, and going backwards and forwards between the three colors, until you arrive at your chosen color. When the color change is vastly different, you will notice that the RGB values individually requires major changes.
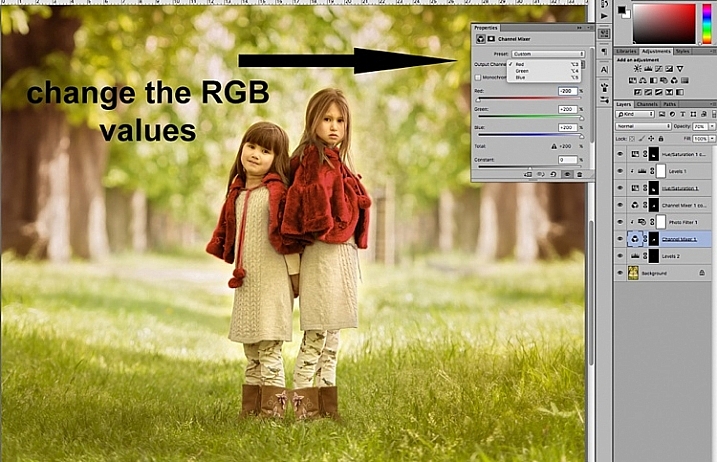
You need to keep an eye on the total value for each channel, aim to keep it within 100%. A warning is displayed when you go over 100%, as this means the color output is too bright or dark, and you are losing data in the darkest areas or the highlights. A negative value means you are adding more of the colour to the channel, and a positive value means you are taking away.
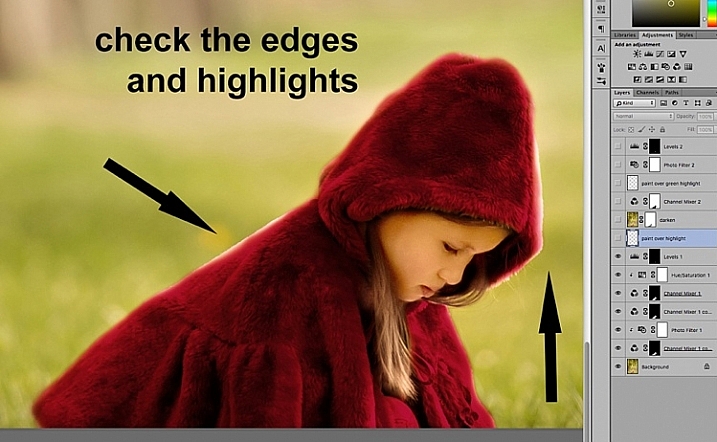
Once you have decided on your new color, don’t forget to check the edges and carefully mask around if necessary. When the new color is a lot darker than the original color, such as on the image below, more meticulous masking is necessary to clean up the edges. In some cases, painting the highlights with the same color is needed for the image to look natural. You may also have to adjust the opacity of the brush, or the adjustment layer as required. The important thing is to make sure the image looks believable, if that was your original intention.
Once you have changed the color and cleaned up your masking work, check the overall look, and adjust the background accordingly. In the case of the image below, the original background looked too bright for the new moodier look so I darkened it to go with the scene I was after. There are various ways of darkening an image in Photoshop. The method I used here was to duplicate the original image (duplicate layer), and change the Blend Mode to Multiply. You can then mask out any areas you don’t want to get too dark, or change the opacity of the layer, as done on the image below.
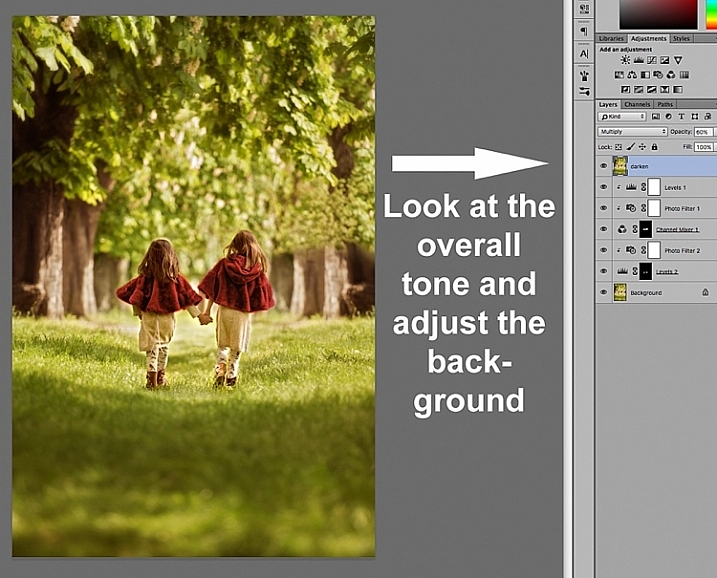
You will notice that I have added additional layers such as levels for brightening some areas, and photo filters for warming up or cooling down other areas. It is essential to have a good look at the overall picture, not just the isolated area and selective changes you have made. This is because our perception of color is relative and mostly dependent on the colors around them. Here are the before and after images (below).
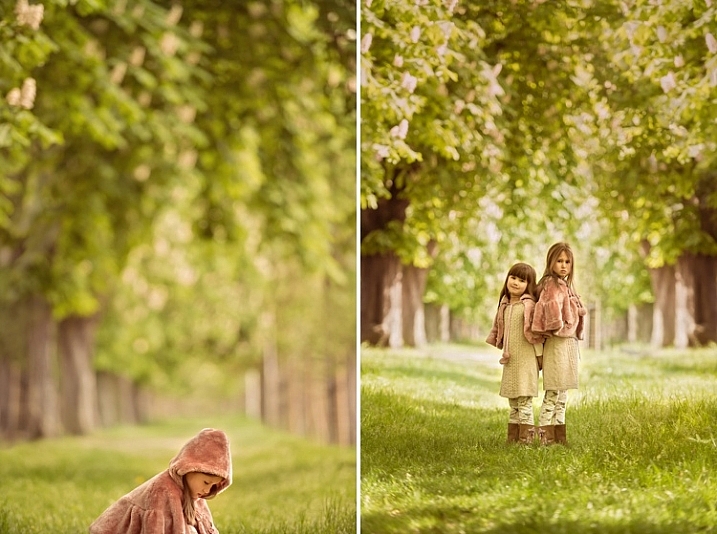
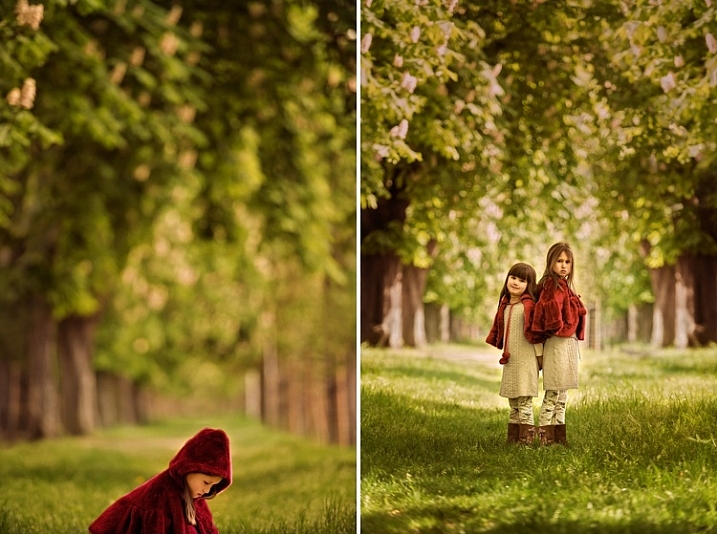
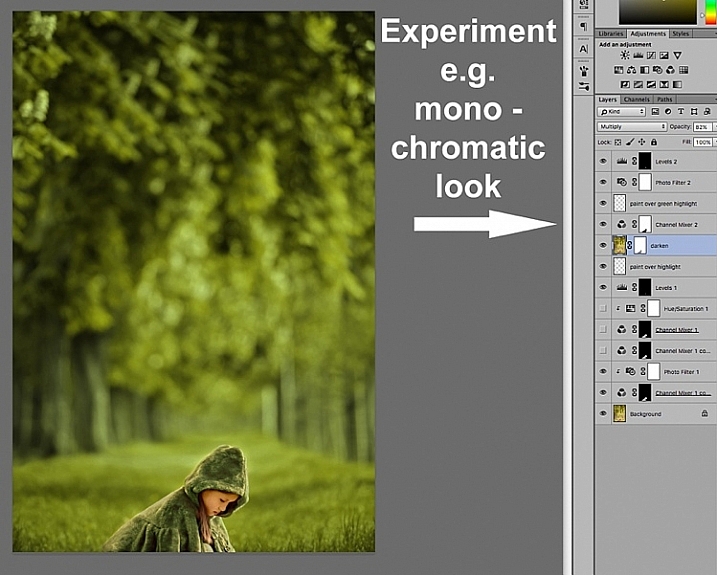
Your Photoshop play doesn’t have to end in isolated color changes. You can experiment in many various ways to achieve any look you desire. In the image below I decided to go for a more monochromatic look. This involved selecting the background, applying another channel mixer adjustment layer, and moving the sliders on each RGB value until I got the color I was after.
Or you can throw all caution to the wind and go totally crazy. You can add and remove colors from each channel at purely 100% in a mix and match fashion, and see what array of unrealistic looks you get, such as the magenta image below – for fun!

I hope this has been a little helpful tip for your Photoshop play. Do you have other ideas on how to use the channel mixer to achieve various effects in Photoshop? Share them in the comments section below please.
The post How to Use the Channel Mixer in Photoshop to Change Colors in Your Images by Lily Sawyer appeared first on Digital Photography School.