Cinematic style portraits are personally one of my favourites. What I like the most about them are the desaturated colours and the dramatic ambience.
Before we start the tutorial on colour grading, I will give you some of my best tips to achieve this cinematic look:
- Use a large aperture, something between f/1.4 and f/2.0. If you have a long lens then you can also use that. The idea is to have a nice background bokeh (when things in the background are blurred). You also want to have nice separation between the model and the background.
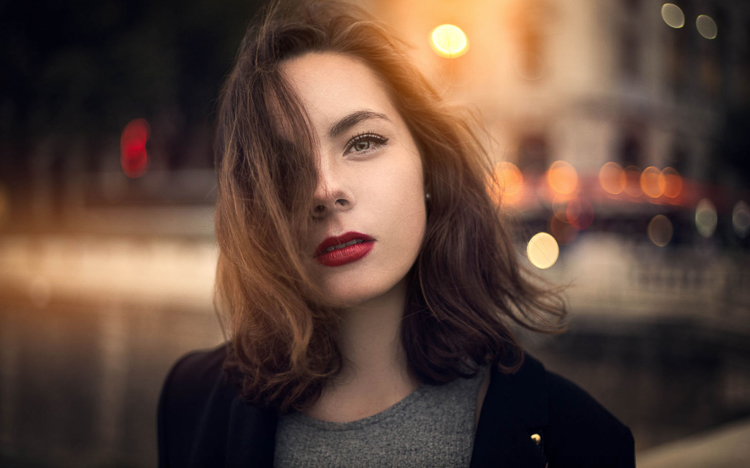
- If you’re shooting indoors with strobes, then try to add ambience by adding shadows to the model’s face. You do not want flat lighting, it is boring.
- If somehow you can’t get the dramatic lighting, don’t hesitate to enhance the contrast with some dodging and burning in Photoshop.
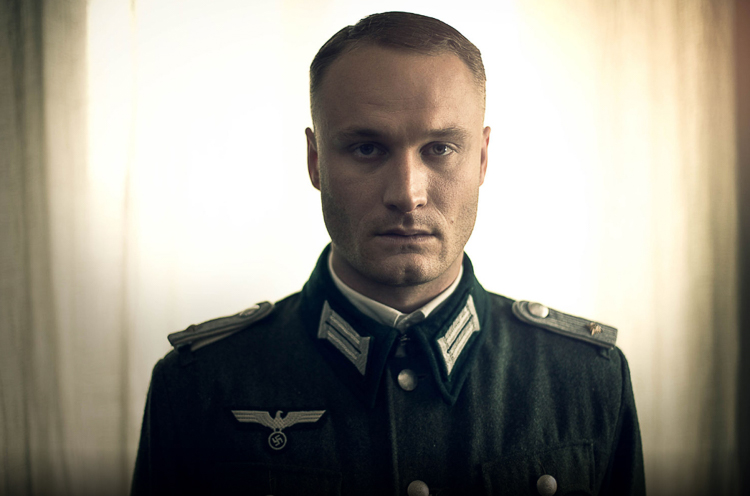
- If you’re shooting outside, the I recommend shooting right after sunset. You will get nice soft light on the model’s face, and you will also have city lights behind them, to really get a cinematic feel. This only works with a large aperture, and it adds another point of interest.

- Your model should have a strong expression on their face, especially if it’s a male. Cute smiling images do not really work that well with this style.
- Leave some space in the frame. You do not want your model to take up the whole frame, so leave some space around them, to add context to your image. You can get better results if the viewer is able to locate the spatiotemporal context of your image.
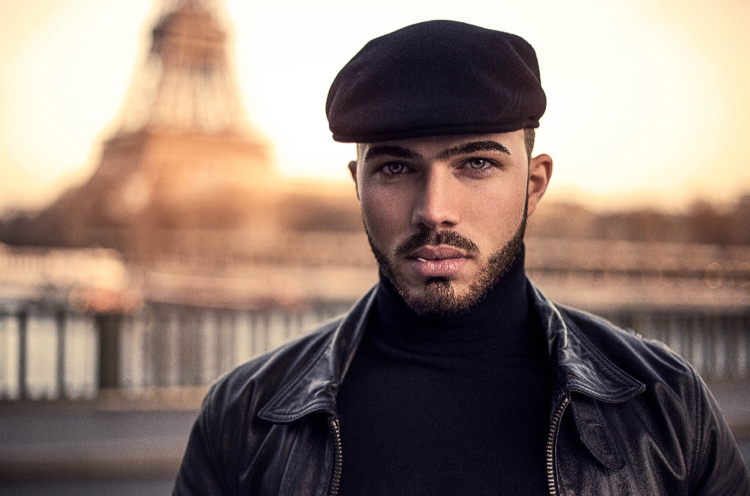
- Your model should not wear something too flashy (something like pink or yellow), limit their clothes to sombre, subdued colours.
- Try to use complementary colours as much as possible, it creates nice depth to your images. Usually in movies, the actor is either in blue and the background in yellow/orange, or vice versa. Try to keep your actor in a range of cold colours and your background in warm colours, it works the best. The opposite also gives you good results.
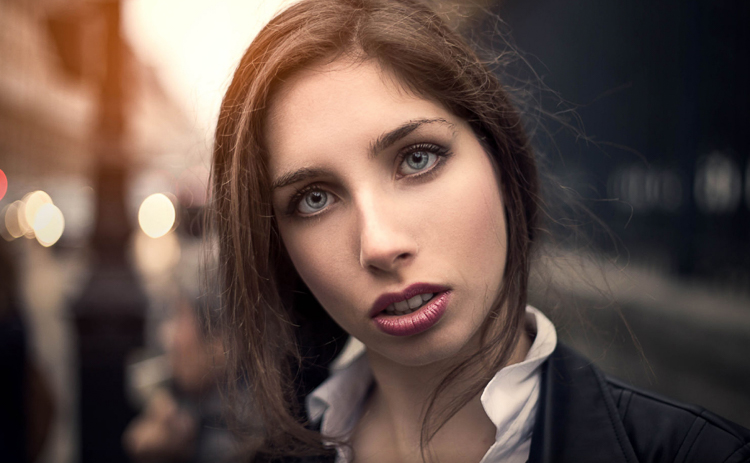
- The most important thing is that your model should look like a character. Try to add accessories, clothes, or poses that make the character look credible. You can discuss with the model or stylist before the session, the look you want to give to your images, and have a look together at the wardrobe.
![IMAGE 6.jpg IMAGE 6]()
Color Grading in Photoshop
For the colour grading tutorial I am going to work on this image:
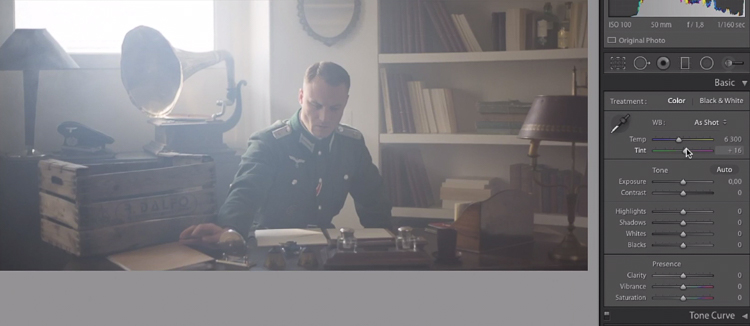
This image was taken on a Canon 6D, with an aperture of f/1.8, on a 50mm lens. This was taken during a short film where I was the photographer. There was a lighting behind the window aiming at the model, we added some fog to create this 1945 look.
What we’re going to do with this image is bring it back to life, by enhancing the contrast between the yellows in the highlights, and the greens in the shadows. We’re going to have a colour scheme based on analogous colours, going from green to yellow.
Let’s start with some basic exposure correction on Lightroom, this will depend on your image, so adjust accordingly.
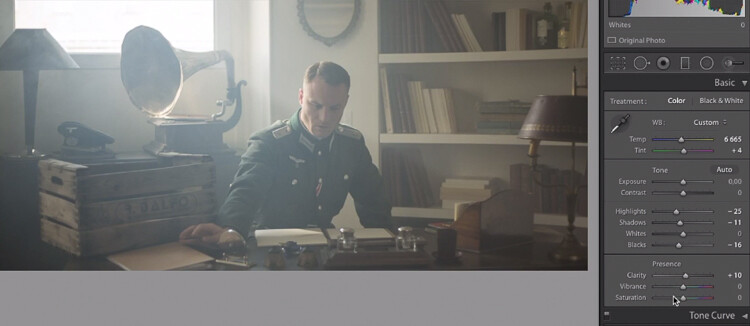
Do basic adjustments in Lightroom, or your program of choice, first.
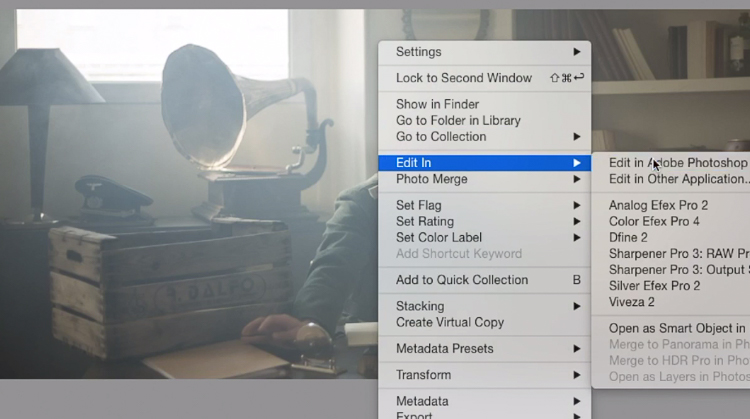
After the basics are done let’s move the image over to Photoshop to start our colour grading. If you are using Lightroom just right click and choose Edit in Photoshop.
First, duplicate the layer in Photoshop so that you won’t do any destructive editing. You can always go back to the original layer if you don’t like the results.
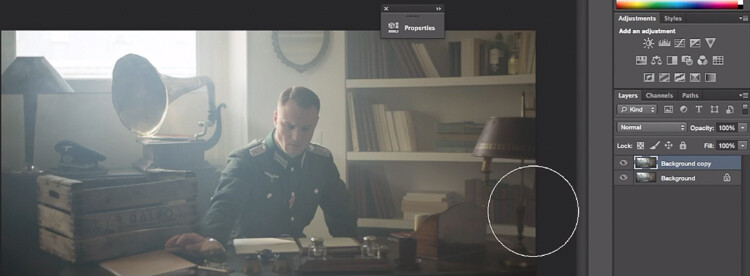
Make a duplicate layer.
The first thing we’re going to do is to create a new layer adjustment, go to: Layer > New Adjustment Layer > Color Lookup…
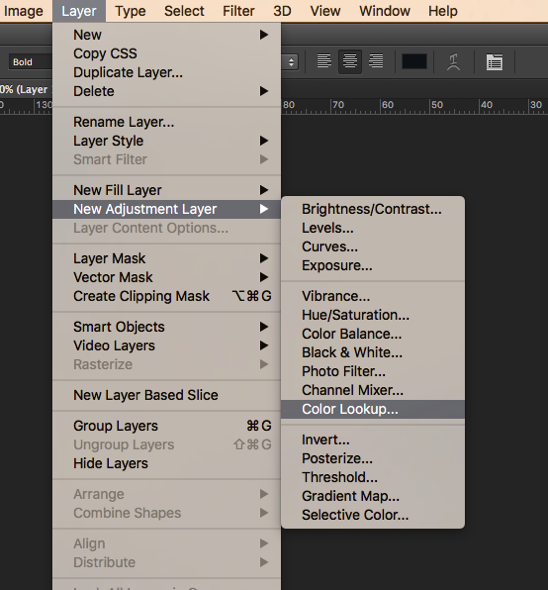
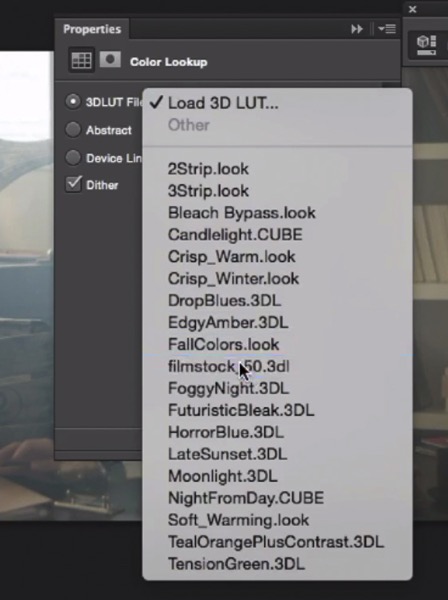
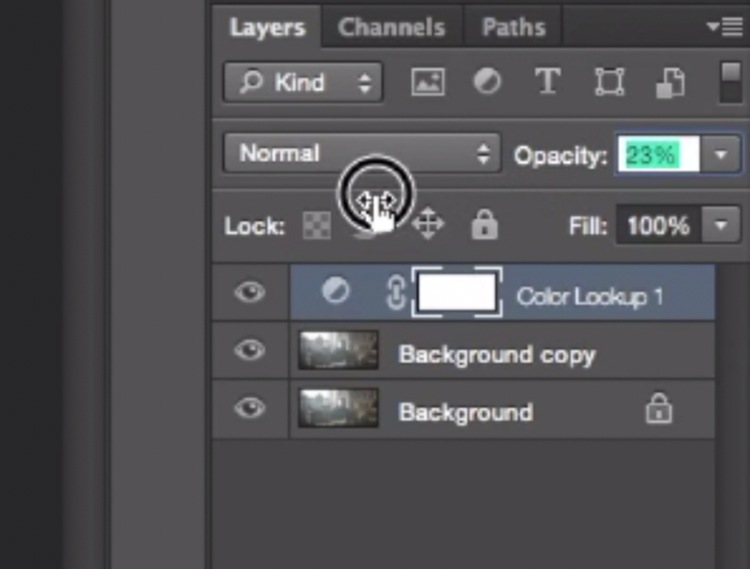
Pick filmstock_50.3dl and reduce the opacity of the layer to around 20%. You need to reduce the opacity otherwise the effect is going to be too strong.
Next thing we’re going to do is create a curves layer and redo the contrast. This will really depend on your image, so adjust according to your taste.
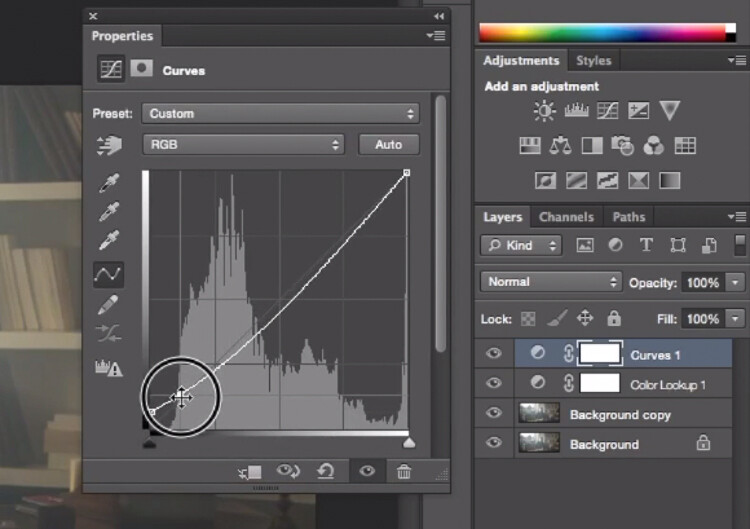
Adjustment layer Curves to add contrast.
Then create another curves layer, go to the blue curve and lower the top right extreme of the layer. This will add yellow to your shadows.
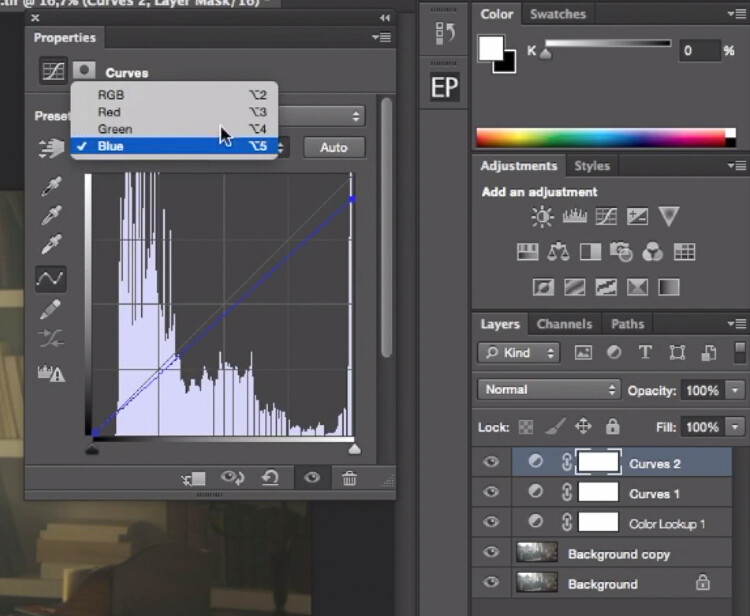
Add yellow to the shadow areas using this curve adjustment
Next step is to play around with the colour balance (make another new adjustment layer) to enhance to greens in the midtones and the yellows in the highlights. Once again just the sliders to add green and yellow to both the highlights and the midtowns.
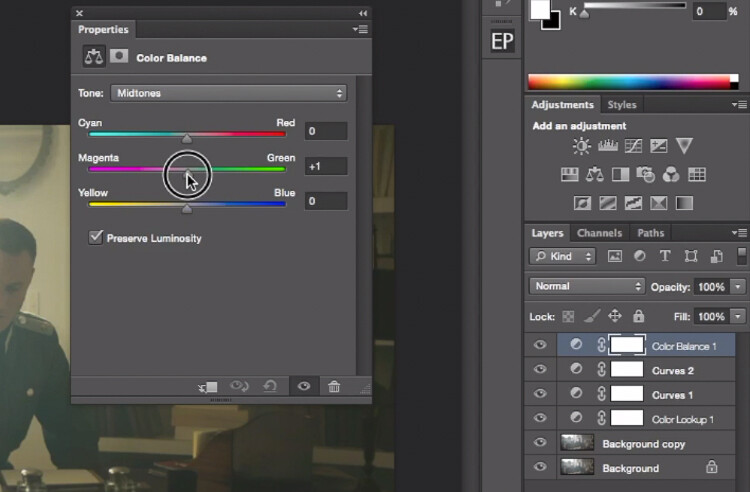
Select Midtones from the pull-down menu and add green and yellow.
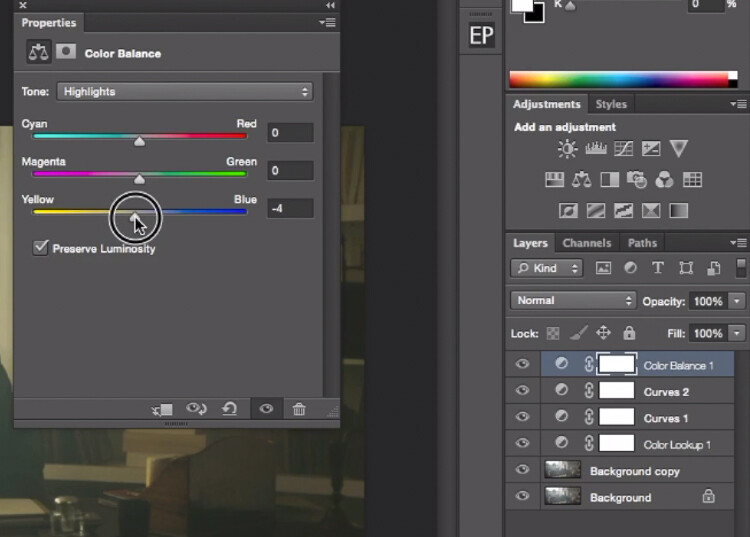
Select Highlights from the pull-down menu and add green and yellow.
Right now, we are basically done with colour grading. Lastly is to quickly dodge and burn, to enhance the light coming from the window, and to darken the image and the background. We are basically doing a manual vignette.
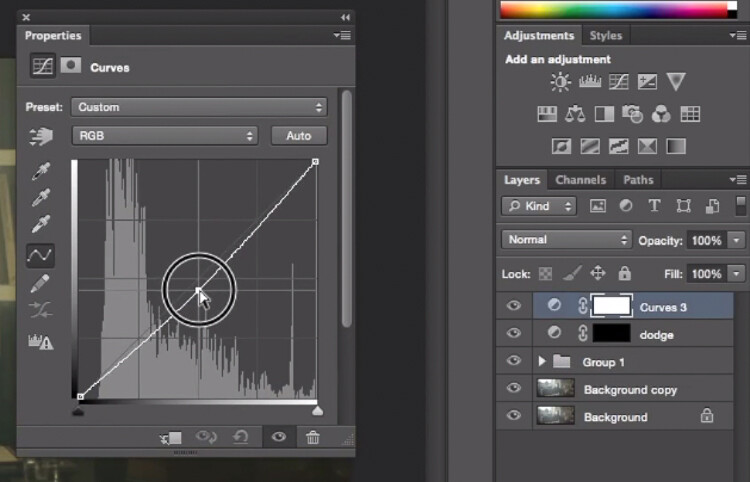
To lighten up the image, create a curves layer, make it brighter, and add a black layer mask (CMD/CNTRL+I to invert the layer mask). Call the layer Dodge, and paint with a white brush (because the mask is black) in the spots where you want to brighten up the image. Pick a brush with an opacity around 40% with and edge hardest of 0%
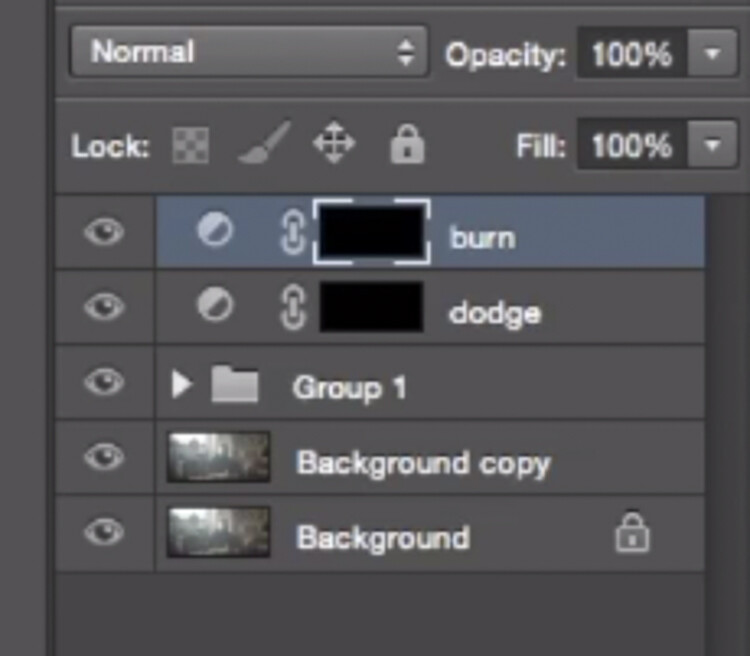
To create a dark layer, we will basically do the same thing but darken up the curves layer and paint over the spots in the image we want darker.
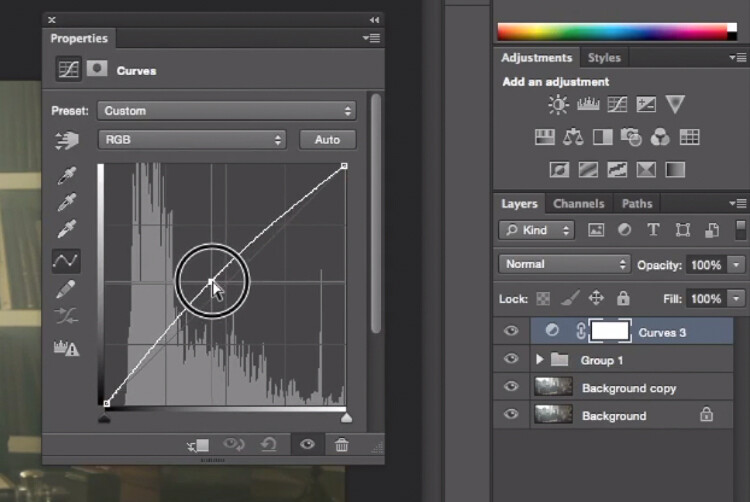
This Curves adjustment layer is for dodging or lightening areas of the image.
This Curves adjustment layer is for burning or darkening areas of the image.
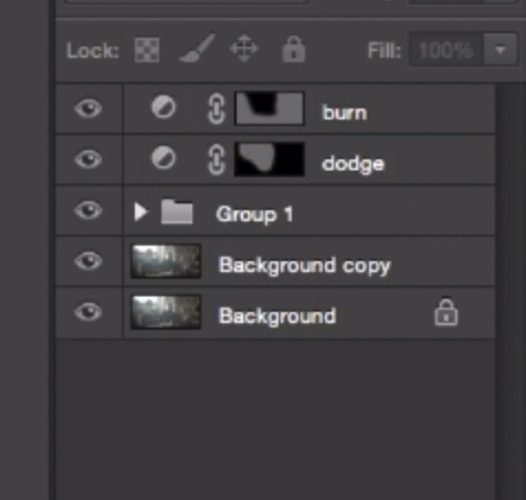
Rename your layers to identify them easier.
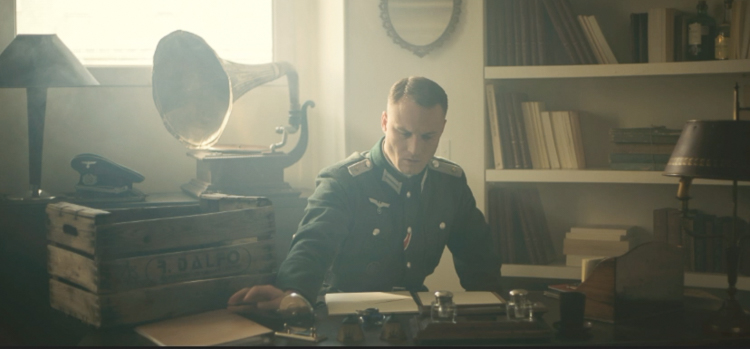
This is the final result:
Conclusion
Cinematic portraits rely heavily on great colour grading – but the lighting, model, camera settings and ambience should not be neglected. It all starts with a great image and ends with Photoshop to enhance your vision.
Enjoy the art !
The post How to Create a Dramatic Cinematic Style Portrait Using Photoshop Color Grading by Yacine Bessekhouad appeared first on Digital Photography School.
