I am a huge fan of color. I love bold colors to create a mood in my images, and often use the meaning behind colors to reinforce the message I want to convey.
Sometimes though, you want to get rid of the colors to draw the viewer’s attention to your compositional lines, to textures, or to make a contrast. To do so, you may want to turn a color picture to black and white, in order to see what works best.
I do not work so often with black and white, but I truly love it. There are some photographers who create amazing black and white pictures and I really appreciate such a beautiful images even if I am mainly drawn by color.
Setting the mood in color or in a black and white image is very different.
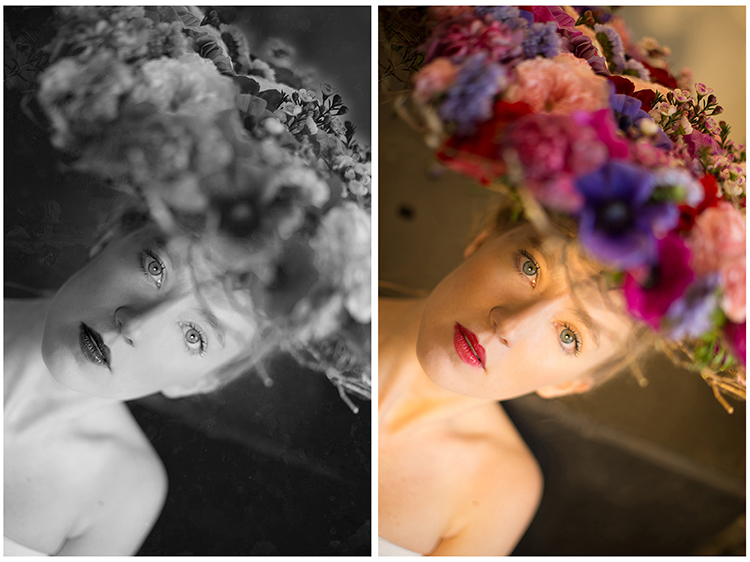
There are very different types of black and white – whether you have a full tonal range from white to black, or merely light or dark grey tones. Dark or light tones will create different effects, and convey a different mood to your image. Dark tones are often associated with a sombre mood, while light tones are more optimistic, or positive. This is a generalization, of course, but it tends to be true most of the time.
Low contrast would impact a gentler mood, while high contrast will have a stronger impact. The eyes usually jump directly to the highest contrast area of an image. In addition to a well thought out composition, using contrast is a great way to highlight an important feature of your subject.
Think about what kind of black and white you are attracted to. It is very personal for you, plus it also depends on the genre of photography you are dealing with. As I am a portrait photographer, I will be showing you how I process a color portrait into a black and white one. I chose a portrait from a vegetal hairstyle shoot I did in Paris last month.
As usual you have many ways to achieve the same result in photoshop. Find the way that suits your workflow best, or the one that achieves the best results according to your photographic style, or mood of the day.
I am going to use two different adjustment layers to show you the difference regarding tones and contrast. Then, we are to combine those different layers, to keep the best part of each one.
1 – Channel mixer adjustment layer
Go to your layer panel and click on Channel mixer, or go to Layer > New Adjustment Layer > Channel Mixer.
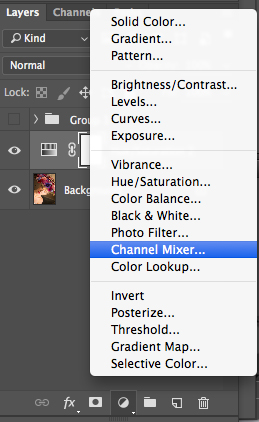
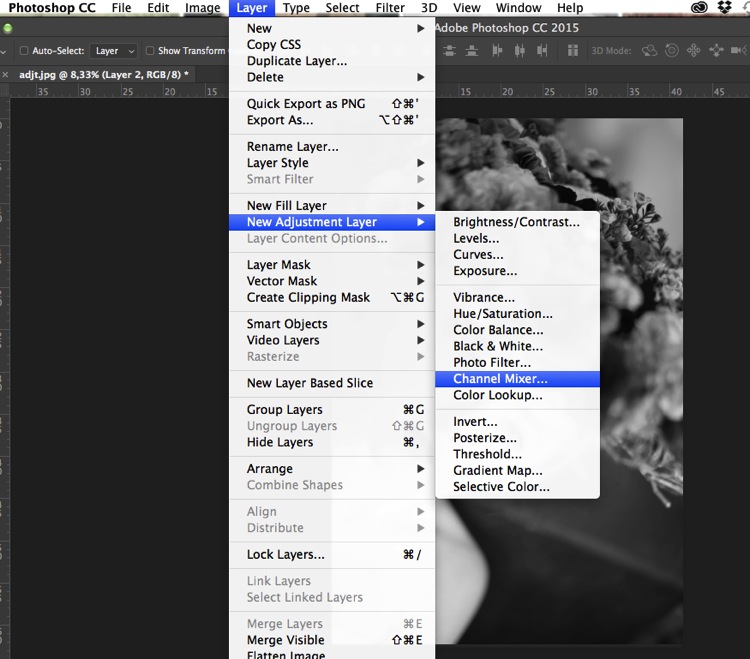
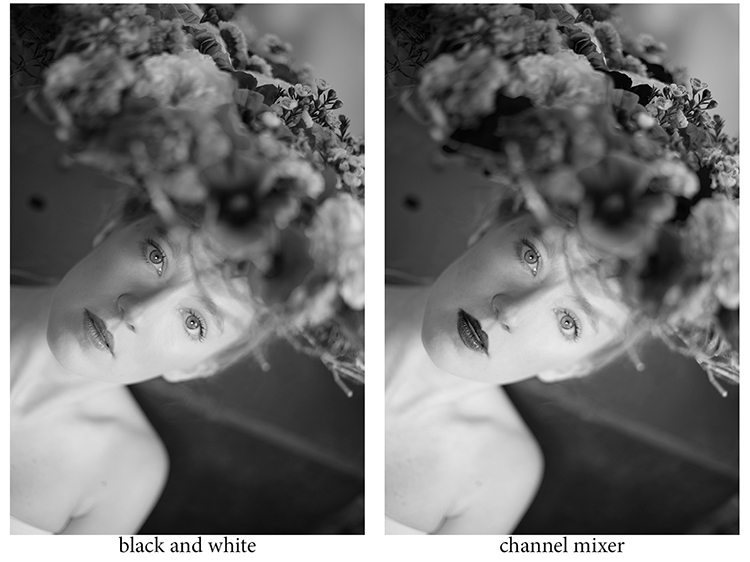
With channel mixer you can do more than just desaturate your colors. You can get great results sorting by color channel. This will modify your input and output levels.
You can get lighter or darker tones, you can also play with your constant overall tone, which I use mainly to darken my background. You can play with each channel and see what you like the most. You can play with red channel in a portrait, as skin tones are usually red, therefore highlighting your subject.
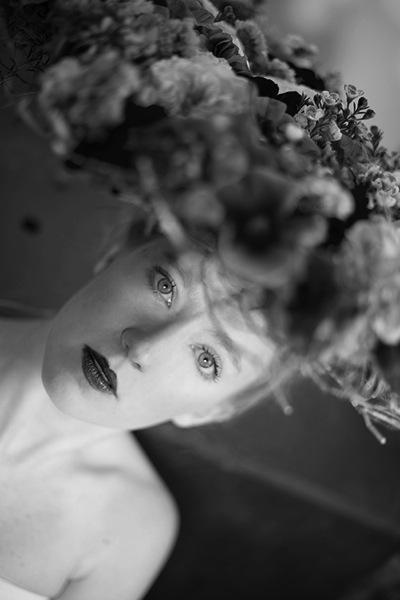
2 – Using a Black and White Adjustment layer
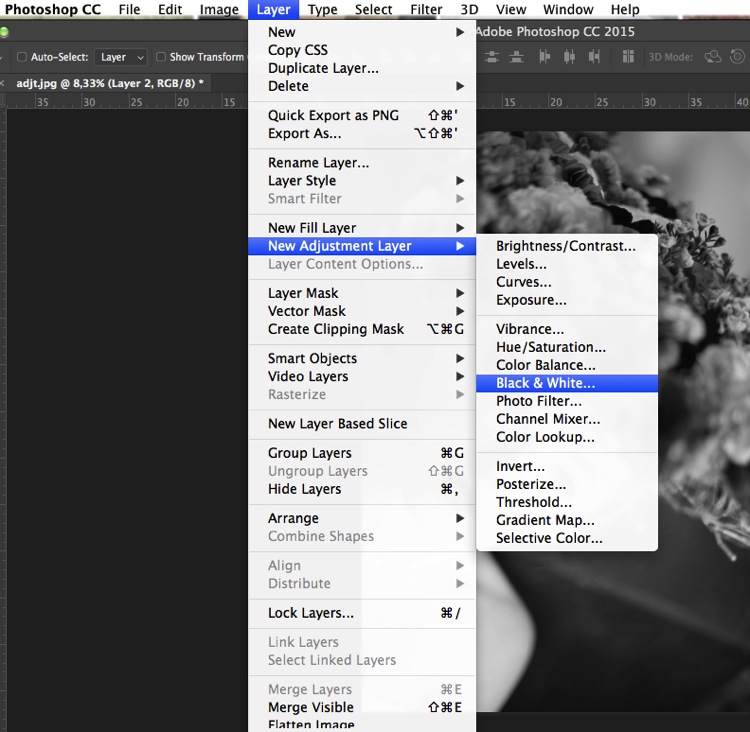
When working with black and white you cannot see different adjustments at once. To keep several adjustments visible, I create a stamp layer (a separate layer on which the adjustment has been applied directly to the image). To do so, press Shift + Option + CMD + E, and the stamp layer appears (combining all visible layers into one).
You can then combine with a black and white adjustment layer. To do so you go to Layer > New Adjustment layer > Black and white. Then, play with the different values for each color to adjust the tones as you wish in your image. As in the previous step I create a stamp visible layer.
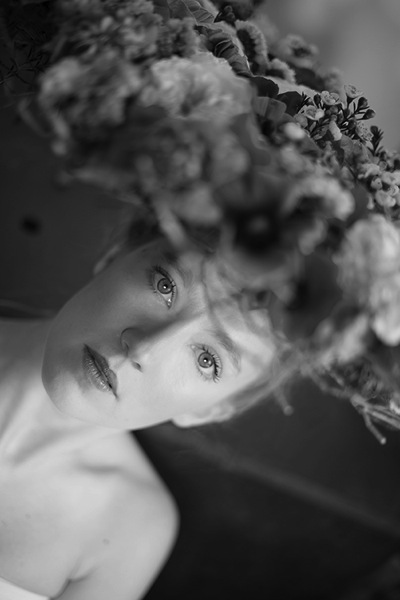
On the two different stamp visible layers I have different contrasts. I can choose to apply each of these contrasts on different parts of the final image, combining those layers.
Add a layer mask to each one, and paint on the mask using black, over the areas you want to hide, thus revealing the layer underneath. Paint with white (layer mask is white by default) to reveal the selected areas of the top layer.
If you are not so familiar with layer masks I would suggest you create only two types of black and white, making it easier to apply selectively the different effects.
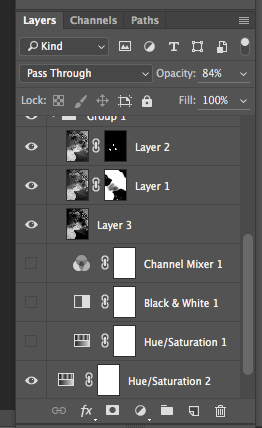
Layer masks deserve an entire article, so I will save how I use them for another article.
At the end, you have a mix of different contrasts in your image, and can apply those contrasts as they best suit each area where you want to drawing the viewers’ attention. There are so many ways to create a black and white images in Photoshop, each way giving a different look, and contrast to your image
For example see how I use gradient map in this previous tutorial: How to Create a Vintage Look for Your Image Using Photoshop
3 – Use a Level/curves adjustment layer
In this image I create a new curves adjustment to modify a little the overall light. Also, it is great to remove distractions such as you can see in this image.
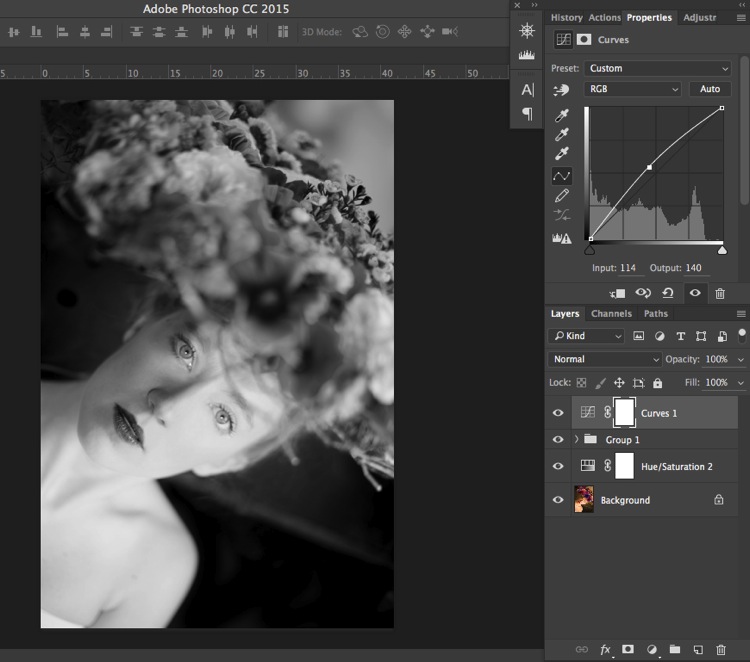
Usually I do not pay much attention to small distraction in my backgrounds, as I would add a texture overlay to my image (therefore adding more details to a plain background). If you like smooth backgrounds it is very useful.
In this image I also wanted to remove the light distraction on the top right corner (too bright compared to the rest of the dark background).
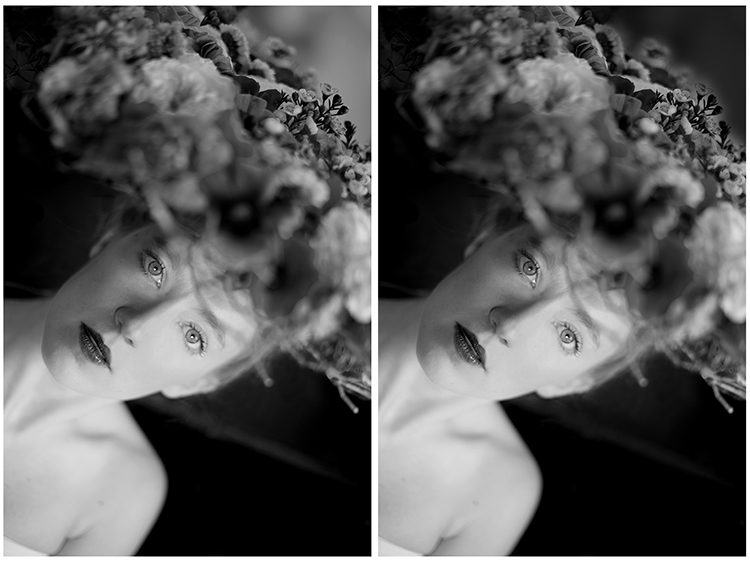
To finish this image I will add some texture.
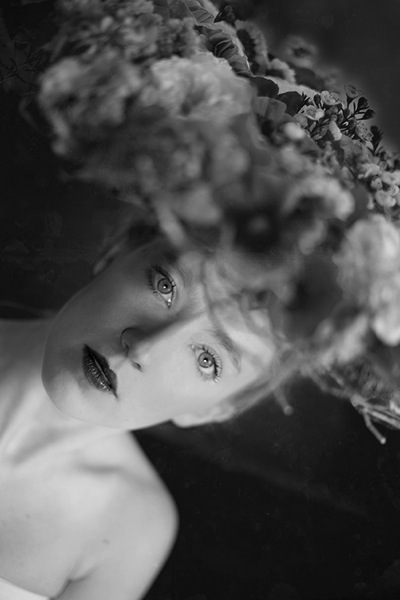
Do you have other methods to convert to black and white using Photoshop? Please share in the comments section below.
The post 3 Methods for Converting to Black and White Using Photoshop by Amélie Berton appeared first on Digital Photography School.