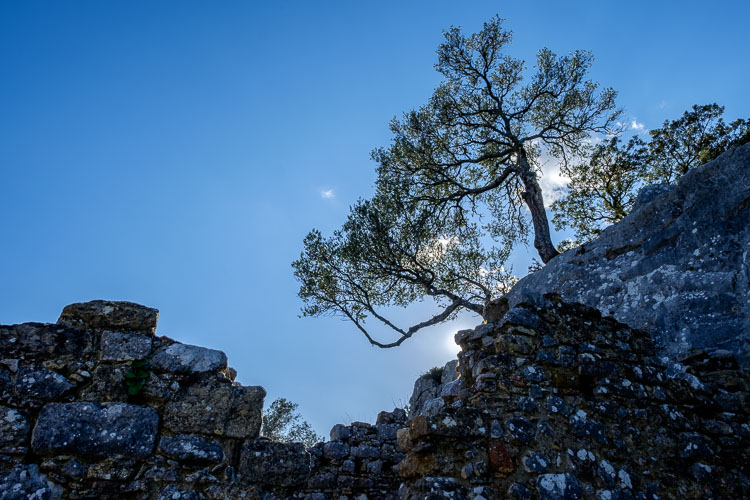
There are lots of plug-ins that you can use with Lightroom to create High Dynamic Range (HDR) images. Photomatix and HDR Efex Pro are two of the best known, and MacPhun’s Aurora HDR (Mac only) is a new application that has received good reviews.
But, if you have Lightroom 6 or CC, you can create HDR images right within Lightroom itself, without having to buy a plug-in. There are several advantages to using Lightroom for your HDR conversions:
- You save money. Most HDR plug-ins are not free, and are an additional cost for you.
- Lightroom’s HDR merge creates natural looking HDR images. Not everybody will see this as an advantage – but if you want to create garish, over-saturated images the aforementioned plug-ins will help.
- You don’t need a lot of bracketed images. Two seem to be enough (you can use more if you want, or if you have a really contrasty scene), one exposed at -2 stops, the other at +2 stops.
- The final HDR image is saved as a DNG file. Not only is this smaller than a TIFF file, but you can process it in Lightroom the same as you do with any other DNG or Raw file. The main difference is that the Exposure slider runs from -10 to + 10 stops, rather than the normal -4 to +4. There is also much more information in the file for Lightroom to work with, when you make adjustments with the Shadows and Highlights sliders (and local adjustment tools like the Graduated and Radial filters).
- You can take bracketed sequences hand-held, and Lightroom will align them automatically. Having said that, I’ve found the best results come from bracketed photos taken with a tripod mounted camera.
- There is less noise in shadow areas than you would expect from a regular, single photo.
Lightroom HDR merge in action
Let’s look at a couple of practical examples to see how it performs.
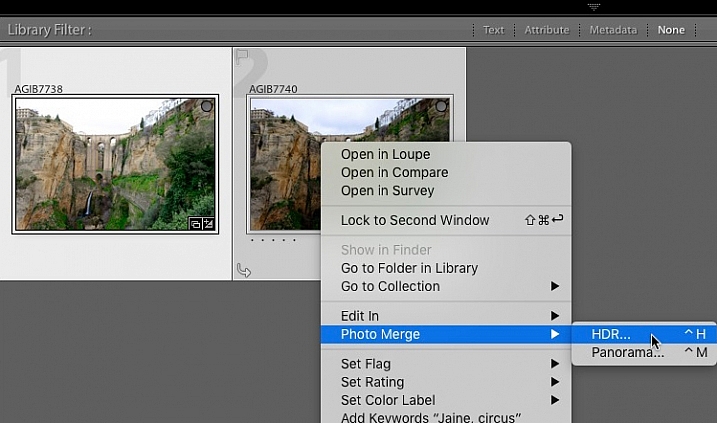
Start in Grid View in the Library module, and select the images you want to merge. Alternatively, you can select the images in the Filmstrip in the Develop module. Then, go to Photo > Photo Merge > HDR. Or, right-click on one of the selected photos and select Photo Merge >HDR.
The HDR Merge Preview window opens, and Lightroom creates a preview of the HDR image. This may take some time, especially if you have selected several images. The Auto Align and Auto Tone boxes are ticked, and the Deghost Amount is set to None, by default. Lightroom remembers the last settings used, if you have changed them.
Auto Align is useful if the camera moved between exposures (for example if you hand-held the camera) and Auto Tone performs a similar function to the Auto Tone settings in the Basic Panel of the Develop module.
I find HDR merge works best with the Auto Align and Auto Tone boxes ticked (see below). If there is subject movement between frames you can set Deghost Amount to Low, Medium, or High (trial and error is the only way to see what works best, and is different for each set of images).
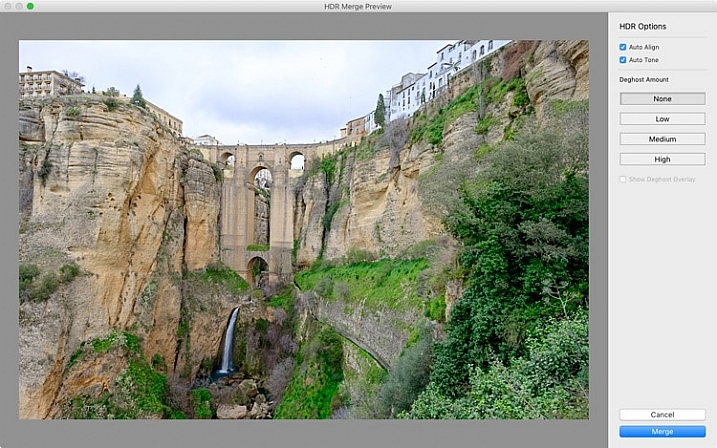
You may be surprised to learn that there are not many settings to adjust. This is deliberate, as the aim is to let Lightroom produce a natural looking HDR image, which you can then process in the Develop module to achieve the desired look.
You can set Deghost Amount to Low, Medium, or High if you see any ghosting (double images) in the image. Ghosting takes the form of lines, white patches, or other artefacts caused by subject movement taking place between frames (such as trees blowing in the wind, clouds moving across the sky, or people walking through the scene).
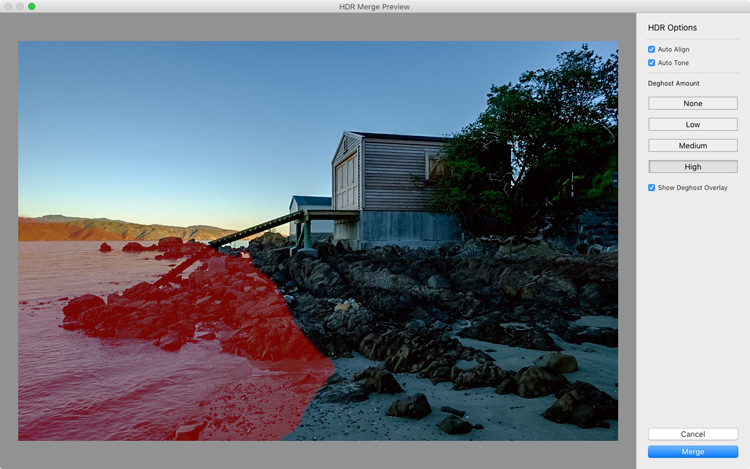
You can’t zoom in to a 100% in the preview mode, so you may only become aware of ghosting once you move on to the Develop module and zoom in to 1:1 magnification. You can simply go back and reprocess the images if you notice ghosting at that stage. Tick the Show Deghost Overlay box, to reveal the areas in which Lightroom has detected and attempted to clean up ghosting (it is shown in red).
Click the Merge button when you’re done. Lightroom saves the merged image as a 32-bit DNG file, with the suffix -HDR appended to the file name, and takes you back to the module where you started. From there you can edit the image as normal in the Develop module.
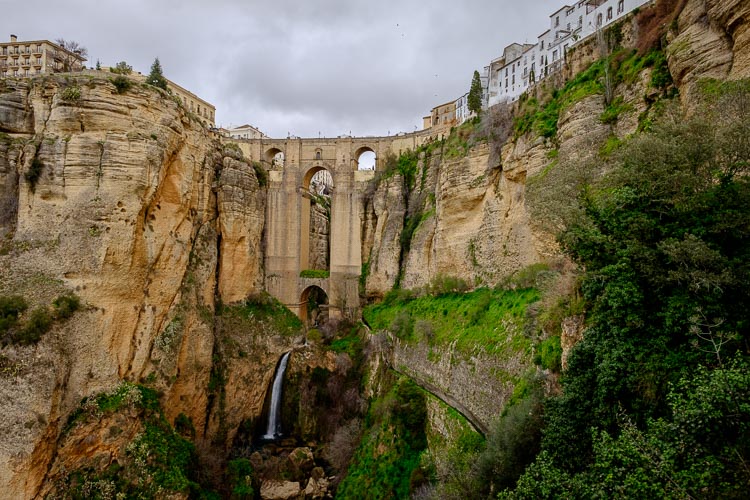
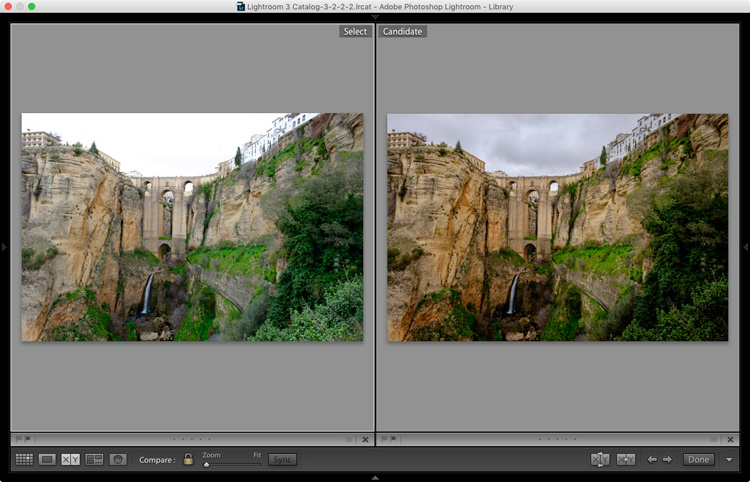
This is the result from my HDR merge. I used two photos, bracketed one stop apart. That’s not a lot, but it was a cloudy day and what I wanted was a photo that captured detail in both the landscape and the sky. On a sunny day you would use images that were bracketed further apart.
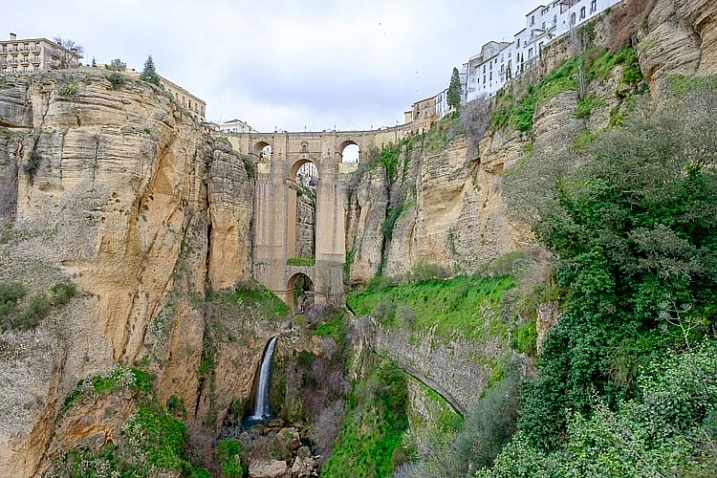
The result should be treated as a starting point in your processing – a new Raw file that you can edit in the Develop module to achieve the desired effect. In this case photo was too light, so I darkened it, made some tonal adjustments, and increased clarity. This is the result.
The screenshot below shows a comparison between the HDR image (right) and the same photo taken without any exposure compensation (left). As you can see, merging two exposures has allowed me to capture the details in the grey clouds. If, at this stage, you think the image has too much of an HDR feel, you can use the Basic Panel sliders, or local adjustments, to alter the tonal values. For example, you can increase Shadows or the Blacks setting to add contrast, so you don’t have the unnatural detail in every shadow effect that typifies overdone HDR.
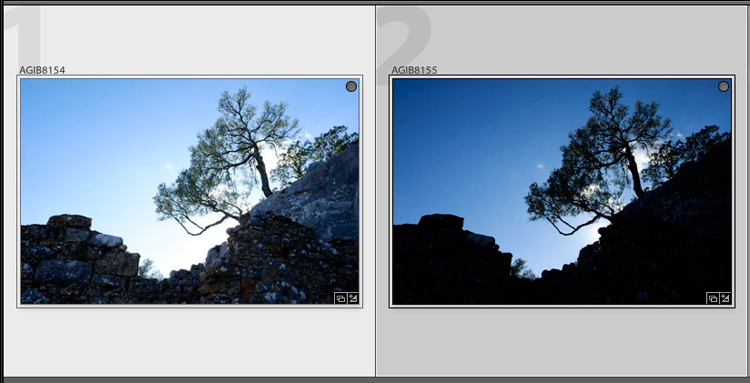
Here’s another example, this time with photos taken in the sun, and a much greater brightness range. These two photos were taken at +1 and -1 stops respectively.
This is the result that Lightroom gave after the HDR merge process.
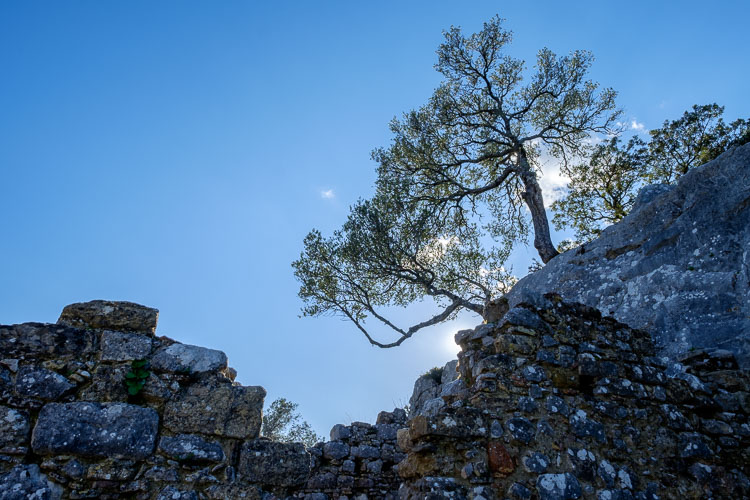
Below is how it looks after editing in the Develop module. The differences are subtle, I just made the image a little darker, and moved the Highlights slider to zero, to bring out as much detail in the clouds as possible.

High contrast example
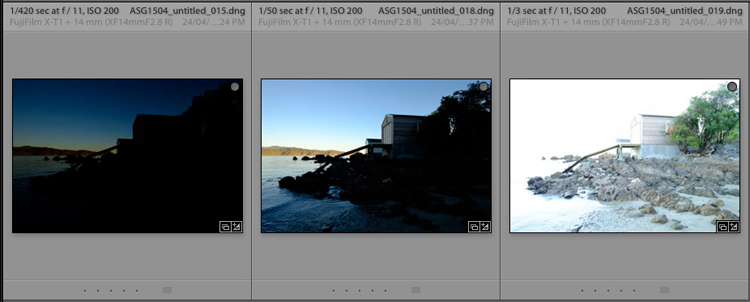
Here’s another example, this time taken with three photos with a total of seven stops difference in exposure. You probably don’t need to make the exposure differences that drastic, but it’s always interesting to try.
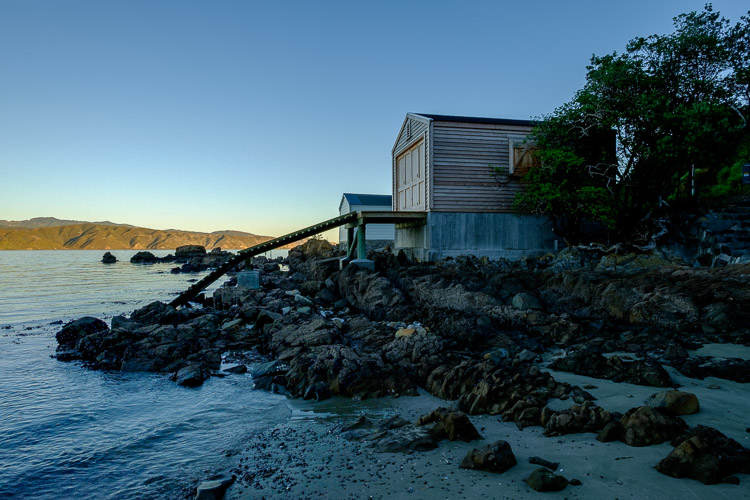
Here’s the result.
The water looks different in each version of the photo so I set Deghost to High. The deghosted area (shown in red below) covers all of the water – when I compare the three original images I can see that Lightroom has used the water from the first photo in the sequence, avoiding the ghosting that would be caused by merging three photos with a different level of water in each shot.
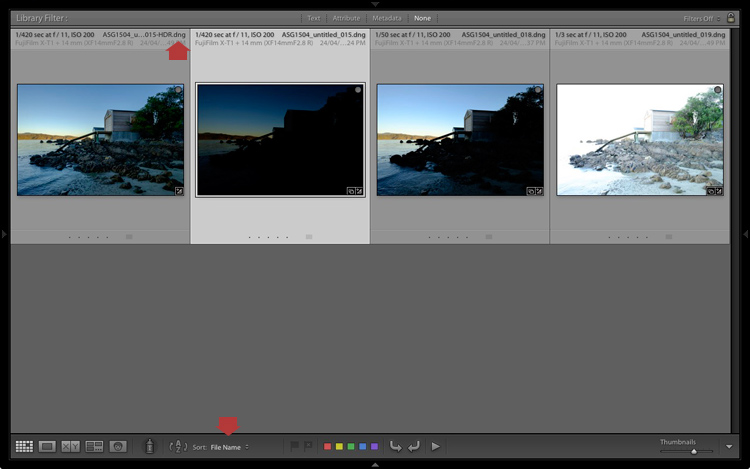
Can’t find your new HDR file?
By the way, if you’re not sure where to find the newly created HDR file, set Sort to File Name in Grid View, and it will appear next to the first image in the sequence (also make sure you are in the folder of originals, not inside a collection).
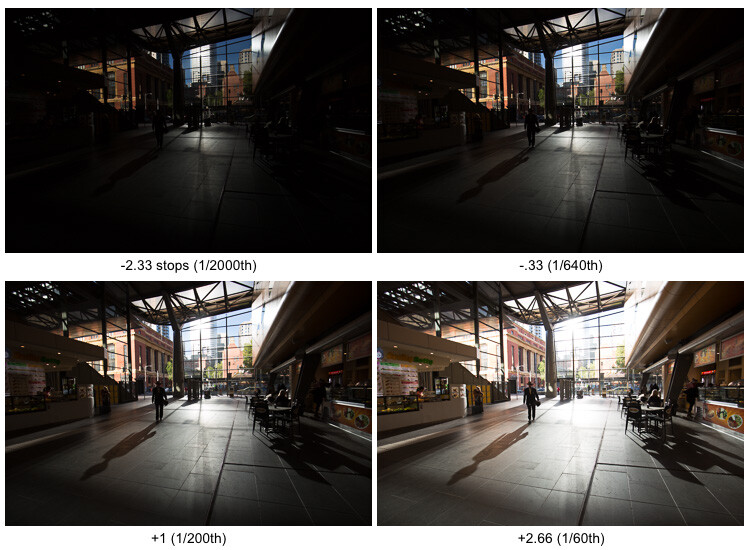
Here’s an extreme contrast example – a tototal 5 stops bracketed to keep details in the buildings outside, and capture some inside.
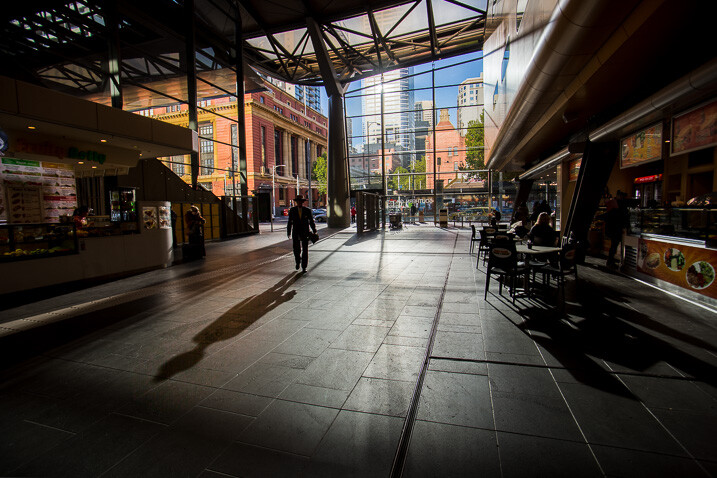
The final HDR merged and edited version.
Final notes
You should be aware that it is best to carry out the HDR merge process with files that haven’t yet been edited in the Develop module, as Lightroom only retains some of the adjusted settings. These are taken from the most selected photo and applied to the HDR image. They are listed below (all other settings are returned to their default):
- Presence sliders (Saturation, Vibrance and Clarity).
- HSL / Color / B&W panel
- Split toning panel
- Detail panel
- Lens Corrections (excluding Upright)
Lightroom also requires access to the original photo files. It can’t create a HDR image from Smart Previews alone.
Over to you
Have you tried Lightroom’s HDR merge tool? If so, what did you think? Is it a worthwhile addition to Lightroom’s toolset or would you prefer to use a plug-in. Please let us know in the comments below.
Mastering Lightroom
If you’d like to learn more about Lightroom, then please check out my Mastering Lightroom series of ebooks.
The post Step by Step How to Use HDR Merge in Lightroom by Andrew S. Gibson appeared first on Digital Photography School.