We’re all beautiful. Sometimes however, we have imperfections that can be a distraction (most often they are magnified in our minds and really not as bad as we think). In this tutorial, I am going to show you how you can use a basic Photoshop tool, the Clone Stamp, to create clear, natural looking skin in your photos.

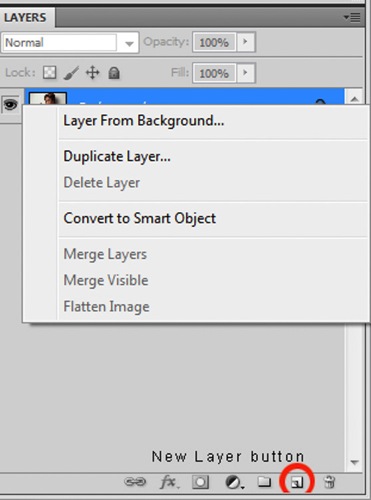
It’s always a good idea to work on a separate layer when editing or retouching images in Photoshop. Once you have your image open, you should create either a new layer or a duplicate layer which you will edit on. You can create a new layer by clicking the new layer button in your Layers Panel, or by selecting Shift+Ctrl+N on a PC (or Shift+Command+N on a Mac). If you prefer to create a copy layer like I have, you can right click on the image in the Layers Panel and select the Duplicate Layer option provided. If you prefer to use keyboard shortcuts, you can simply press Ctrl+J if you’re using a Windows PC, or Command+J if you’re using a Mac.

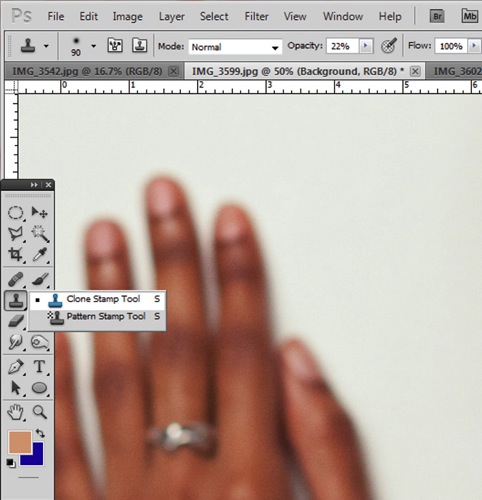
Select the Clone Stamp tool from the tools panel, it conveniently looks like a miniature office stamp. In the options bar at the top of your screen, ensure that your brush softness is set to zero, the mode is normal, and it is set to sample Current & Below. You can keep your opacity anywhere between 10 and 30% depending on the subject. To get a natural looking result, it’s best to gradually work your way up to the final complexion or shade you are trying to attain.


Zoom in on the area you would like to retouch by pressing Ctrl (or Command) and the plus (+) symbol on your keyboard. In this image, I’m going to focus on the shoulders mainly. You don’t need to zoom all the way in to the area, but ensure that it’s zoomed enough for you to clearly see the area you are trying to adjust.

The Clone Stamp tool works by allowing you to duplicate a selected area, over to another section of your image. It’s really great for removing unwanted elements from your photos. Hold down the Alt key on your keyboard and click on an area of skin close to the spot you are trying to remove. If your spot is lighter than the overall skin tone, select an area that is darker than the spot; if the spot is darker than the surrounding skin, you will make your selection from an area that is slightly lighter than it.
Play around with your Clone Stamp brush size and the opacity, until you find a combination that gives your best results. You will more than likely end up using a variety of brush sizes and opacities for the image (change the sample area frequently as well so you don’t get a repetition of patterns). The clone stamp method is very effective at clearing skin but requires patience on your part. A few other minor adjustments resulted in the final image below.

With practice and patience you can clone your way to clear skin with the Clone Stamp tool. Have fun!
Please share any questions and comments you have about using the Clone Stamp tool to make clear skin.
The post How to Use the Clone Stamp Tool in Photoshop to Make Clear Skin by Tricia Bent appeared first on Digital Photography School.