Processing a good landscape image is a lot like getting a good haircut…it should look good, but people shouldn’t really be able to tell you’ve had anything done. Now while that may be a slightly funny (hopefully) analogy, it really is a good way to approach the editing of your landscape photos. Ideally, the image should be developed to its full potential in accordance to your vision, while stopping well short of over-processing. The key to pulling off a strong landscape image can sometimes be understanding when to stop.
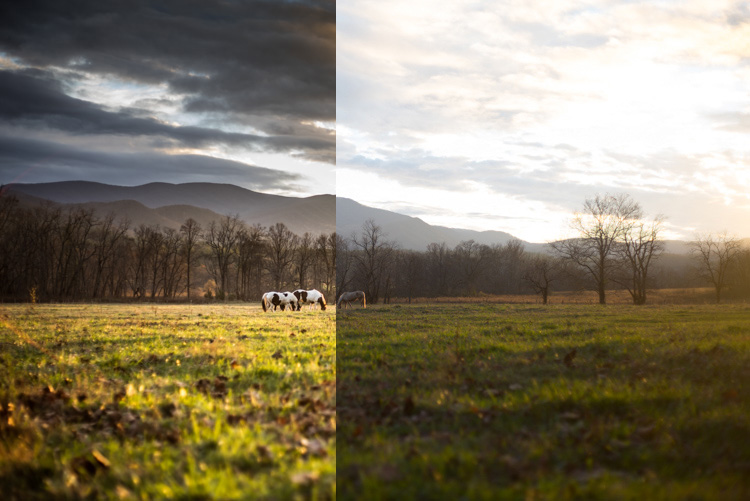
In this article, we will go from a straight out of the camera RAW file to a fully processed photograph using Adobe Lightroom CC. We will look at each step, and I will explain why each edit was made. By the end, you will see just how easy it is for you to take full control of your landscape photography with a few simple edits.
Shoot in RAW
Here we have the RAW file as it looked after importing into Lightroom.
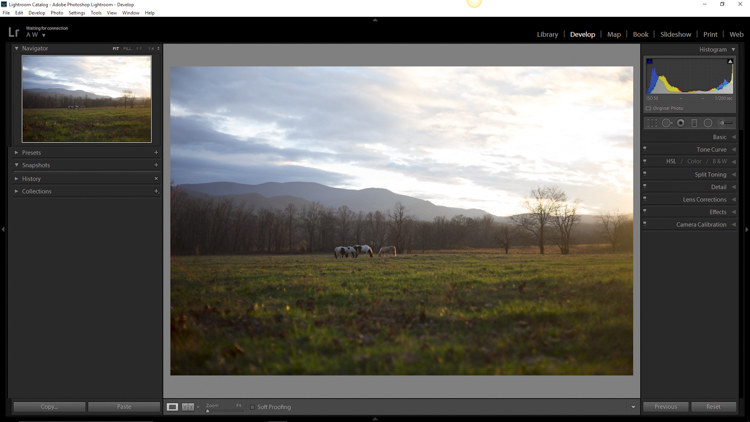
As always, the better the ingredients you have to begin with, the better the finished product will be. This means to always strive to make for best exposure, crop, and composition you can, before any processing is applied. Shooting in RAW format helps you immensely when working with landscapes. The greater dynamic range (exposure latitude) will allow you to bring up shadows, and manage highlights, much better than with smaller JPEG files. I know, I know – you’ve heard all of this before – but it doesn’t hurt to hear it again! RAW truly is the best friend of the landscape photographer.
Crop first
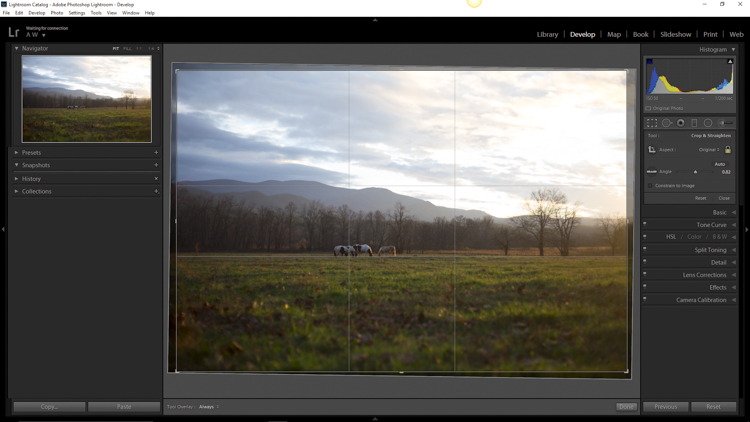
The image above is virtually level, but not perfectly so. The first thing we will do is open the crop panel and tweak the alignment before we begin any development. Having a grid overlay will really help you to get the lines of the image just right (with the crop tool activated, press the O key to cycle through all the grids available until you find the one you want). If you wanted to crop the image further, this would be done here as well.
Add Graduated Filters to adjust sky and foreground
Now that the image has been straightened, it’s time for the real fun to begin. The first thing to do is take control of the sky so that it isn’t quite so bright. To do this, we will use the Graduated filter tool. It’s located just above the Basic Panel in the develop module, in the same row as the crop tool.
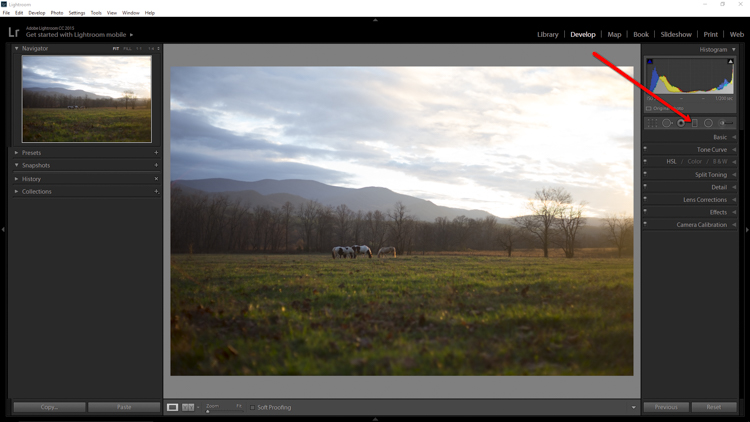
The filter simulates the effect of a graduated neutral density filter. It is an indispensable tool for adjusting landscape photos. Using the Graduated filter, you can decrease the exposure, add a little contrast, and then increase the clarity just to make the clouds more pronounced, which adds a little drama in the sky. In this example I also took town the highlights, and dehazed ever so slightly. The dehaze feature is a relatively new addition to the Lightroom tool box, is available in Lightroom 6 and Lightroom CC, and really helps when clearing skies.
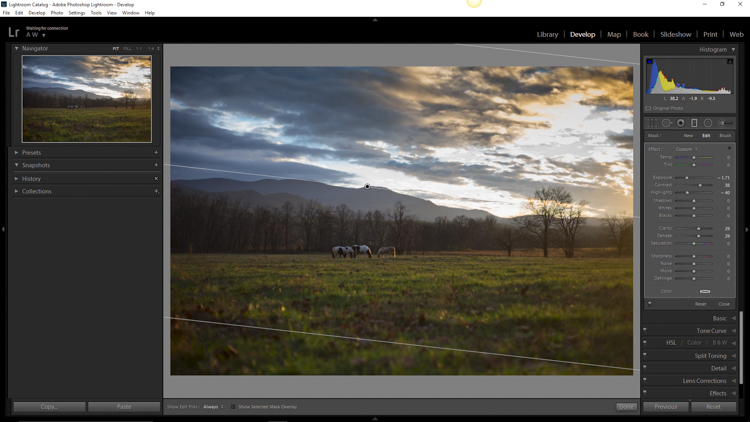
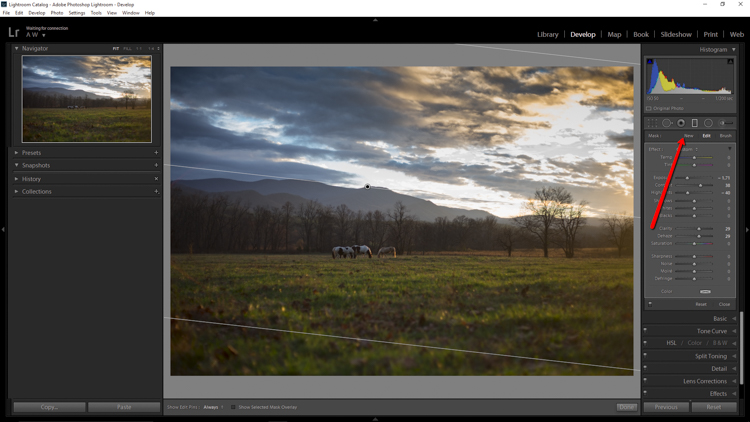
Next, you want to process the foreground but not disturb the edits you’ve just made to the sky. To do this, click new to make a new Graduated filter.
To better understand where your edits will be applied with the ND filter, simply hover the pointer over the indicator dot for a second. Everything in red indicates where the filter is working (you can also just press the o key and it will show the mask overlay – it may also show in another color on your screen, press Shift+o to cycle through all the various colors).
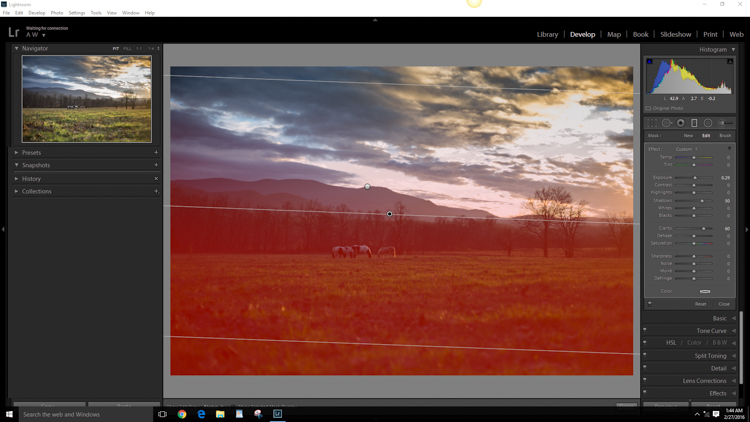
Using the Graduated filter, I increased the clarity of the foreground grass, as well as illuminated the shadows. This will help to draw the viewer’s eye into the image. I’m careful not to overdo the exposure here. The main subjects of the image are the horses, and the mountains in the background, so I want to keep those emphasized. Speaking of horses…
Do local edits using a Radial Filter
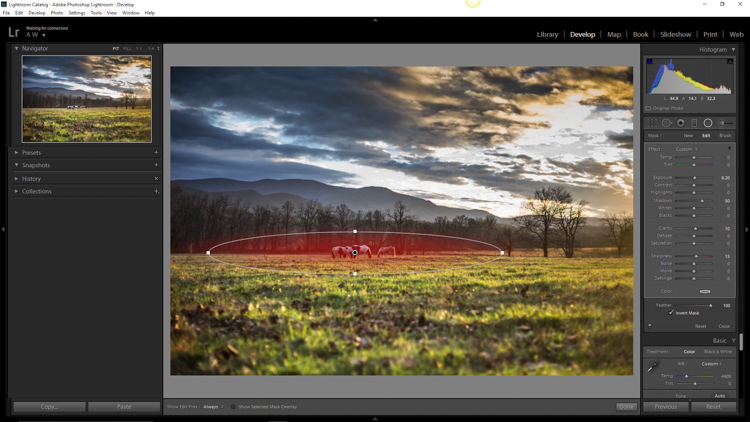
I wanted to really make the horses standout within the photo so let’s make use of another powerful tool in the Lightroom arsenal – the Radial filter. It works virtually the same way as the Graduated filter, except that it is applied in the form of a circle (fully adjustable). It can be set to apply edits either inside or outside of the circular outline.
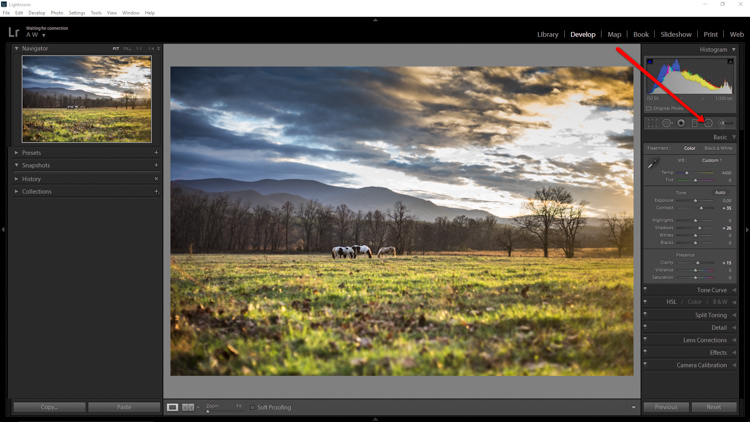
With the Radial filter, I raised the shadows around the horses and increased clarify slightly. I also threw in a little extra sharpening there as well. When using the Radial filter, it’s important to remember that the border between what is, and what is not edited, is very controllable. Make use of the feathering slider in order to control the density of your adjustments as they radiate outward or inwards of the circle. Effective feathering will make make your adjustments with the Radial filter seamlessly blend in with the rest of the image. Here you can see exactly where the edits will be applied.
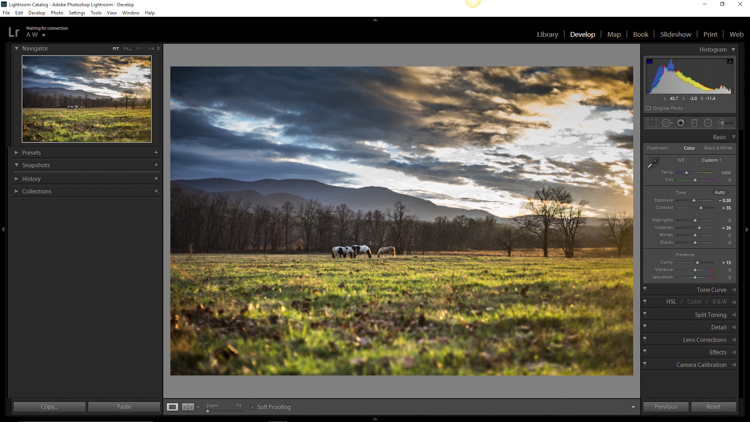
Makes global adjustments
So far, the image has been processed using only the Graduated and Radial filter tools for local adjustments (specific areas). Now we will make some final global (whole image) adjustments in the Basic Panel.
I brought up the overall contrast and shadows, and added in a little bit more clarity. Doing this made the highlights a little too harsh so I reduced the exposure by -10. This photograph was made in the waning golden hours of sunset, so I increased the total temperature (white balance) from 4400 to 5200, so that the tone better matched what I was feeling at the time of the exposure.
Add an edge vignette
As a final touch, I add in a small amount of vignetting.
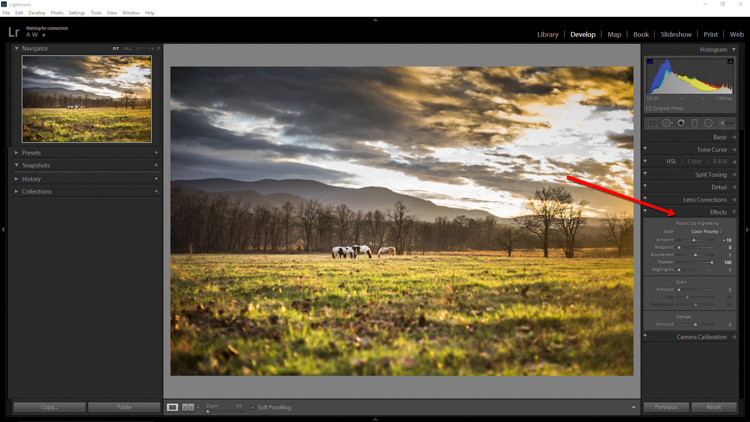
Vignetting is great because it serves to draw the viewer’s attention into the image. In the case of this photo it works well, but that is not always the case. Just as with any other effect used in post-processing, discretion is the name of the game. When using a vignette, make sure it fits the overall mood of the image. Experiment with the feathering slider (and others) until you achieve the desired effect. As a general guideline, very subtle vignetting usually works best.
See, that wasn’t difficult at all! We have went from a completely unprocessed RAW file to a fully developed image using relatively few edits in Adobe Lightroom.
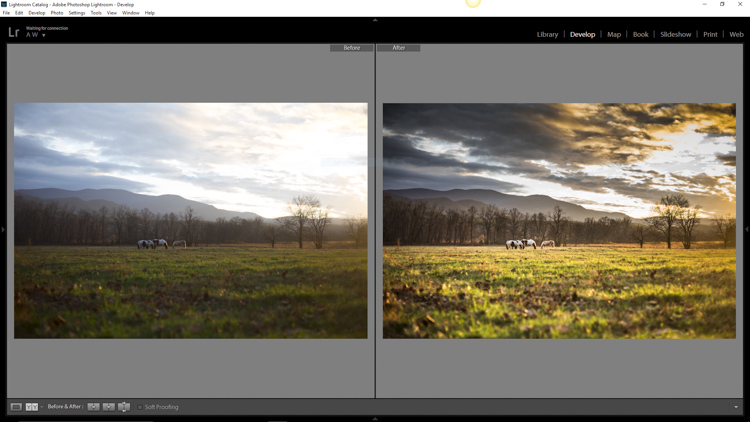
Processing a landscape image doesn’t have to be a massive undertaking. Everything you do to a landscape photograph should compliment the scene and add harmony. You have some incredible processing tools available today which can help you to achieve your creative vision. Be careful that you don’t go too far, though. Every photograph is as unique as a fingerprint, and should be approached individually. Use the techniques in this article as a guide to your processing, and have fun helping your photos reach their full potential.

If you have any additional landscape post-processing tips that work for you, please share in the comments below.
The post Lightroom Quick Post-Processing Tips for Landscape Photography by Adam Welch appeared first on Digital Photography School.