Color swapping in Photoshop is both a fun thing to do and a very handy tool for product photographers with clients in need of options. It’s not a hard technique and it only takes a try or two to get it right. This article outlines two methods for how to swap colors in Photoshop.

The first is a quick method and the second tends to do a better job. I’ll be using this the image below from my review of the Lowe Pro Photo Sport 100/200 AW bag. This demonstration was created with Photoshop CC 2017.
The Quick Method
This method is a quick color swap that may or may not cover your needs. If your subject has nice, solid colors without very much tonal difference, you can likely use this method by itself. Go ahead and open your file in Photoshop and let’s get started!

Sample Image
Step #1 Create a Hue/Saturation Adjustment Layer
Click on the “Create New Adjustment Layer” button on the bottom of the Layers panel and choose “Hue/Saturation”.
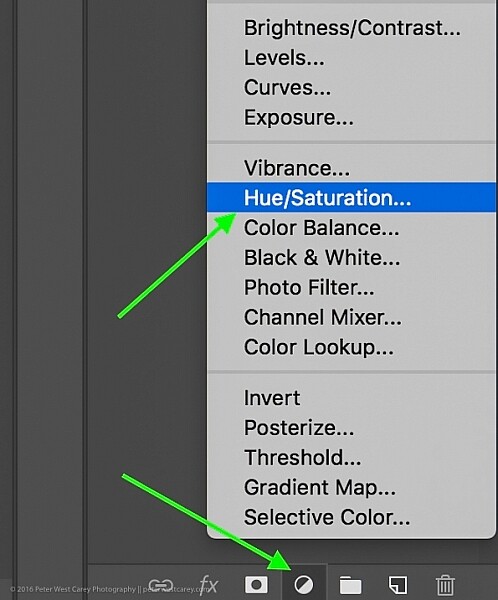
Choose Hue-Saturation
In the Properties window that pops up, there is a little hand with a pointer finger in the upper left side of the box. Click that.
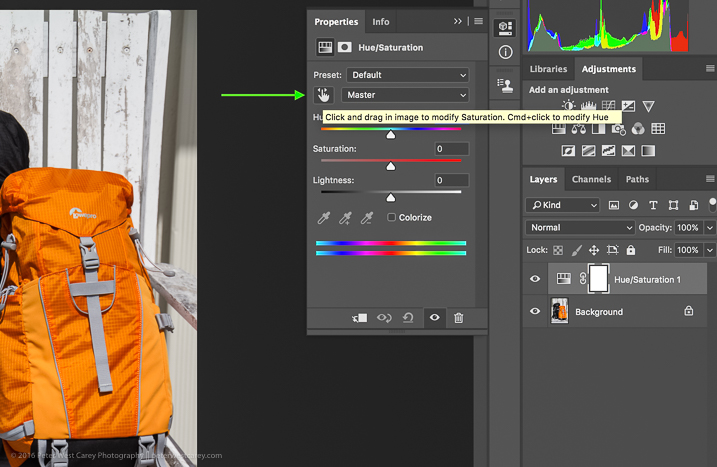
This is where my method deviates from some others. As you can see in the image above, there is an option to hold Cmd/Ctrl as you drag the mouse, and change the Hue straight away.
This is a tempting method, for sure. But it won’t always get you as close to your desired results as if you follow the rest of these instructions. For instance, I used that method to try to change the orange pack to blue and this was the result.
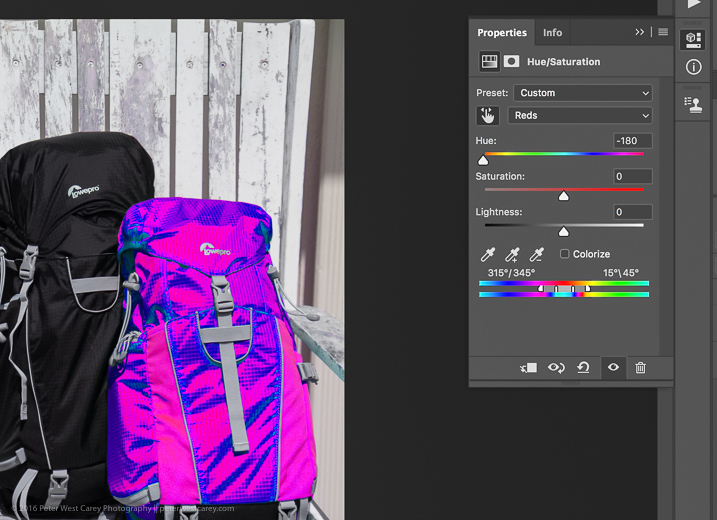
Not what I wanted. So….
Step #2 – Select a color range
After you click that little finger and hover over your source color (the orange bag), click there to select the color. Your screen will change depending on which color you pick, but more or less it will look a little like this.
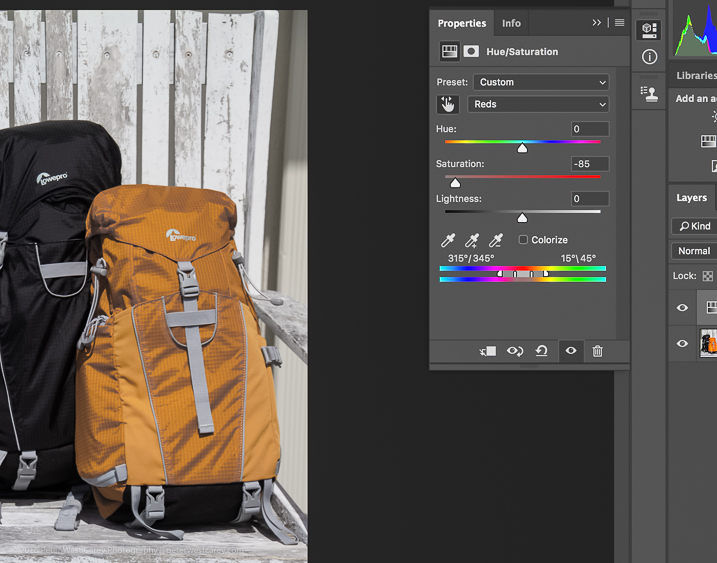
I chose a dark spot so my saturation for all orange dropped and now there is a little slider in the color bands at the bottom of the properties box. You will be using those bands and the saturation slider to refine your selection.
Step #3 – Adjust to get all the color
To know you have the right colors you want to work with, move the Saturation slider all the way down, essentially turning off the source color. If that doesn’t get all the color you want, move the little white bands on the color slider on the bottom until it captures all your source color.
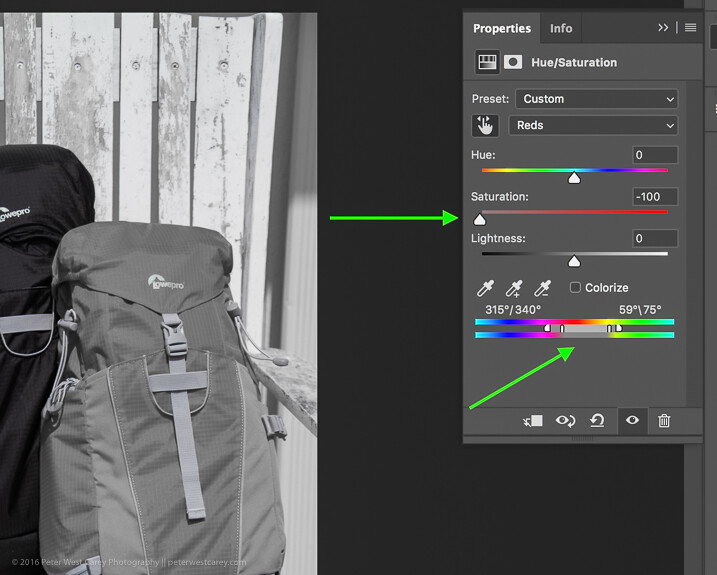
Move Saturation to -100, and adjust the bands (bottom green arrow) left or right, or apart, until there is no more of the selected color showing.
Can you see how that lighter gray box on the sliders at the bottom is larger (they were moved farther apart) in this image compared to the one above? That is to make sure I gobbled up all the orange, including some reds and yellows. Fiddle with this option to capture all your source color.
Step #4 – swap the color for a new one
Now that you know you have the right source color, jack up the Saturation slider then move the Hue slider until you get a color you like.
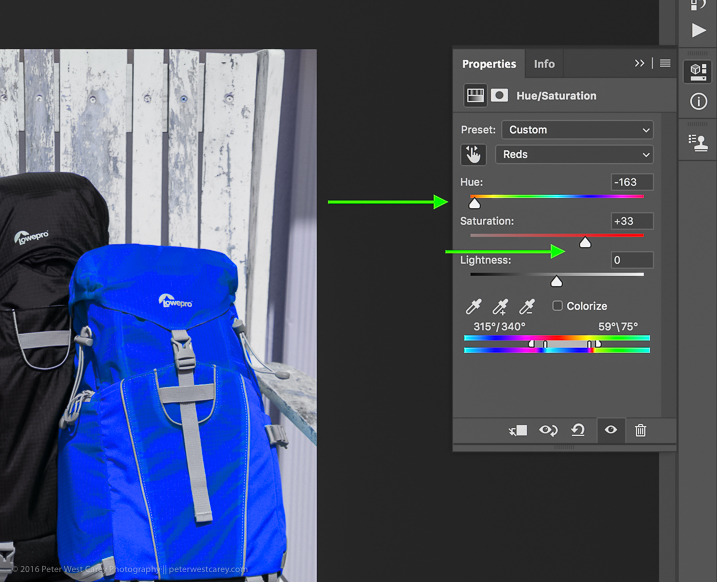
If you’re looking for quick and easy, you are essentially done! Save the file with a new name and you’re good to go.
But wait! Things aren’t as good as they could be with this method. For one thing, there is now a slight tint to the entire image as the mask was applied to the entire image. Let’s clean that up a little.
Method #2 for swapping colors
Method #2 picks up where Method #1 left off and continues:
Step #5 – Apply a layer mask
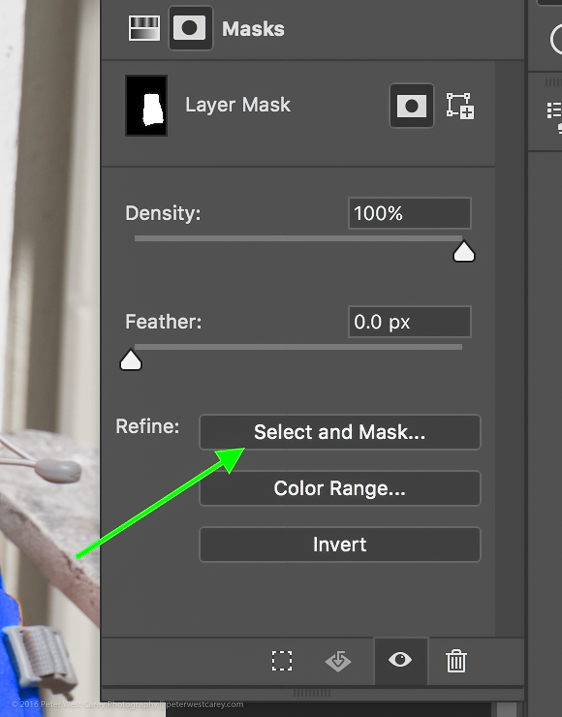
In this step, you want to apply a mask to the Hue/Saturation adjustment layer (seen on the right side of the layer) just to the backpack so it doesn’t tint the whole image. Click on the layer mask and the information panel will change to show mask options.
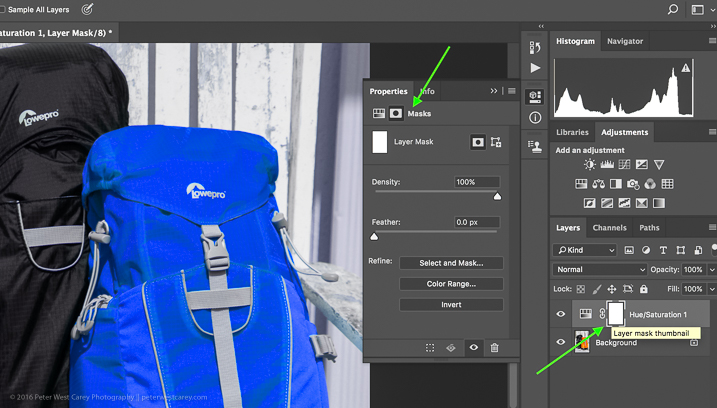
Choose “Color Range…” from the “Refine” options at the bottom.
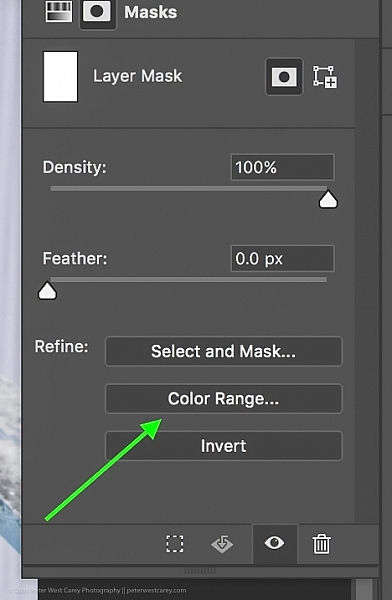
This should bring up a mask with the color range you have already selected and changed in the steps above. Your mask should show the area of color you are swapping as white, like so:
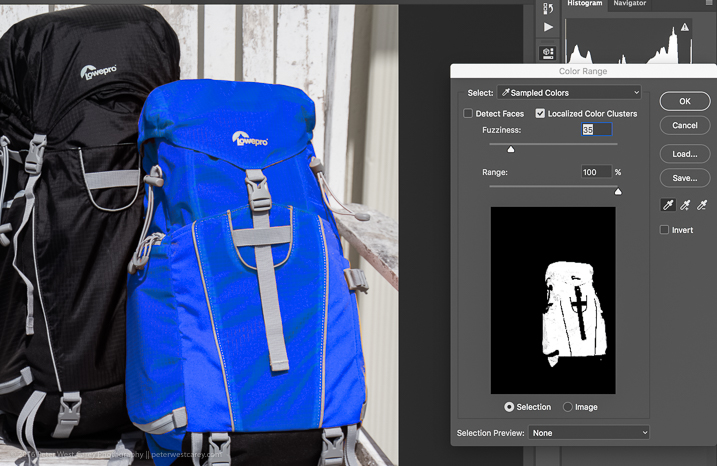
Click OK to apply the layer mask.
Step #6 – Refine the layer mask
Now you need to refine the layer mask just a little as Photoshop is not always perfect. Take a look close in my example and you can see some orange peeking through.
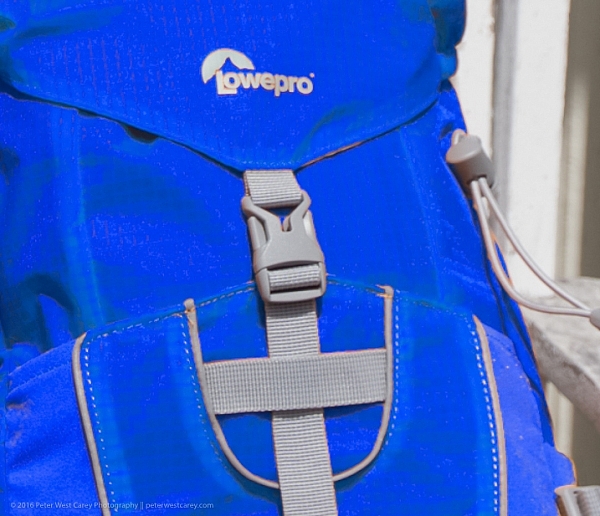
To eliminate this effect, click on “Select and Mask”, once again in the “Refine” options area.
Choose to use the “Marching Ants” View to make it easy to find the missing areas.
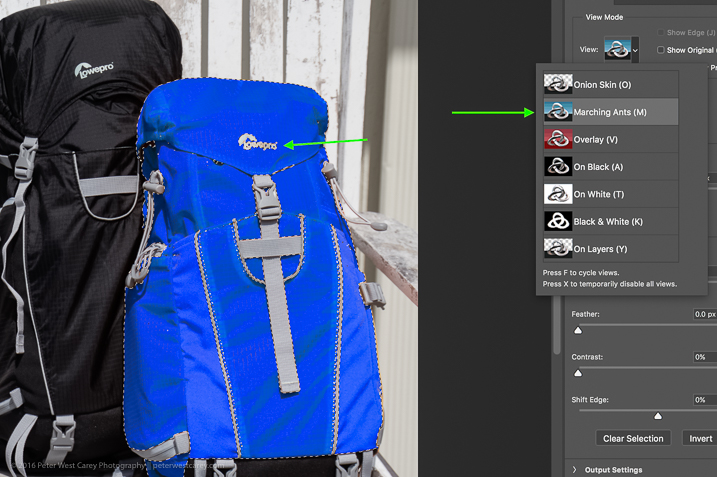
Then in the upper left corner, choose the Brush Tool and make sure the “add” feature (+) is selected. Lastly, choose a radius size to make the selecting easy. In this case, I used 365.
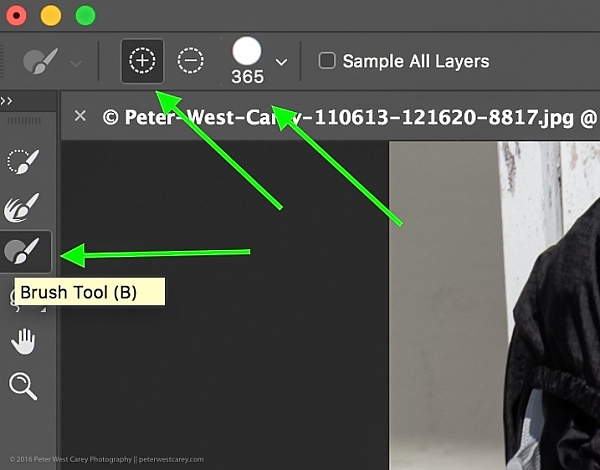
Now paint all over the area you want to change to the new color. It’s okay to go slightly over the edges to ensure all of the color is changed. If you are making drastic changes or if your background color will interfere, you may need to be more careful with your painting.
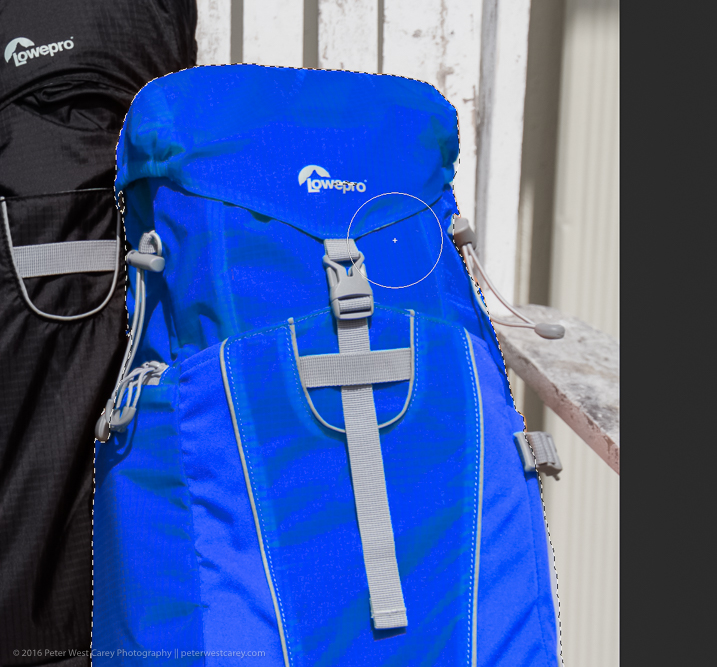
Zooming in, you can see that I missed some edges here and there and overlapped a little too much. Take your time and make it look good.
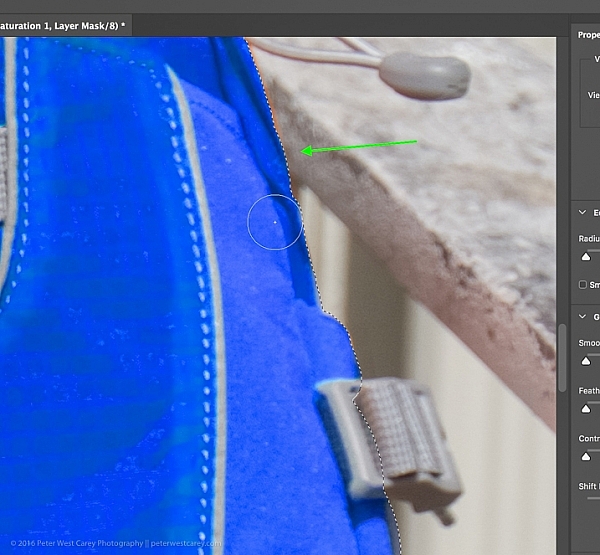
You can also see in the image above that there is still an orange cast on the armrest of the chair. To make the scene complete, I’ll swap that color as well.
Click OK when you are finished painting in the area to swap. You’re just about done!
Step #7 – Layer blend mode
Depending on what you’re swapping and the textures and colors involved, you may be able to get a slightly better result by choosing a different blend mode option for this layer. Click the word “Normal” above your layer and play around with the different layer blend mode choices.
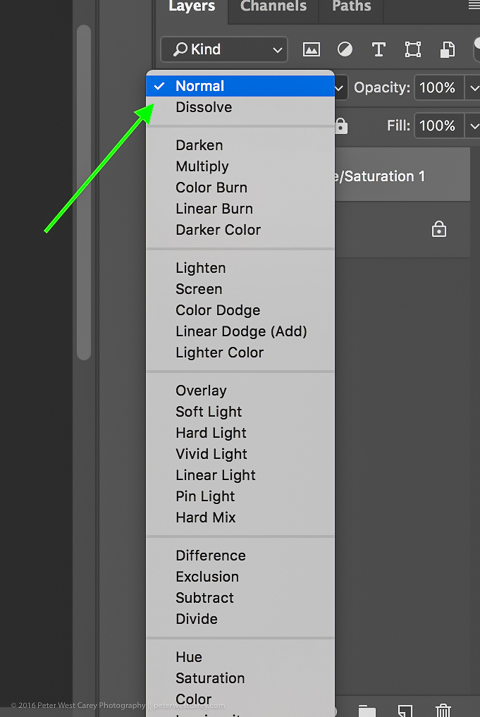
You’re done!
From here, you can fiddle until your heart is content. Try new blending modes and opacities. Refine your masks. Then sit back and enjoy your handy work!

Cautions
- Watch out for white objects when there is a lot of white in the scene. These can be tricky.
- For that matter, watch out for the color you want to swap appearing anywhere else in the image. You’ll need to remove the mask from those areas manually (Step #6 but use the “minus” option).
The post How to Swap Colors in Photoshop – Two Methods Explained by Peter West Carey appeared first on Digital Photography School.